Before getting to the configurations, let’s have a look at the working of the LDAP client.
How LDAP client works
LDAP servers back up the LDAP clients, and all the stored information is made available to LDAP clients via servers. When a new database needs to be added, the LDAP client changes to the LDAP database as per the users’ requirements. When a change occurs, it is synchronized with existing data and thus nullifies the act of updating. Moreover, with the help of the LDAP client, you can perform the following key actions:
- Search and retrieve data from directories
- Add/Update/Delete/Rename entries in a database
How to configure LDAP client on Linux Mint
The following steps follow the configuration of the LDAP client. Firstly, you have to install the utilities associated with the LDAP client. To install LDAP client and its associated utilities, provide the following command in terminal.
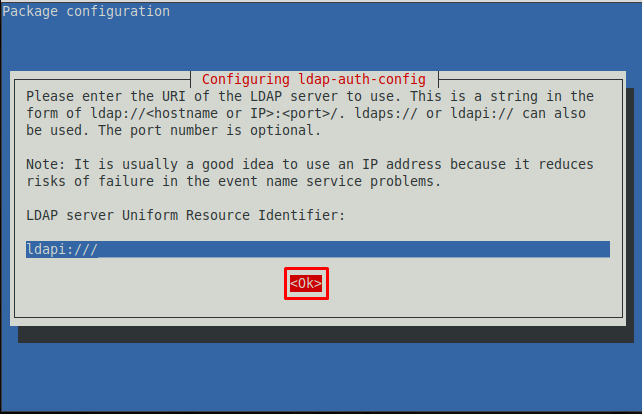
The time you run the above command, you get an interface like shown below in Step 1.
Step 1: You have to enter the details of the LDAP server. The following image requires the URI(Unique Resource Identifier) of the LDAP server.
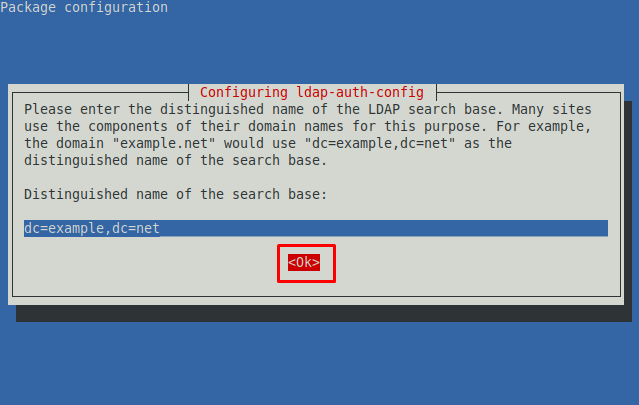
Step 2 : The next prompt asks you to set up a distinct name for the LDAP search base. Navigate to OK and go with the default.
ote : The dc and dc in the image below represent the domain name. For instance, considering linuxhint.com, the distinguished name would be dc=linuxhint and dc=com.
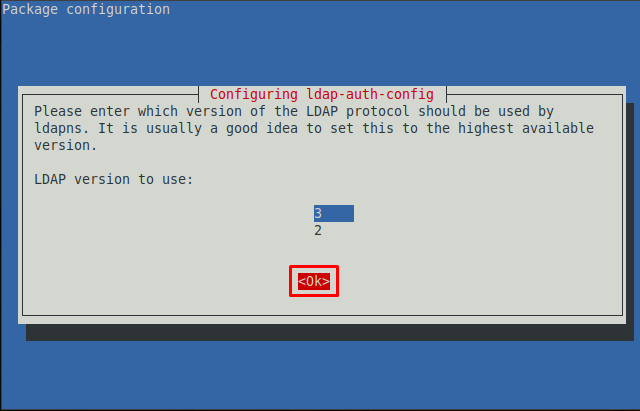
Step 3 : Choose the latest LDAP version from the available. As the image below shows that 3 is the latest version.
Step 4 : Here, you have to allow LDAP’s root account like a local root. Navigate to “Yes” and hit Enter.
Step 5 : Choose the authentication for the LDAP database. Navigating to “Yes” will require login for the LDAP database. However, if you do not want the authentication step while logging in to the database, you must choose “NO“. Here we are going with “Yes“.
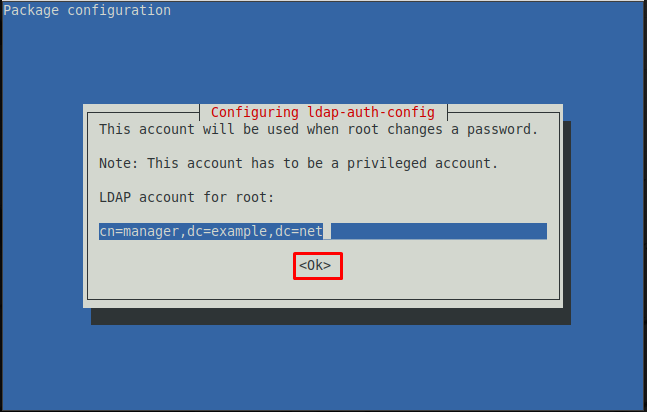
Step 6 : Choose the account to use when the root password is changed.
Note : The cn in the image below shows the user associated with the distinguished database.
Step 7 : Choose a password to use when ldap-auth-config uses the root account of LDAP.
Step 8 : Enter the password that you set earlier to log in to the LDAP database.
After doing the above steps the command will be executed completely that was initiated before Step 1.
Step 9 : You must configure the Linux Mint to use LDAP for authentication. Firstly, update the PAM-auth file.
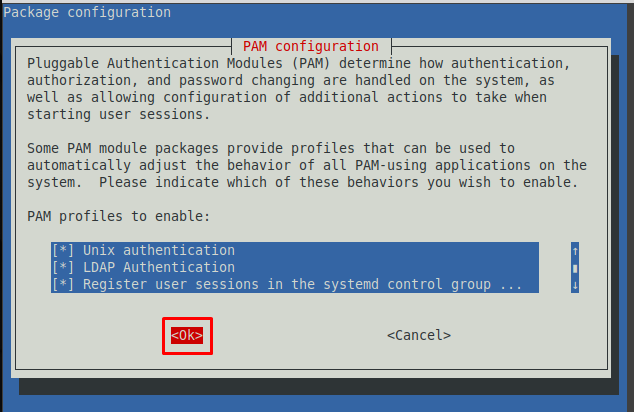
The following prompt will appear, and you can enable any profile from the provided list. Keep the default settings and choose “OK“.
The steps provided above do most of the configurations automatically. There are several steps that need to be performed manually.
Create User Home Directory
The common-session file of PAM directory can be edited to perform some comigration changes. For instance, you can create a user home directory by accessing the common-session file inside pam.d directory.
The command provided below opens the common-session file in nano editor.
Now, at the end of this file, add the following line to create a new user home directory.
How to remove LDAP client from Linux Mint
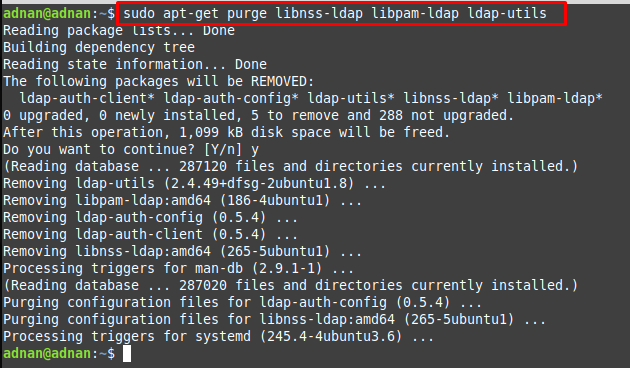
If you want to remove LDAP client from your Linux Mint, it is recommended to adopt the following way. The below-mentioned command removes the installed LDAP and the associated libraries.
Conclusion
The LDAP is an authentication platform that is used to authenticate the users for web applications or servers. The usernames and passwords are obtained and then LDAP uses them to check for the authentication. This writeup demonstrates the way to configure LDAP client on Linux Mint. The LDAP configuration is mostly system based and the user may require very few manual steps. This guide also provides the commands to install or uninstall the LDAP client from Linux Mint.

