In this topic of kubectl, let us cover the pod basics. To easily understand the kubectl kill pod command, you must understand the basics of kubectl. For a beginner, kubectl works as a dashboard for Kubernetes, enabling you to execute the Kubernetes processes. A pod is a basic Kubernetes object that is just like namespace, volume, and service. It is a small execution unit consisting of one or many containers, out of which one is an application container and others are the sidecar containers attached to the primary application container.
The init containers halt once it finishes a job or the application container is about to perform a function, or they can be a series of similar application containers. In addition to the application’s container, a pod also has storage resources and provides the capability for container processes. A pod or application container won’t leave because of an application failure. In such situations, the Kubernetes Pod needs to be restarted explicitly.
This article will guide you through the step-by-step process of creating a pod using the Nginx image, viewing YAML that explains the pod, and how to kill it successfully in a deployment to restart using multiple methods. To work with kubectl, the Minikube tool needs to be installed to run a single-node Kubernetes cluster on your system.
Before you proceed
Killing or deleting pods is a part of a stateful set and a fairly advanced task that can violate some properties inherent to a stateful set. Hence, before you begin, get familiar with the considerations listed below:
To execute the commands in Kubernetes, you need to install Ubuntu 20.0 on the Linux operating system. Furthermore, install the Minikube cluster on your system as it is required to run Kubernetes in Linux. Minikube provides an exceptionally smooth experience as it gives a systematic way to test the commands and applications. Therefore, it is the best learning environment for Kubernetes beginner users.
Follow the instructions below to learn the usage of kubectl. Once you learn about the tool usage, we will elaborate on the pod’s creation, view, and deletion in Kubernetes.
Starting the minikube cluster is the first step. Then, start Ubuntu 20.04, which you have installed, and go to the command line terminal. You can do this by following the two methods, press the Ctrl+Alt+T shortcut key or write “Terminal” in the Ubuntu 20.04 system’s search bar. The complete terminal will be launched by following either one of the mentioned methods.
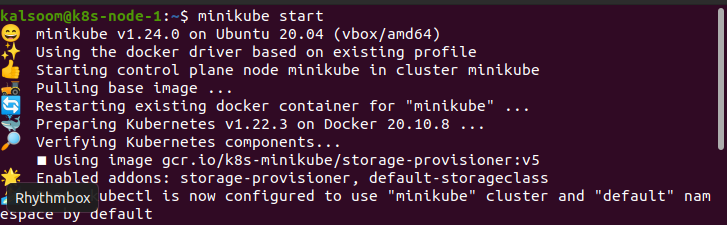
The next step is to start the minikube. To initiate the minikube, enter the “minikube start” command in the terminal. This command will start the Kubernetes cluster and create a virtual machine capable of executing a single node cluster. Moreover, it will develop the kubectl installation to interact with this cluster.
The output of the “minikube start” command is given below. When you enter the “minikube start” command, it will show you the following results.
How to create a pod in Kubernetes?
To create a pod in Kubernetes, launch a Kubernetes cluster and enter into the Kubernetes sandbox environment. After that, execute the “Kubectl get nodes” command in the command line to observe the cluster’s node in the terminal. It will ensure that you are connected to the Kubernetes cluster. For example, you will obtain the following output when you execute the command “kubectl get nodes”. Now you are ready to easily create and run a new pod.

After executing the “kubectl get node” command in the command line, you can create a pod using the nginx image. For example, to create a pod, execute the command mentioned below.
![]()
It runs with the Nginx image on Docker Hub. Once the pod is created, you will get the “pod/Nginx created” output in the terminal, as shown above.
How to view a pod in Kubernetes?
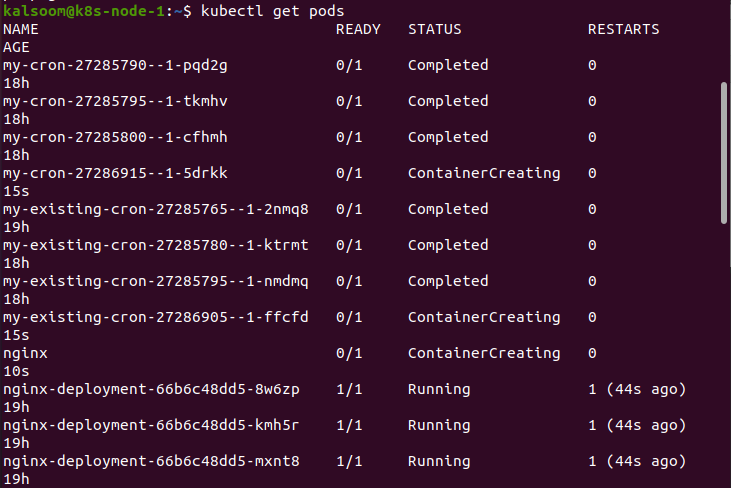
After creating the pod, you can view it using the ‘get pod’ command. Enter the “kubectl get pods” command in the terminal and see the status of the pod you have just created. For example, when you enter the command “kubectl get pods” in the terminal, you will obtain the following output.
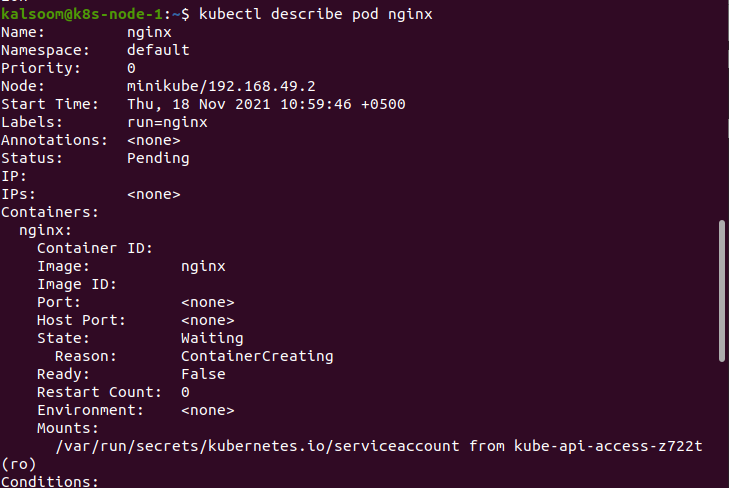
Moreover, if you want to see the entire configuration of the pod, the ‘describe pod nginx’ command will help you. Enter the “kubectl describe pod nginx” command in the terminal and get the entire configuration of the pod. As shown below, you can see the YAML for the pod. It gives you the name, namespace, priority, minikube node, start time, current status, and some other detailed information.
How to delete a pod in Kubernetes?
Now that you have created and viewed the pod, now understand how to destroy it. Enter the “kubectl delete pod nginx” command in the terminal to delete the pod. Before you execute this command, make sure to confirm the pod’s name that you want to destroy. Once you press enter after “kubectl delete pod nginx”, you will see the following output. This will delete the pod successfully and show the output ‘pod “nginx” deleted.

Conclusion
A pod is a basic Kubernetes object that is a vital unit to understand the Kubernetes object model. In this article, we have learned how to create a pod in Kubernetes, view the pod’s YAML image, and finally, kill a pod in Kubernetes.