This article gives an extensive guide on how to make a bootable CentOS USB drive. Bootable USB drives are effortless to create and are super convenient. Whether you’re using Windows or Linux, there are many different ways one can create a bootable USB, but in this article, we will only focus on three of the most convenient and most accessible methods.
Prerequisites
- An 8GB or larger USB Drive
- A Computer Running any Linux Distribution or Windows (XP or later)
Downloading CentOS
Whether you’re using Windows or Linux, the first step will always be to download the latest version of CentOS.
You can easily download its ISO file by visiting the official website of CentOS.
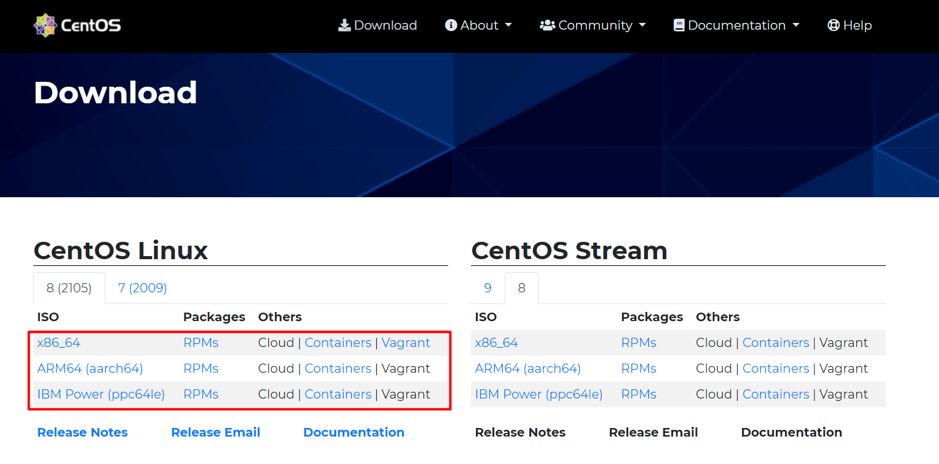
Once on the website, choose the correct ISO based on your system’s processor. For example, for intel-based processors, select x86_64.
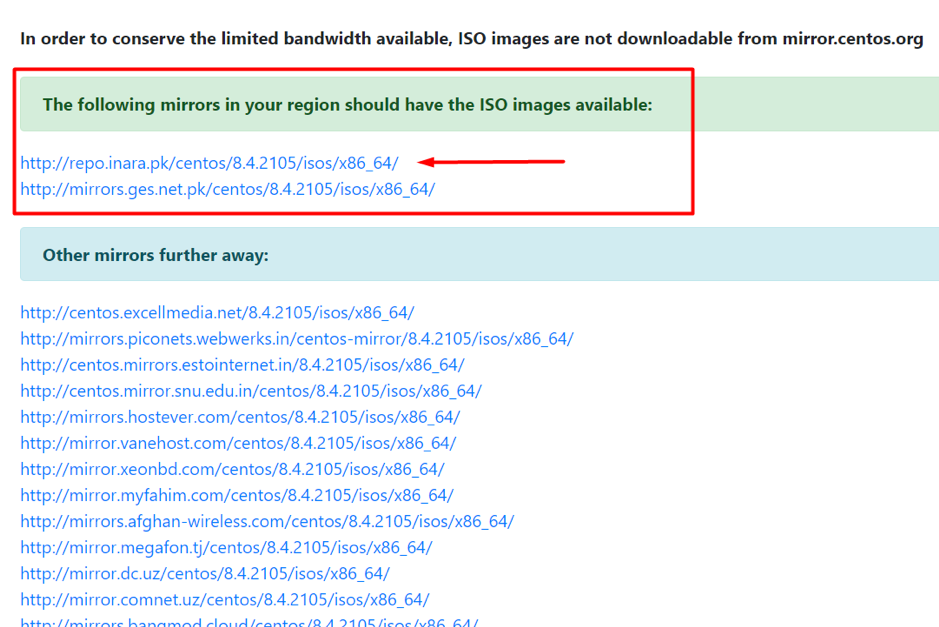
On the next page, you have to choose the mirror. Choose the mirror for downloading which is closest to your region, and it will get you to the final page for selecting the ISO file of CentOS 8.
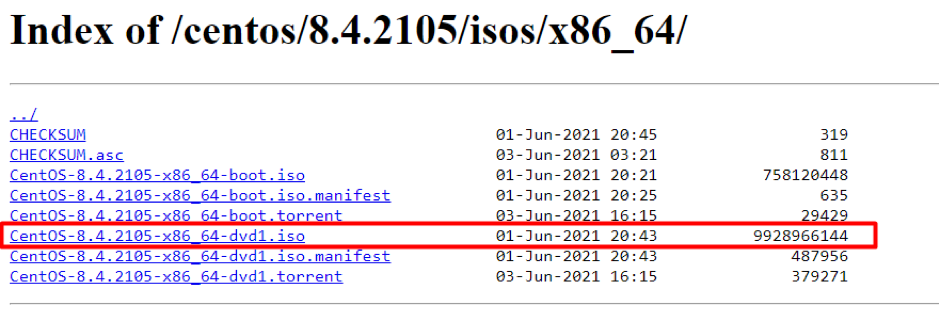
Choose the “DVD ISO,” and it will start to download.
Once it is downloaded, there are various ways to make or create a CentOS 8 bootable USB. We will provide you a detailed guide on how to create a CentOS bootable USB on Windows as well as on Linux. Let’s start with windows.
Create CentOS Bootable USB in Windows using Rufus
We have several options when it comes to using utility software to create ISO images on USB drives. This tutorial will use Rufus, as it is wildly popular for creating Bootable USB drives.
Many users prefer Rufus because it provides lightweight, rapid flashing and is recommended by developers and specialists.
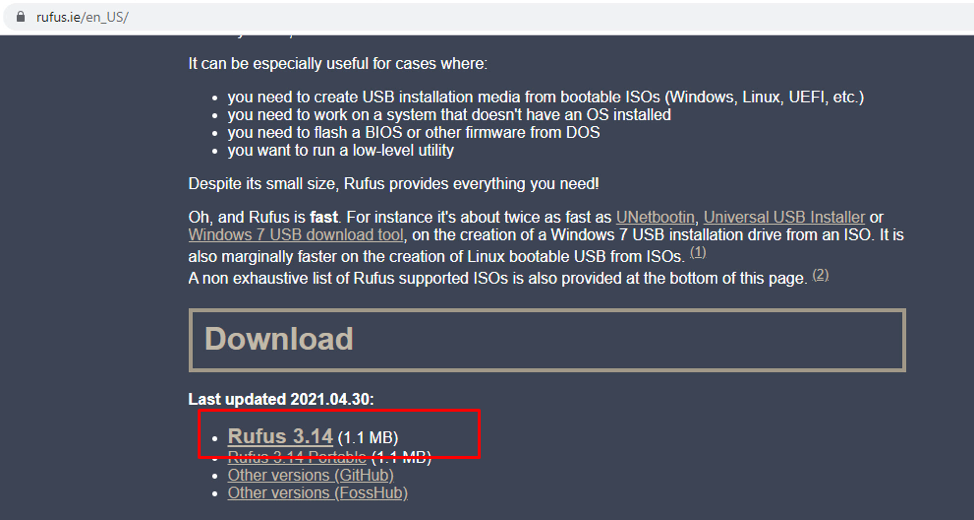
To get the Rufus, go to rufus. i.e., and download the latest version of Rufus for Windows.
Please install the application once it gets downloaded.
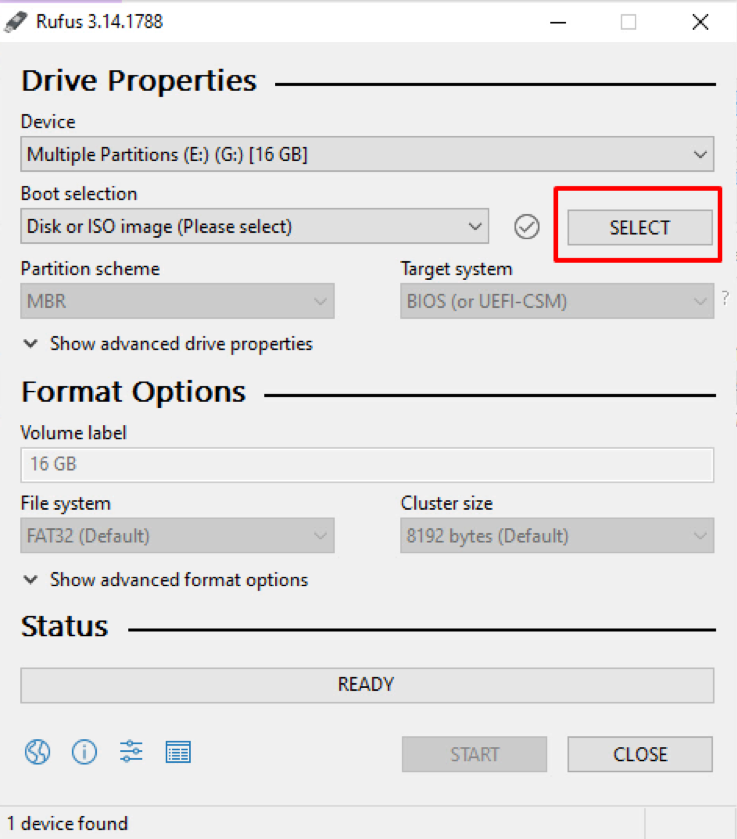
Now Launch Rufus and select the Disc, as highlighted in the screenshot above.
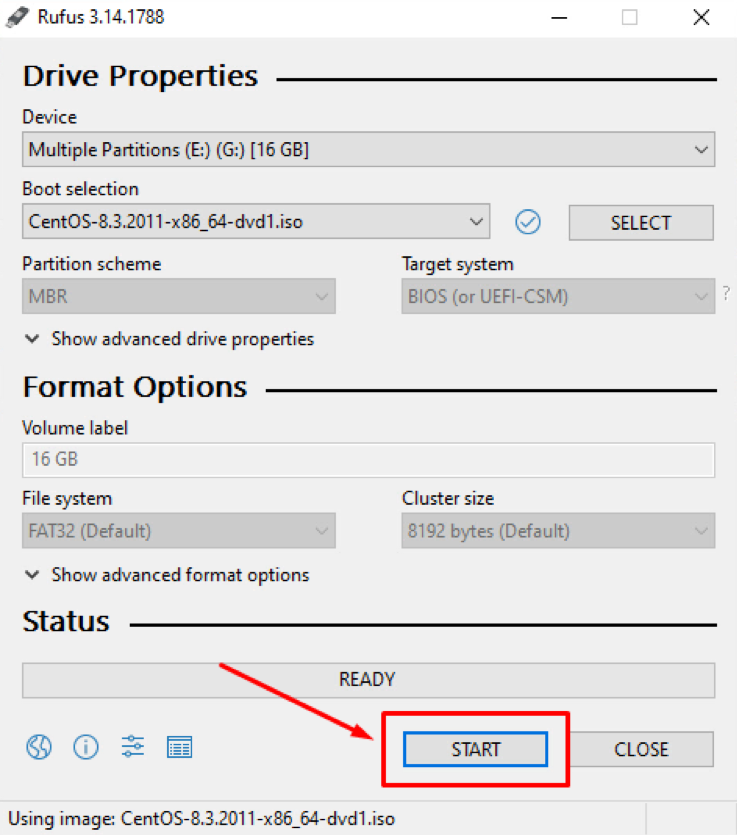
Go to the directory where the latest CentOS ISO file was downloaded and select it.
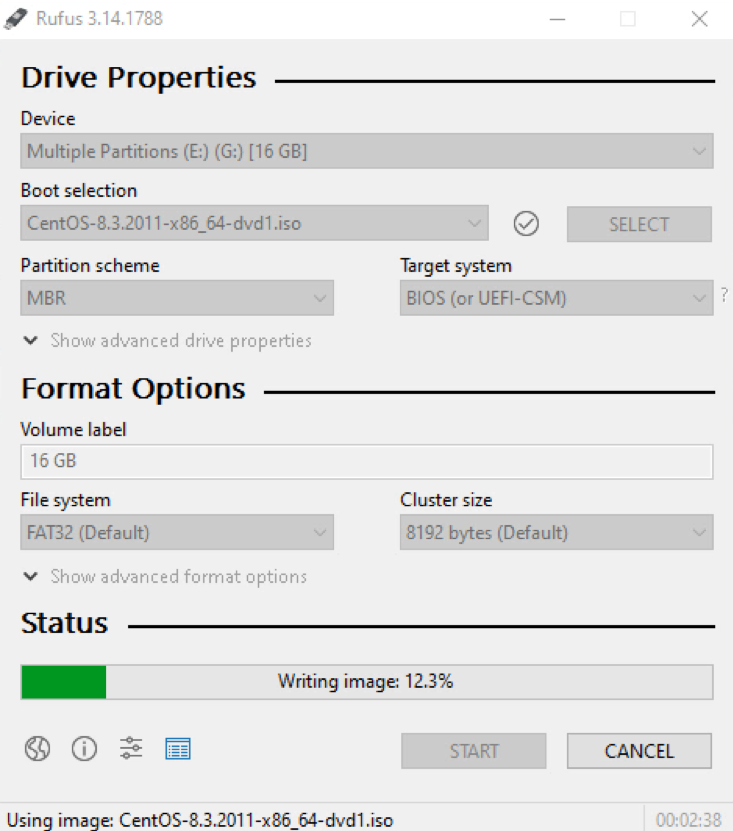
Select “Start” to initialize the process. This may take a few minutes.
Note: Please backup any valuable data you have on the drive before pressing the start button, as it will get deleted in the process.
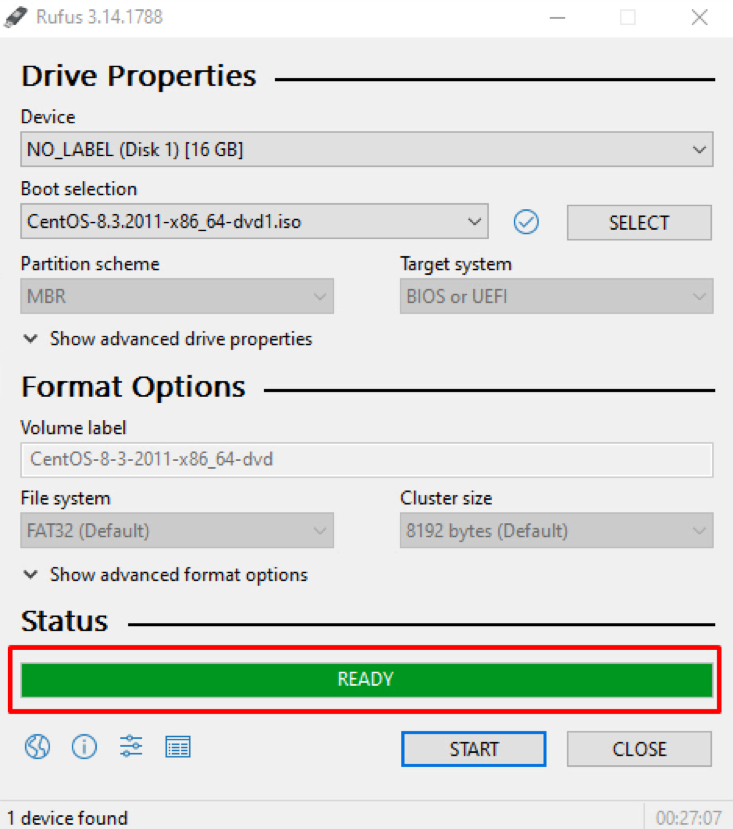
Congratulations! You have created a bootable CentOS on your USB stick.
Create CentOS Bootable USB using Etcher
Etcher is another popular tool used for creating Bootable USB drives. Its GUI looks great and is easy to use; moreover, it is a multi-platform application. It can run on all major operating systems such as Windows, Linux, and Mac, making it a great alternative to Rufus.
Creating a Bootable USB stick using Etcher is pretty straightforward.
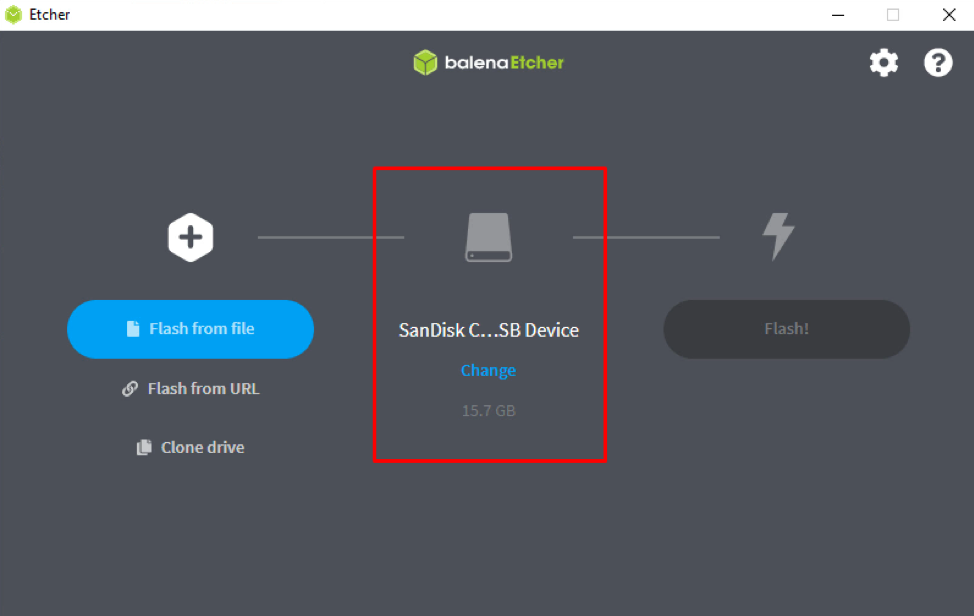
Insert the USB stick in the computer system and open the Etcher application. Etcher will automatically detect the USB Drive:
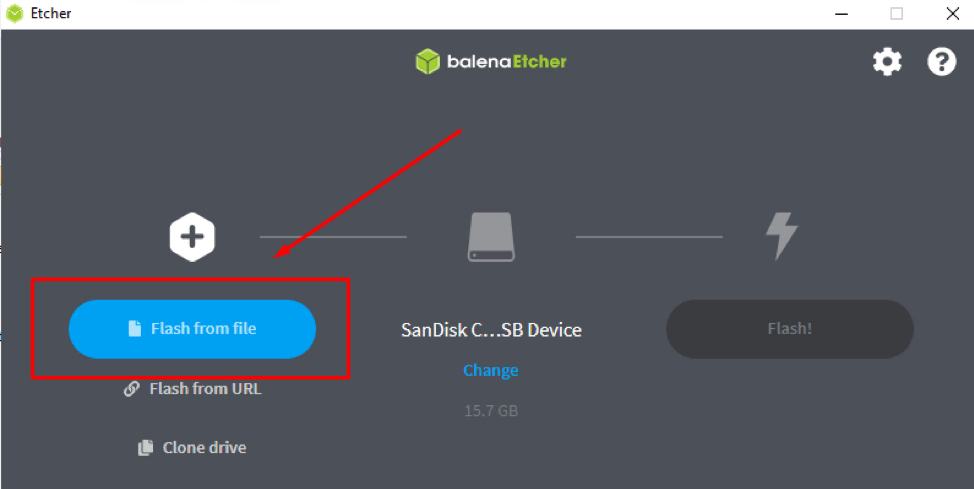
Click on the “Flash from File” button as shown in the screenshot given below:
Go to the location where you downloaded the latest CentOS ISO file and select it.
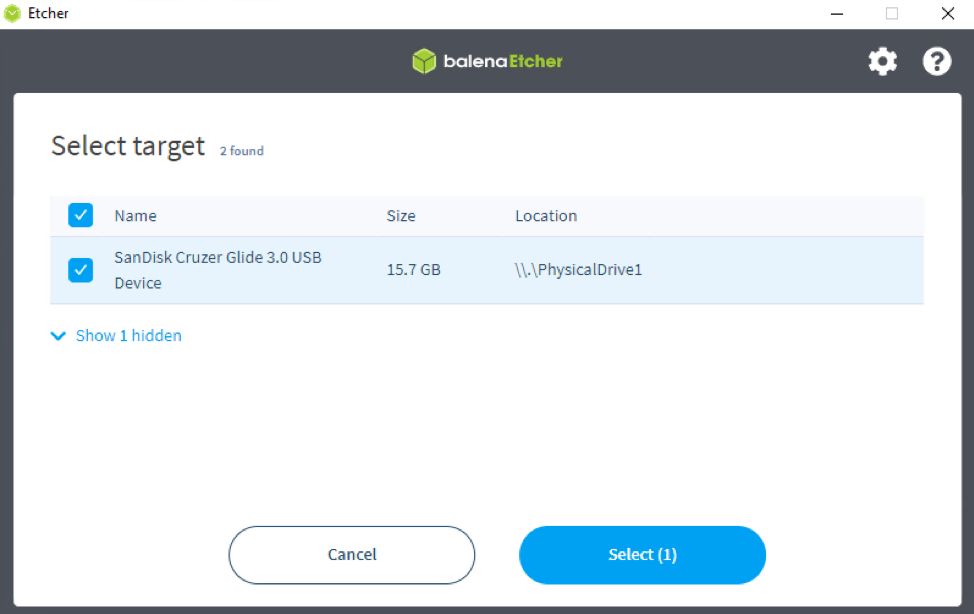
Etcher will auto-select a USB drive. Please make sure that it is the right one. If not, you have the option to select the right one manually.
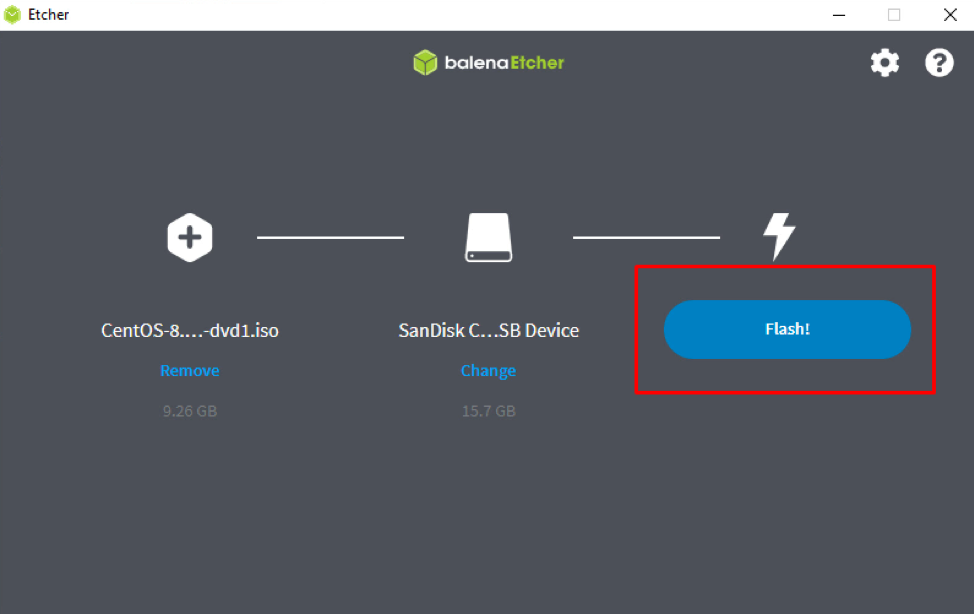
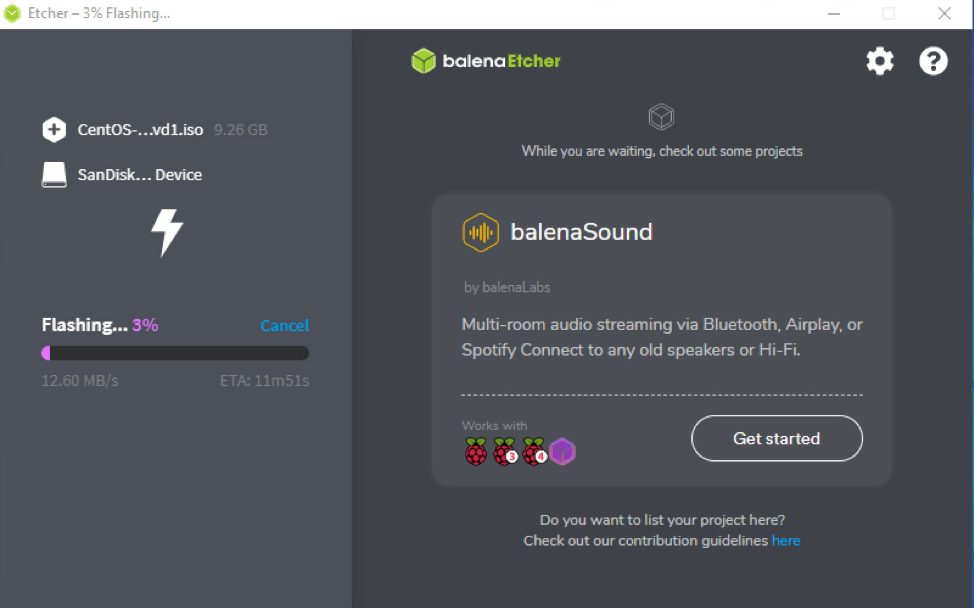
Now, select the “Flash image” option, and it will start flashing the USB Drive.
Wait for several minutes.
You can use the CentOS bootable USB to install CentOS 8 once the process is completed.
Congratulations! Now you’ve learned how to create a bootable USB device by two different methods. Now, let’s know how to create a CentOS bootable USB on any Linux-based operating system.
Create CentOS Bootable USB in Linux using Terminal
Unlike Windows, Linux does not necessarily require utility software to create a Bootable USB drive. Instead, you can use a few commands on the command line terminal to make a Bootable USB drive.
This method is a bit more complex than the prior two methods, but you don’t need to worry. I will explain the whole procedure in a few simple steps.
Insert the USB flash drive into the computer system and launch the terminal.
Now, to find the name of your drive, use the “lsblk” command.
You might need to use the umount command followed by either the directory where it has been mounted or the device name because most Linux distributions will automatically mount a USB when it is inserted.
To manually unmount the USB Drive, execute the command:
Replace the “/dev/sdx1” with your device name.
After unmounting the USB drive, flash the downloaded ISO image to the USB Drive using the command:
Provide the ISO image path and USB Drive name in the above command.
Note: While providing the USB Drive name, do not include the partition number.
This process will take several minutes depending upon several factors, the ISO file size and USB stick speed. Once the process is complete, you can use the CentOS bootable USB to install CentOS 8.
Congratulations! Now you can create bootable USB drives across different OS.
Create CentOS Bootable USB using Etcher in Linux
You can use Etcher to create Bootable USB on Linux as well. As mentioned above, Etcher is software that runs across almost all major operating systems. So, just follow the steps mentioned above to Create CentOS Bootable USB using Etcher on Linux.
Conclusion
In this article, you’ve learned how to create a CentOS Bootable USB drive using different software like Rufus and balenaEtcher across multiple Operating Systems. Moreover, you have also learned how to create CentOS 8 USB bootable by using commands in the Linux terminal without using any additional application.

