In normal circumstances, the number of installed kernels does not affect the system’s performance, but it is still recommended to remove old unused kernels as it frees up space. Before we start removing old unused kernels, it is essential to note that you should always have at least two kernels on your system at any time.
Remove Old Kernels
It is recommended to update the whole system’s packages and active kernel before removing the old kernels. To do so, execute the command:

After updating, to check the current kernel being used, use the following command:

To list all the kernels installed in your system, use the command given below:
Output:

As you can see, I have three Kernels installed on my CentOS 8 system.
Now we will discuss how to remove old inactive kernels from our systems.
As mentioned above, you should never remove all of the old inactive kernels and should always have at least two kernels (1 active – 1 inactive) in your system.
Remove Old Kernels using DNF Command
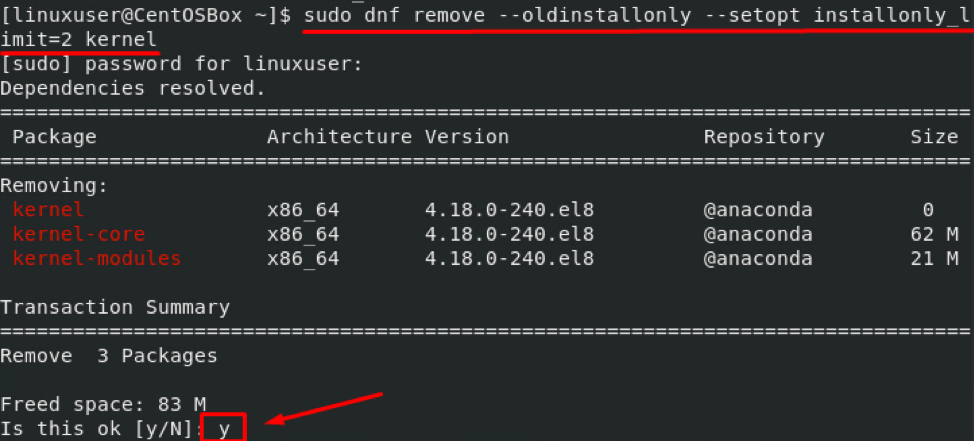
We can use the DNF command to remove old unused kernels. Simply execute the “dnf remove” command with the :
As you can see in the screenshot attached above, the terminal is asking to remove three packages. Allow the removal by pressing “y” and hitting “Enter”:
After successful removal of the older kernel, if we execute the “rpm -q kernel” command again:
You can witness, we have only two kernels left.
If you have more than two kernels installed, the command given above will leave two kernels installed on your system and uninstall all other older and unused Kernel versions.
You can change the number by giving a different value to –setopt installonly_limit=2.
In the command above, the –setopt is used to modify the default value from /etc/dnf/dnf.conf. If you don’t command a value, then dnf will take the default value from dnf.conf.
This command will only work in case the latest kernel is active. If an older version is functional, the command will unsuccessfully try to remove it.
Another method works on older versions of CentOS, but with the release of CentOS 8, this method has stopped working.
So, if you’re still using an older version of CentOS/RHEL, you can still use the command given below to remove old kernels:
The command given above will leave two kernels installed and uninstall all other older and unused Kernel versions on your older version of the CentOS/RHEL system.
Conclusion
This article provides an extensive guide on how to remove old and unused kernels from CentOS 8. We also discussed some good practices to keep in mind while removing inactive kernels.
We learned two different methods we can use to remove old and unused kernels from our system. One of these methods has become obsolete on newer versions of CentOS operating systems but can still come in handy if you’re using an older version of CentOS.


