MySQL is known as the world’s most famous and extensively used open-source database management system. It is an RDBMS(Relational Database Management System) used behind the websites and server applications. The latest version of MySQL is 8.0, and it is available in the default DNF repository of CentOS 8, so there is no need to add a repository of MYSQL and then install it.
MySQL provides various new features in its version 8.0 to enhance the performance of web applications. Being a web developer and primarily a back-end developer, knowing MySQL is a must-know database system for you. The best way to learn MySQL is to learn it from the Official Documentation of MySQL.
In this post, we will learn the installation and configuration process of MySQL v8.0 on CentOS 8 Operating system, and we will learn about the usage of MySQL DB on CentOS 8. Let’s start with the installation of MySQL on CentOS 8.
Installation of MySQL 8.0 on CentOS 8
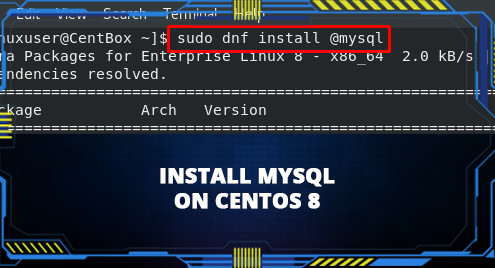
Since MySQL 8.0 server is already available in the official package repository of CentOS 8 so we can download and install it from there using the command given below:
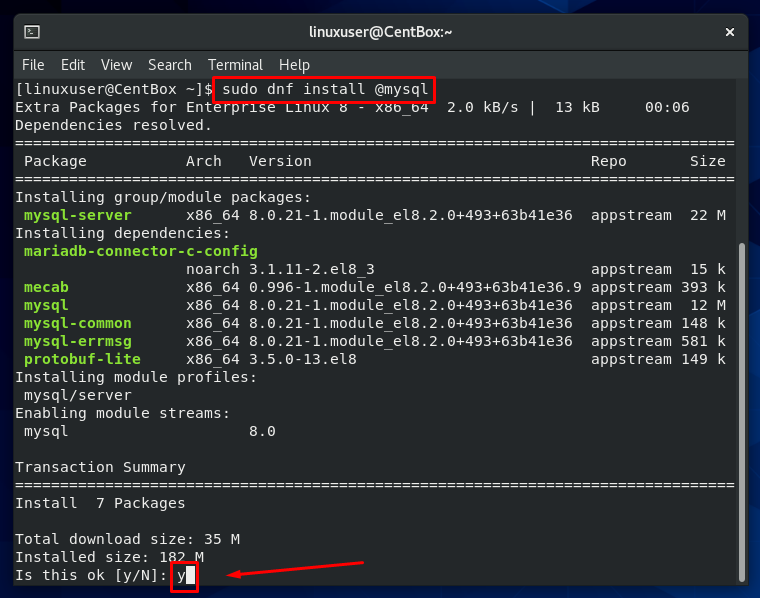
In the above command, the @mysql is a module that will download and install the MySQL server and its dependencies along with it.
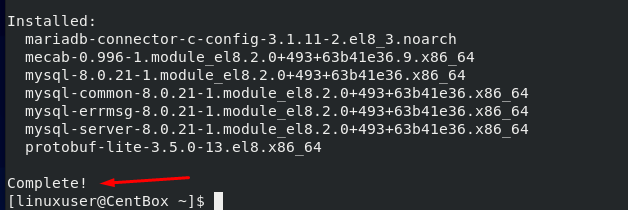
After the successful installation of MySQL server 8.0, the installation can be confirmed by executing the command typed below:

You can verify by looking at the screenshot attached above that version 8.0.21 is successfully installed on the CentOS 8 Operating system.
Although MySQL 8.0 is installed, it is not fully operational. So now, let’s learn how to start the MySQL service on CentOS 8.
Start MySQL service and Check its Status
Without starting the MySQL service, we will be unable to use MySQL. So, the mysqld.service can be started using the systemctl command is shown below:
![]()
After starting the service, the terminal would not show any output if the service is successfully started.
To verify either mysqld.service is started or not, you can execute the command typed below:
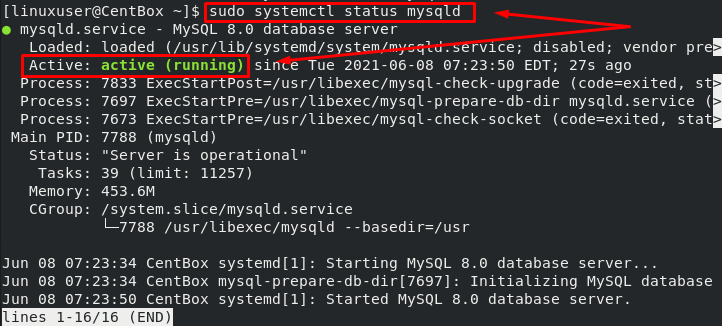
In the above command, if you noticed, we did not use .service after mysqld. The answer to this curiosity is that in many systemctl commands, we are not obliged to use the .service after the name of every service. We can start or check the status of any service without mentioning .service after the name of the service.
In the above output screenshot of the systemctl status command, it can be observed that the mysqld.service is running.
If you do not want to restart it again and again when needed, it is better to enable a service when the machine boots up. To enable the mysqld.service on system boot, run the command:

However, if you are worried about the boot time and do not want to run too many services on boot time, you disable the services anytime using the systemctl command.
In such a case, if you want to disable the mysqld.service, run the below-given command:
Once the MySQL server is installed and mysqld.service is started, enabled, and running perfectly fine on CentOS 8 operating system, let’s learn how to secure, configure and set up MySQL on CentOS 8.
How to Configure MySQL?
The first step in the configuration of MYSQL is to secure MySQL.
Secure MySQL
MySQL comes with a security script that helps in changing and securing the default MySQL settings and configurations.
To start the MySQL secure installation, execute the command given below in the CentOS 8’s terminal:
It will start prompting questions related to MySQL’s security installation, so answer accordingly as per your desire:
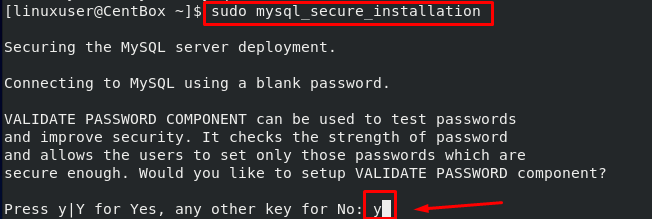
Set up validate password plugin for testing the strength of MySQL password and select the password validation level:
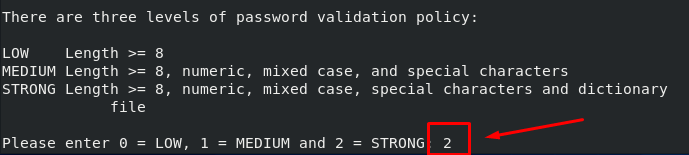
Set the password for the MySQL’s root user:
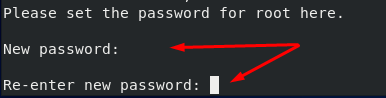
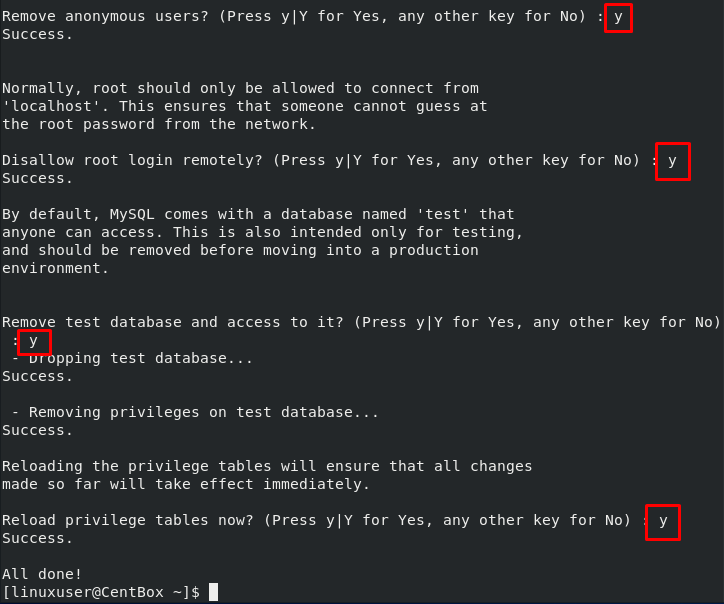
If your password is weak, then the Validate Password Plugin will ask you to make it more robust and secure. Otherwise, in the password confirmation phase, type “Y” and hit “Enter” to continue if you are satisfied:

After that, you can accept the defaults and continue with the MySQL secure installation.
Once everything is set up, secured, and configured, let’s connect to MySQL, log in to the MySQL shell and start learning its usage.
Log into MySQL
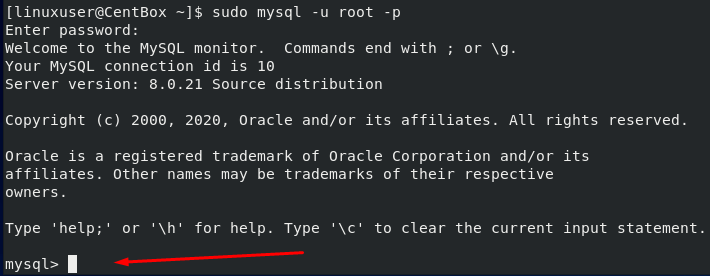
For connecting to the MySQL database in CentoS 8 Operating system, execute the command typed below to login to the MySQL shell:
In the above command:
-u root is used for connecting to the MySQL database and signing in as a root user.
-p is used for prompting the password of the user.
After executing the above command, it will ask for the root’s password you have just recently set for the MYSQL.
![]()
So, provide the root user’s password and hit Enter to log in to the MySQL shell.
After signing in as a root MySQL user, the MySQL shell will look like this:
Now, the MySQL database system is ready to serve. You can perform any of your database-related tasks and execute queries like creating a database, creating a table, adding some data into the tables, and so on.
Create a New MySQL Database
Since you are logged in as a root user, you have access to do anything you want to do, like privileges to all the databases and applying restrictions or granting privileges of the databases or tables to the users.
Let’s first start with the creation of a database. A database can be created by utilizing the CREATE DATABASE command in MySQL. For example, to create a new database named “first_db,” the CREATE DATABASE command would go like this:
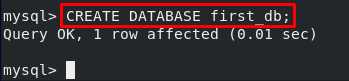
The ‘first_db’ database will be created.
Show MySQL Databases
To list all the databases in MySQL, the SHOW DATABASES command is used. So if we execute the SHOW DATABASES command in MySQL shell:
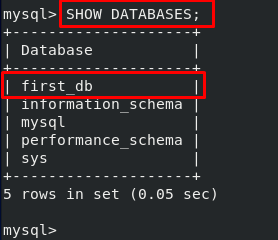
You can witness the SHOW DATABASES command in the output of the SHOW DATABASES command that all the databases and our recently created “first_db” database are listed.
Create a New MySQL User
A new user in MySQL can be created using the CREATE USER command. For example, if we want to create a new user named “first_user,” the CREATE USER command would go like this:

In the above command, you can provide the username and password that you want to set.
Major MySQL Commands
Similarly, there are various MySQL commands used for performing multiple database-related tasks. We can not explain all of the commands; however, we are listing down some significant commands and their usage:
- For example, CREATE – for creating a Database or Table.
- SELECT – for reading data from the Tables.
- INSERT – for adding data or rows into the Table.
- UPDATE – for updating the data in rows of Table.
- DROP – for deleting a Database or Table.
- DELETE – for deleting rows from the Table.
- GRANT OPTION – for granting privileges to the Users.
Conclusion
This post contains in-depth and profound knowledge on how to install, configure and start using MYSQL on CentOS 8. You have learned to install MYSQL using the @mysql module, start the mysqld.service, secure the MySQL server, connect to the database, and start using MySQL to create a database, user, and tables.
After the MySQL is installed and the mysqld.service is started, enabled, and running perfectly fine on CentOS 8 operating system, you are ready to login to MySQL on CentOS 8 and use it to your desired requirements.