It supports two methods for managing remote machines: ad hoc commands and Ansible playbooks. Ad hoc commands are raw commands that you can execute in the terminal to perform a task in a single instance.
Ansible Playbooks, on the other hand, are files written in the YAML language. They contain a single or a set of tasks executed on the remote machine. Due to the strict nature of YAML, Ansible playbooks require careful attention in the general syntax.
This tutorial will walk you through the basics of writing Ansible Playbooks and executing commands on remote machines. For the illustrations in this guide, we will set up a simple playbook that installs and configures Apache webserver.
NOTE: This tutorial does not purpose to teach you Ansible. All it does is provide you with tips and guidelines for writing an Ansible playbook.
Pre-requisites
To get the maximum value out of this guide, we recommend following along. The following are things you require.
- Ubuntu or a Debian-based distribution – This is the machine we use to connect to the remote machines using SSH.
- A remote machine to control with Ansible – We recommend getting a Linux system such as Debian Server.
Once you have both of the above requirements met, we can begin.
How to Install Ansible on Debian/Ubuntu
The very first step is to ensure that we have Ansible installed and running on our local machine. I will be using Ubuntu for this tutorial.
Step 1
Start by updating your system using the commands below:
sudo apt-get dist-upgrade -y
Step 2
Next, use the commands below to install Ansible on Ubuntu.
sudo add-apt-repository --yes --update ppa:ansible/ansible
sudo apt install ansible -y
Now that we have installed it on your local machine, we can proceed to configure it.
How to Setup Ansible Inventory
To manage the remote servers using Ansible, you need to tell Ansible about it. We do this by creating an inventory file containing the IP addresses or hostnames of the remote machines.
By default, the host inventory file is in/etc/ansible/hosts.
To learn how you can create a custom host inventory file in Ansible, consider one of our tutorials.
Edit the /etc/ansible/hosts file and add the IP address of your remote machine as shown below:
In the example inventory above, we create a group of servers (linuxhint) that we will manage in this tutorial. You can have other groups such as webservers, database_servers, etc.
How to Set Up SSH Key Pair
Ansible uses SSH to login into the specified remote machines and performs the tasks defined in the playbook. Therefore, to minimize the interaction and create a fully automated workflow, it is best to create an SSH pair to log in to the remote machine.
Step 1
The first step is to generate an SSH key pair is using the ssh-keygen tool. Use the command as:
This will interactively ask you to generate an SSH key pair. For simplicity, accept the defaults and do not add a passphrase.
The output for that is below:
Step 2
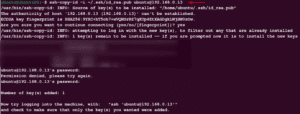
Next, we need to copy the SSH key to the remote machines using the ssh-copy-id tool. Use the command as:
The output is as shown below:
To learn more on how to use the ssh-copy-id command, use this: Use SSH Copy ID Command.
How to Write an Ansible Playbook
As I mentioned earlier, Ansible playbooks use YAML, and hence, you need to observe strict syntactical conventions.
If you are not familiar with how to write YAML files, consider the tutorial in this link: Read YAML File Values
To stay organized, let us create a directory where we are going to store all our playbooks.
mkdir anisble-workspace
cd ansible-workspace
Now that we have the directory created let’s create our first Ansible Playbook (the file should end with .yaml extension.
Inside the YAML file, add the following contents.
- hosts: all
become: true
become_method: sudo
tasks:
- name: "Show Network Interfaces"
command: ifconfig
register: details
- name: 'Get Interfaces details'
debug:
msg: "{{ details.stdout }}"
Save the file and run it on the server using the command:
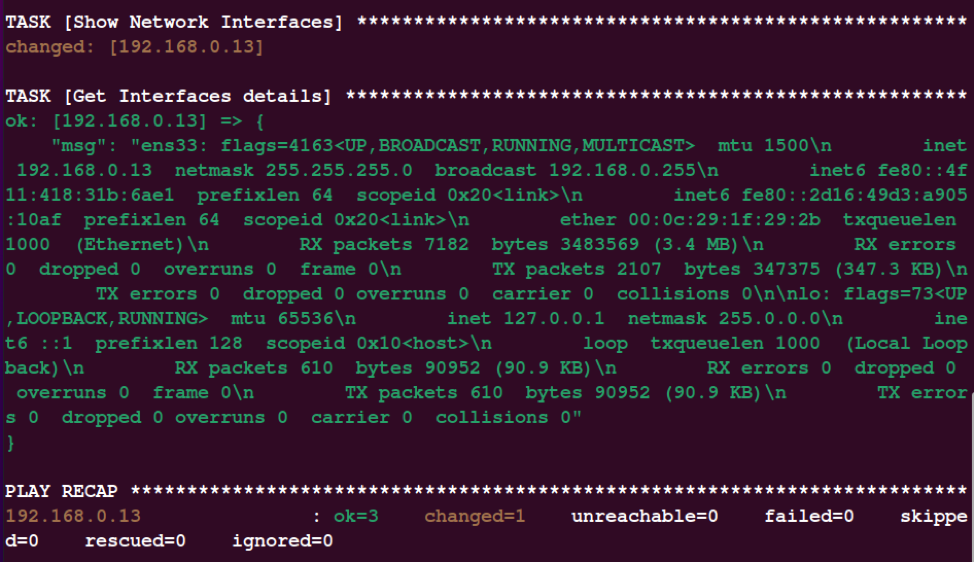
The command will output the information about the network interfaces on the remote machines as shown in the image below:
Although the output is not pretty and does not provide the most efficient way to gather network information using Ansible, it aptly illustrates how we can use Ansible to run commands on remote hosts.
How to Register Variables in Ansible Playbooks
To create a variable in an Ansible playbook, we use the register keyword followed by the variable’s name. You can also use the variable’s name as the key and set its value using the colon notation.
For example, two ways to register a variable in Ansible.
variable2: value
With the variable defined, you use it by calling its name inside a set of two curly braces as:
{{ variable2 }}
Privilege Escalation in Ansible
Ansible also allows you to upgrade the privileges of a user using the become. The become method is a Boolean value that specifies that the tasks inside the playbook should run as root.
In our first playbook, we set the become to true and set the method of privilege escalation as sudo.
Apt Inside Playbooks
Ansible provides us with ways to manage apt packages in Debian based system. Using this method, you can update, install and uninstall the packages using the Ansible playbook.
Consider the update.yaml file shown below:
- hosts: all
become: yes
become_method: sudo
tasks:
- name: "Update cache & Full system update"
apt:
update_cache: true
cache_valid_time: 3600
force_apt_get: true
The above playbooks update the repository cache. This corresponds to a raw command as:
That can be incredibly useful when installing software such as apache, nginx, etc., on a remote host.
Example Use Case
This section will create a playbook that installs an Apache web server on the Debian system and performs basic configuration.
This playbook shows various moving pieces of Ansible and will provide a good example of how Ansible playbooks work.
Start by creating the YAML file.
Inside the YAML, enter the following playbook.
- hosts: all
become: true
become_method: sudo
tasks:
- name: "Update packages and upgrade"
apt:
update_cache: true
upgrade: dist
force_apt_get: true
- name: "Install Apache server"
apt:
name: apache2
state: latest
- name: "Create document root"
file:
path: "/var/www/html"
state: directory
owner: "www-data"
mode: 0755
- name: "Enable Apache on Firewall"
ufw:
rule: allow
port: 80
proto: tcp
- name: "restart apache2 service"
service:
name: apache2
state: restarted
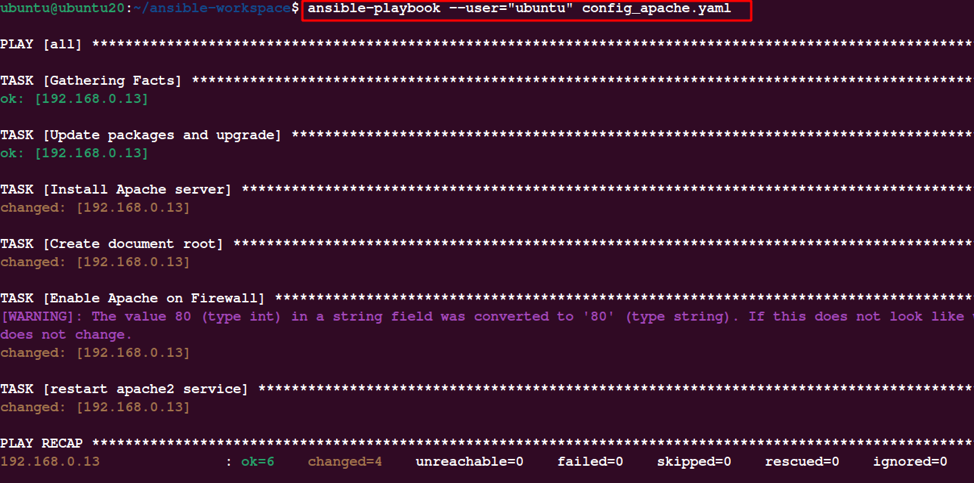
Save the file and run it on the remote server using the command:
Upon successful execution, you will see on output as shown.
Confirm the server is running using curl as:
You should get the default apache source code (snippet shown below).
And with that, we have concluded this tutorial.
Conclusion
It is good to note that the functionality of writing playbooks will heavily depend on the tasks you need to perform. However, I hope this tutorial gave you a few guidelines and tips to create one of your own.
Happy Automation!


