The ssh-copy-id command is a simple tool that allows you to install an SSH key on a remote server’s authorized keys. This command facilitates SSH key login, which removes the need for a password for each login, thus ensuring a password-less, automatic login process. The ssh-copy-id command is part of OpenSSH, a tool for performing remote system administrations using encrypted SSH connections.
This article shows you how to use the ssh-copy-id tool to make your SSH logins more seamless and secure.
How to Install the ssh-copy-id Command
The ssh-copy-id tool, part of the OpenSSH package, is available in all major Linux distribution repositories, and you can use your package manager to install this command.
To install the ssh-copy-id tool on Debian, use the following command:
Once you have OpenSSH installed, you can use the ssh-copy-id tool in the command-line.
Usage: /usr/bin/ssh-copy-id [-h|-?|-f|-n] [-i [identity_file]] [-p port] [[-o <ssh -o options>] ...] [user@]hostname -f: force mode -- copy keys without trying to check if they are already installed -n: dry run -- no keys are actually copied -h|-?: print this help
Using ssh-copy-id is simple because the script makes the public key authentication process easier and more efficient. Before we dive into how to use the tool, we will first discuss how SSH public key authentication works.
NOTE: If you already know how SSH public key authentication works, feel free to skip this part and dive deeper into how to use the ssh-copy-id command immediately.
SSH Public Key Authentication
Public SSH key authentication is an SSH authentication method that allows users to use cryptographically generated keys to log into remote servers.
SSH keys are more secure than raw passwords and provide a much more efficient way of logging into SSH. SSH keys are automated, and once authorized, do not require a password at each login.
To use an SSH key, we will begin by generating a key.
How to Generate an SSH Key
To generate an SSH key, use the ssh-keygen tool that comes as a part of OpenSSH. This tool generates public and private key files stored in the ~/.ssh directory, as shown below.
Generating public/private rsa key pair.
Enter file in which to save the key (/root/.ssh/id_rsa):
Created directory '/root/.ssh'.
Enter passphrase (empty for no passphrase):
Enter same passphrase again:
Your identification has been saved in /root/.ssh/id_rsa.
Your public key has been saved in /root/.ssh/id_rsa.pub.
The key fingerprint is:
SHA256:ddVOQhS6CGt8Vnertz9aiSnvOUKmSpPrZ+gI24DptsA root@user The key's randomart image is:
+---[RSA 2048]----+
| o=o |
| o. o|
| . . + .+.|
| . + + o .o|
| S + . . |
|. o ..o o + .|
|.E o +. +. + + |
|o. = o.o+ .o.+..|
|.o.. oo=+ o=o.+|
+----[SHA256]-----+
How to Copy SSH Key Using SSH-copy-id
Once we have generated an SSH key, we can manually add the SSH key to the remote machine authorized_keys file or use the ssh-copy-id command.
We will use the ssh-copy-id command to make this process easier. Simply call the ssh-copy-id command and pass the path to the public key, as follows:
After inputting the above command, you should obtain the following output:
/usr/bin/ssh-copy-id: INFO: attempting to log in with the new key(s), to filter out any that are already installed
/usr/bin/ssh-copy-id: INFO: 1 key(s) remain to be installed -- if you are prompted now it is to install the new keys user@77.134.54.101’s password:
Number of key(s) added: 1 Now try logging into the machine, with: "ssh -p '6576' '[email protected]'" and check to make sure that only the key(s) you wanted were added.
NOTE: Never copy your private key to another machine.
Once the command has been executed successfully, try logging into the server using the key that you uploaded, as follows:
The above command will require you to enter the passphrase for your public key, as shown in the output below:
Last login: Fri Mar 5 14:06:16 2021 from 173.208.98.186
The command above should allow you to log in to the remote host without asking for the user’s password. The system may prompt you to enter the passphrase of the key that you set up earlier.
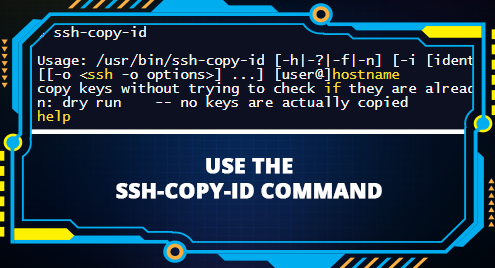
SSH-copy-id Command Options
You can modify how the ssh-copy-id command works by using the provided arguments. To view the help page, use the command ssh-copy-id -h or use the ssh-copy-id command with no arguments.
- -i argument: This argument specifies the identity file to be used, i.e., copied to the specified remote host. If you fail to specify the -i argument, all the files in the ~/.ssh directory with the matching pattern *.pub will be added.
- -f flag: This flag enables forced mode, which does not check whether the key is pre-configured in authorized_keys on the server. The -f flag adds a key, often resulting in multiple copies of the same key installed on the server.
- -p flag: This flag specifies the SSH port to connect to the remote host. This flag is used when the default SSH port is not being used.
- -n flag: This flag performs a dry-run that prints the keys intended for installation without installing them on the remote host.
Conclusion
This guide showed you how to use the ssh-copy-id command to install SSH keys on remote hosts. Though this can be a simple and efficient method to install keys, misconfigured keys may result in security issues or getting locked out of the system. Therefore, be extremely careful as you experiment with this process.