
Examples include from host discovery to vulnerability audit, network diagnostics and more. Most of them were produced in real or simulated scenarios making them real valuable for network administrators or students.
Implementing the examples described in this tutorial is pretty simple, as running a command.
All subjects covered in this article include:
- Nmap ping sweep examples
- Defining ports to scan with Nmap
- Nmap NULL scan example
- Nmap FIN scans
- Xmas Scan with Nmap
- Updating Nmap NSE (Nmap Scripting Engine)
- Get devices OS, workgroup, domain, device name over SMB protocol
- Finding Zombie for Idle Scan
- Executing an Idle scan
- Scanning ranges for vulnerabilities
- Scanning for smb-vuln-ms08-067 vulnerability
- Brute force against SSH with Nmap NSE
NOTE: Last update of this tutorial was in October 2021.
Ping Sweep with Nmap
Ping sweep is a technique used to discover live hosts within a network or range.
Nmap ping sweep examples were deeply explained at Nmap ping sweep.
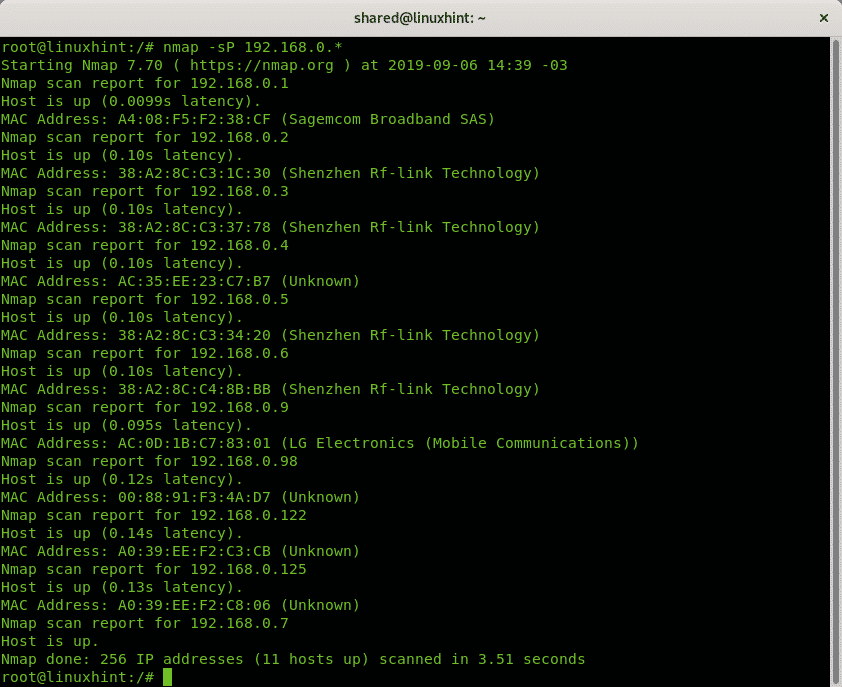
To execute ping sweep using Nmap, you need to implement the -sP or -sn options, which instruct Nmap to avoid port scan after discovery.
In the following example, a wildcard is implemented to instruct Nmap to discover all online C class network hosts or devices.
In the previous example, Nmap only confirms the host is alive without scanning the target. The opposite would be the -Pn option, which instructs Nmap to start the scan without checking if the host is alive.
At the end, it will print the total number of live hosts as shown in the screenshot below.

As you can see, from 239 scanned addresses, 10 were online devices.
Defining Ports with Nmap Using the -p Flag
Defining a port to scan with Nmap is pretty easy, just add the flag -p followed by the port, or ports separated by commas as shown in the screenshot below.

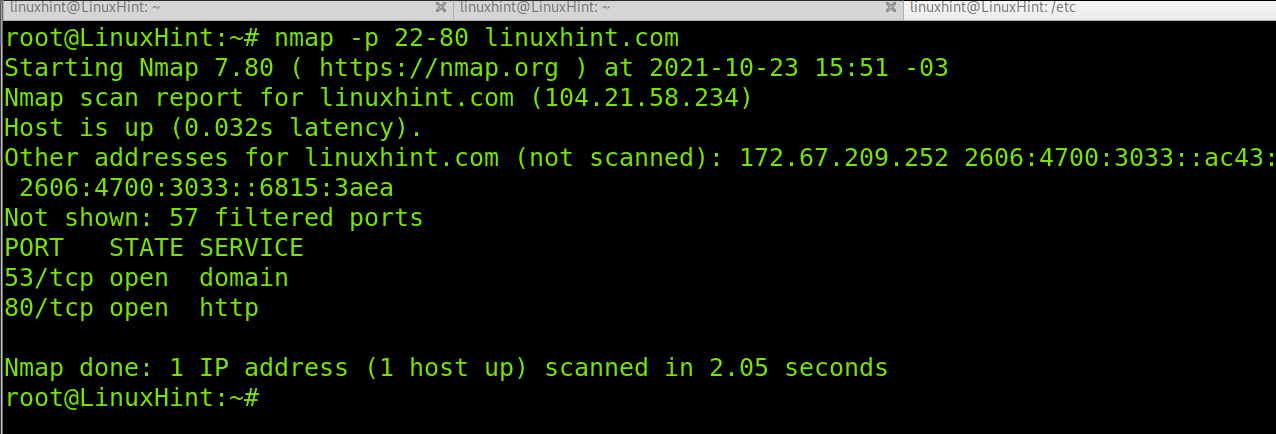
In the following example the port range is defined with a hyphen to scan Linux Hint port range from 22 to 80:
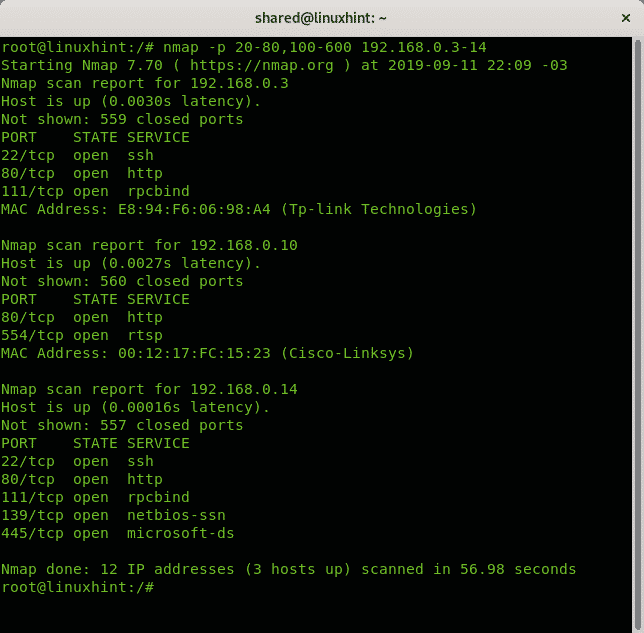
The following example shows Nmap scanning two different port ranges separated by commas.
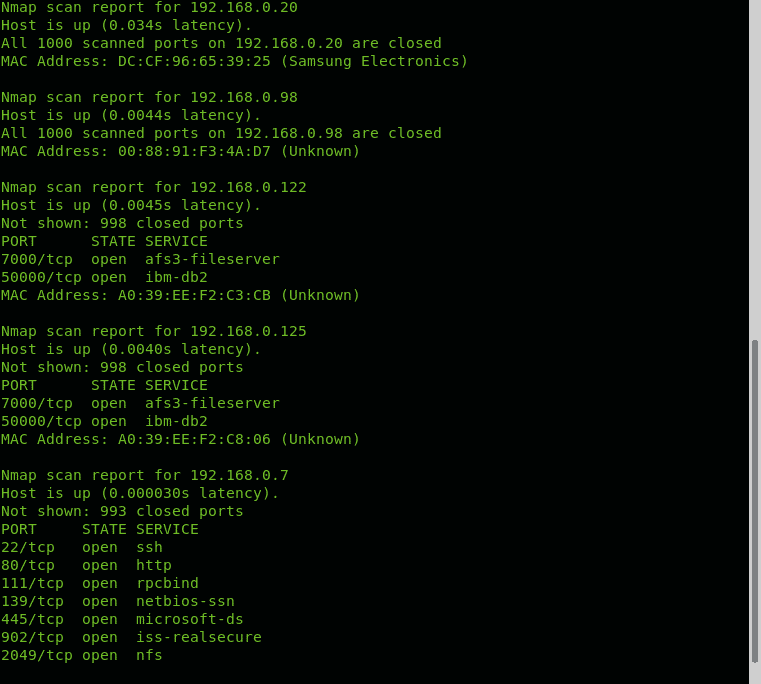
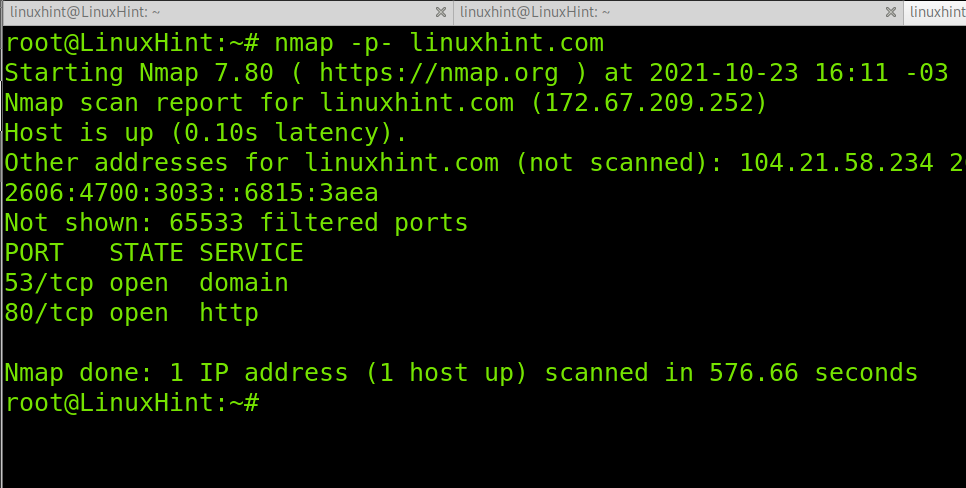
There are many ways to specify ports to scan using Nmap. We have published a tutorial showing different ways to scan all ports using Nmap. One of these methods to scan all ports on a target requires the implementation of the -p- option as shown in the following example.
The final example of this section shows an ARP scan executed through Nping, part of the Nmap suite, which inherited Nmap flags to customize ARP scans.
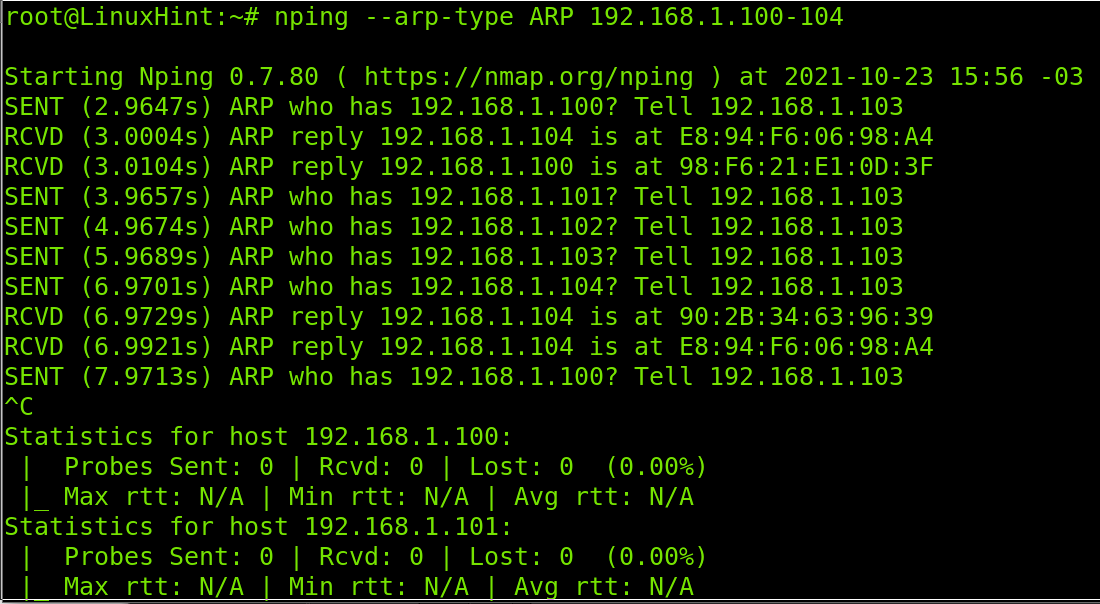
As you see, Nping identifies every IP with the proper MAC address.
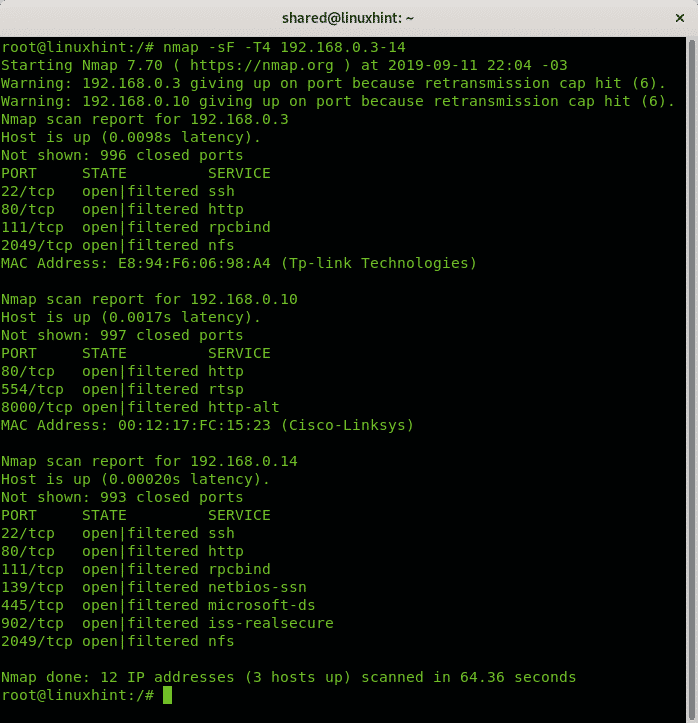
Nmap FIN Scan Example
The next example is an aggressive FIN scan against a port range.
This is an example of an insane FIN scan against a single device:

To end FIN scan examples, let’s do a less aggressive scan against a metasploit virtual device.
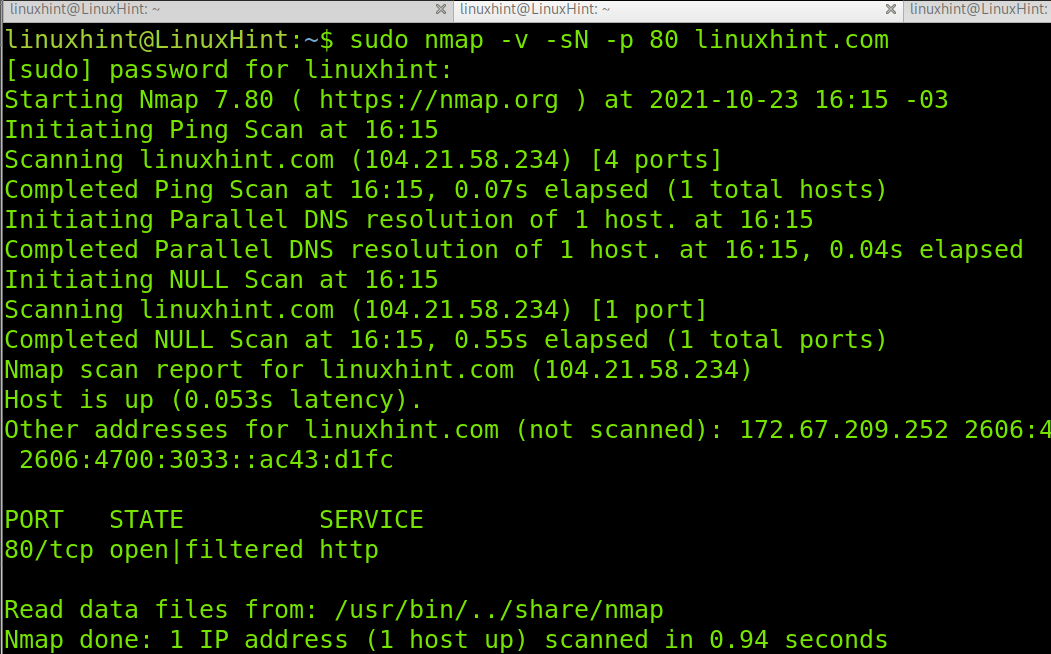
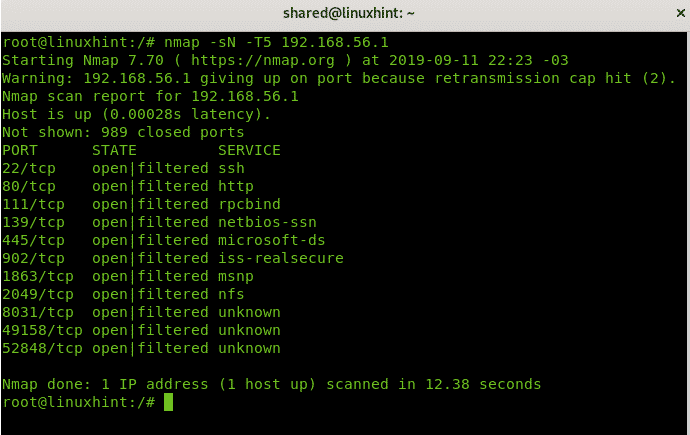
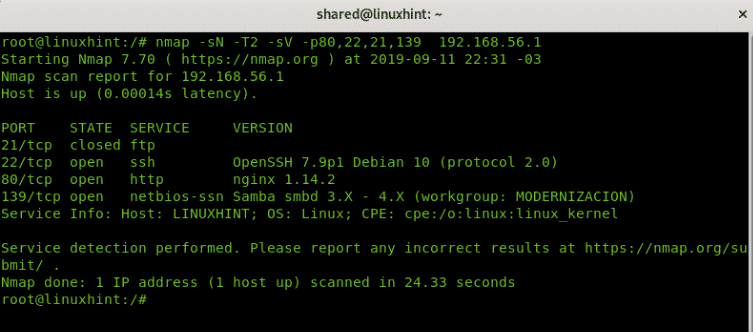
Nmap NULL Scan Example
The following example shows a NULL scan against linuxhint.com port 80. Remember Nmap NULL, Xmas and FIN scans can’t distinguish between open and filtered ports, in many scenarios.
Now, let’s try an insane scan against a router.
Usually NULL, Xmas and FIN scans can’t distinguish between filtered and open ports when the port is open, the next example includes the -sV option to help it distinguish, but adding this option results in a less stealthy scan:
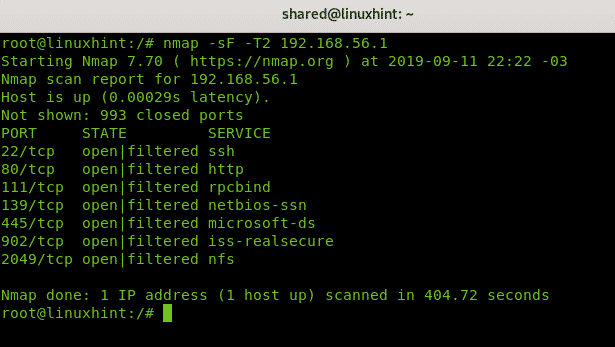
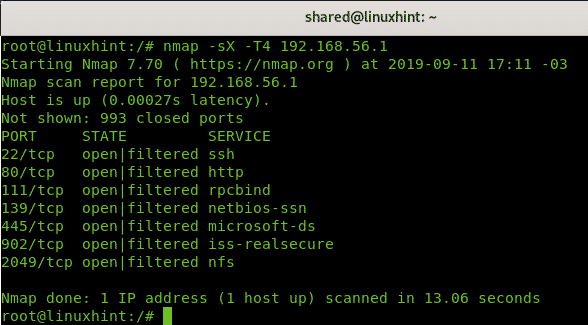
Nmap Xmas Scan Example
The Xmas scan with Nmap was deeply explained in this article.
Below, you can see an example of an aggressive Xmas scan against the target 192.168.56.1.
Now, a less aggressive Xmas scan against port 80 and 22.
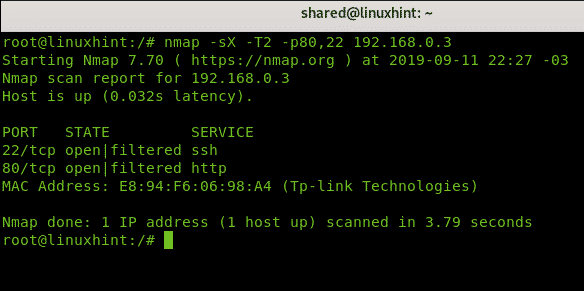
The following example is similar to the above, but includes level 2 verbosity:
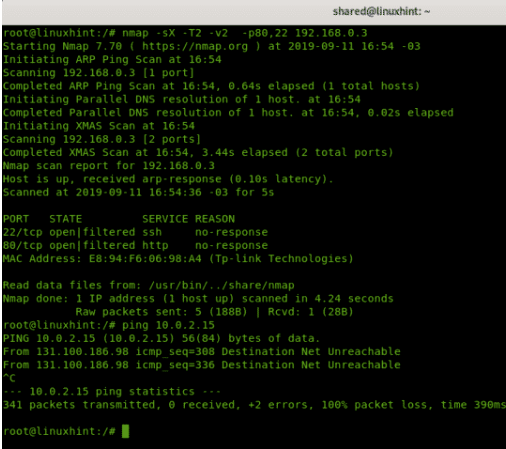
As you can see, the last output reveals additional information than the previous output.
Update Scripts Database
Nmap contains a suite of scripts with additional functionalities. This suite is known as Nmap NSE.
Before using the Nmap NSE update the database by running the command below.
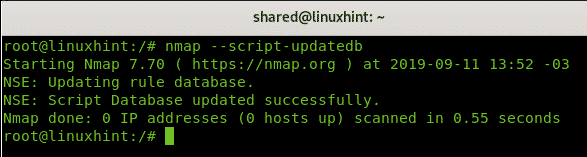
Once updated, you can proceed with Nmap NSE.
Get Devices OS, Workgroup, Domain, Device Name Over SMB Protocol
The following example uses the NSE script –script smb-os-discovery (https://nmap.org/nsedoc/scripts/smb-os-discovery.html) against whole last 2 octets of the network 172.31.X.X
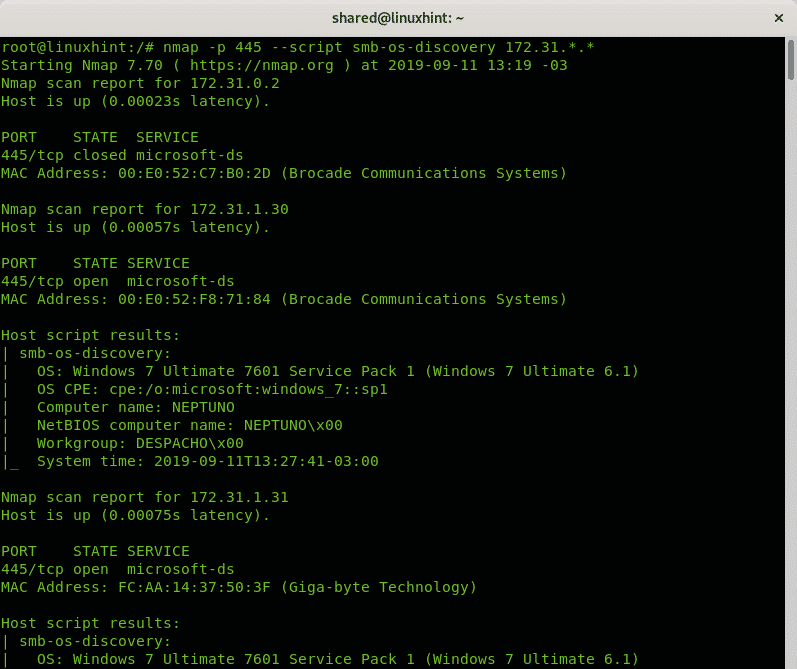
As you can see in the screenshot below, the first possible vulnerable target was one.
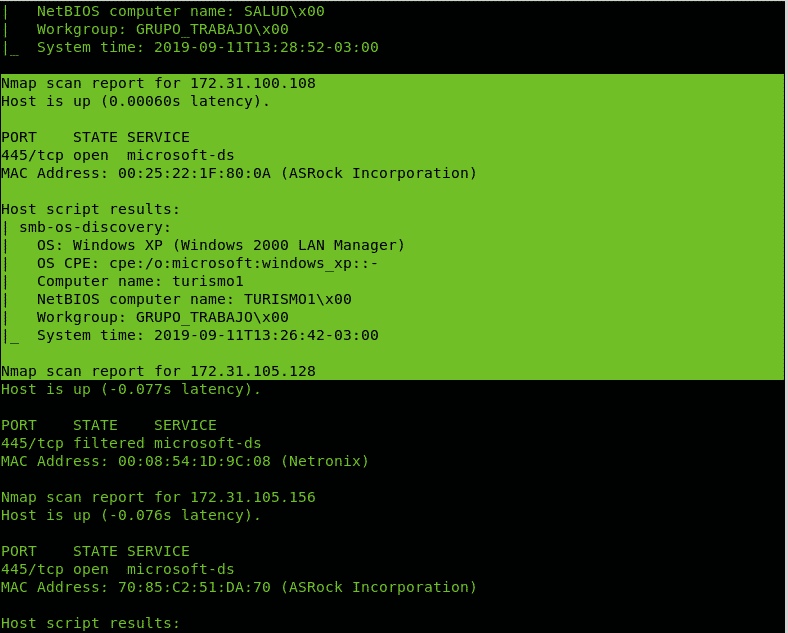
The screenshot below reveals a new vulnerable target was found.
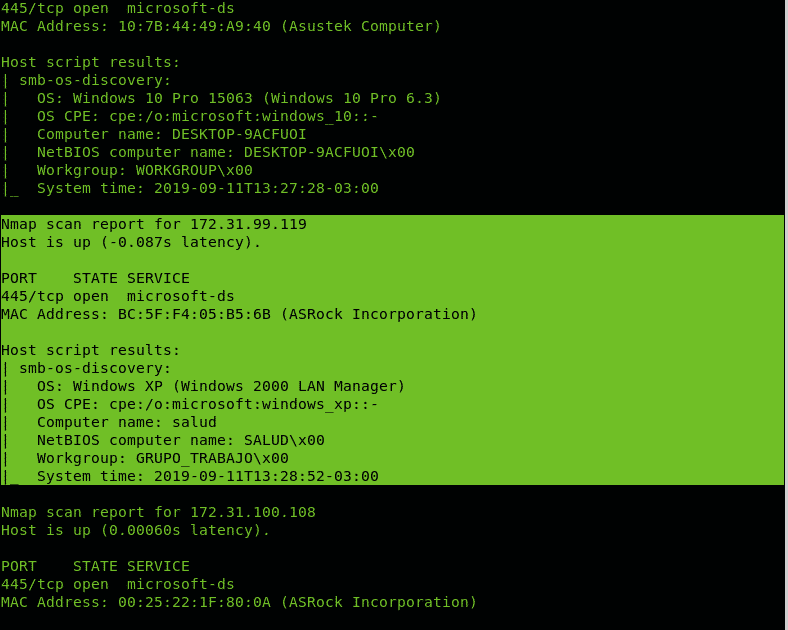
Two Windows XP computers were found, great candidates for a Idle scan which will be explained later below in this tutorial.
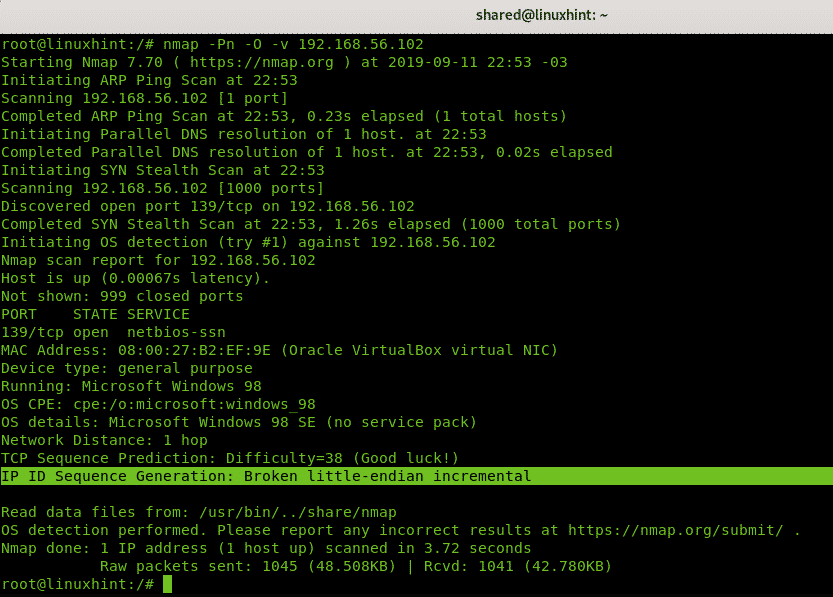
Finding Zombie for Idle Scan
The following example shows how to search for a zombie candidate to execute an Idle scan by scanning the last octet of the 10.100.100.X network by using the NSE script ipidseq (https://nmap.org/nsedoc/scripts/ipidseq.html).
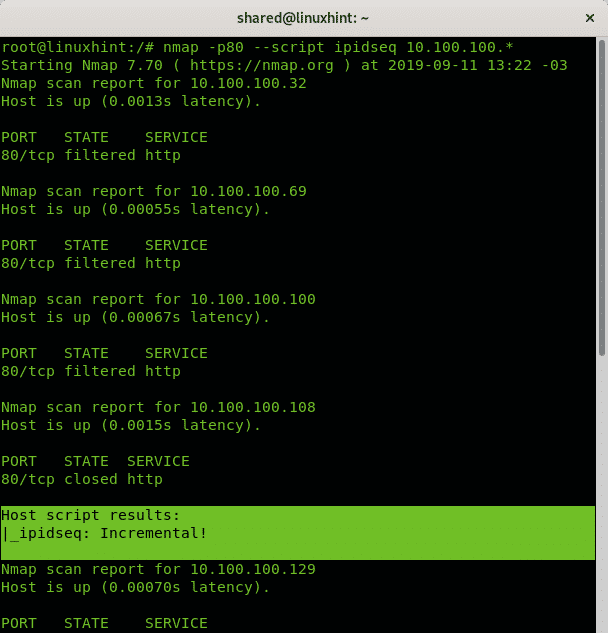
Another way to find potential zombie candidates for Idle scans:
Executing an Idle Scan
Running an Idle scan using a candidate found in the previous step.

Another Idle scan using the same candidate against a gateway:
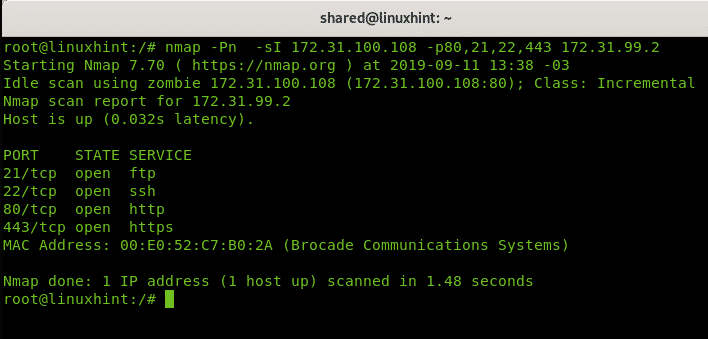
An Idle scan against the FTP of a router using a Windows 98 virtualized device:

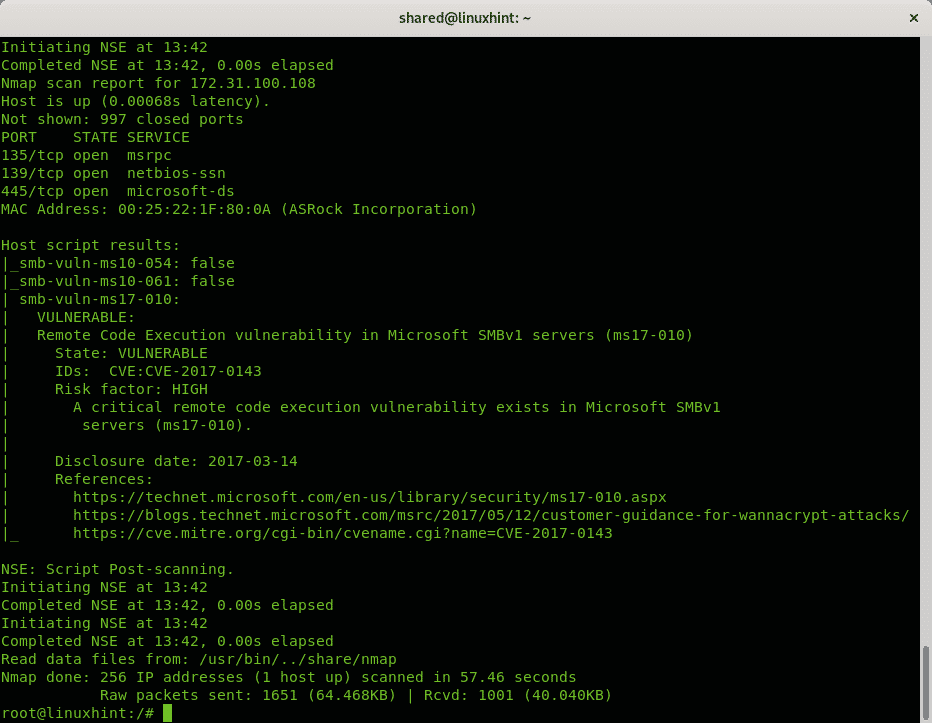
Scanning Ranges for Vulnerabilities
The following example shows the wildcard implementation to scan a whole octet’s range.

Below, you can see an output sample.
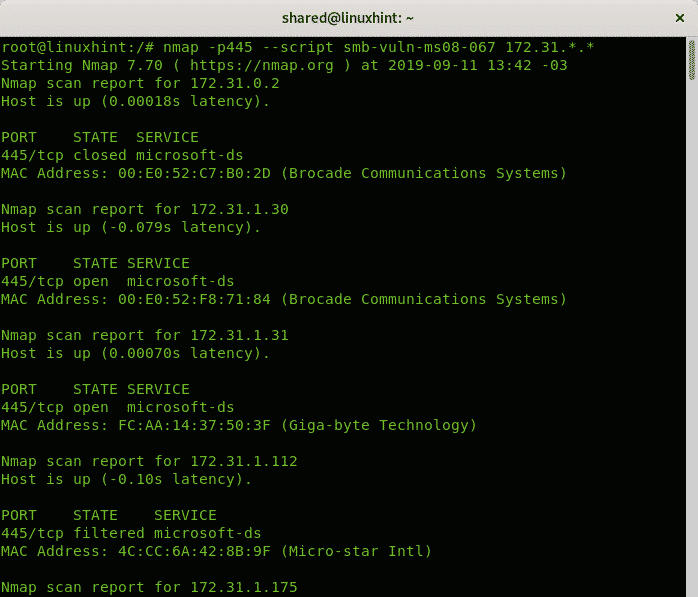
Scanning for smb-vuln-ms08-067 Vulnerability
The following scan uses the NSE script smb-vuln-ms08-067 (https://nmap.org/nsedoc/scripts/smb-vuln-ms08-067.html) to search for a remote execution vulnerability on two last octets of the network by implementing the wildcard twice.
Brute Force Against SSH with Nmap NSE
Nmap NSE (Nmap Scripting Engine) was deeply covered in the Nmap NSE tutorial. This example shows how to use the Nmap scripting engine to bruteforce the target ssh.
For this attack we will use the NSE script named ssh-brute.nse.
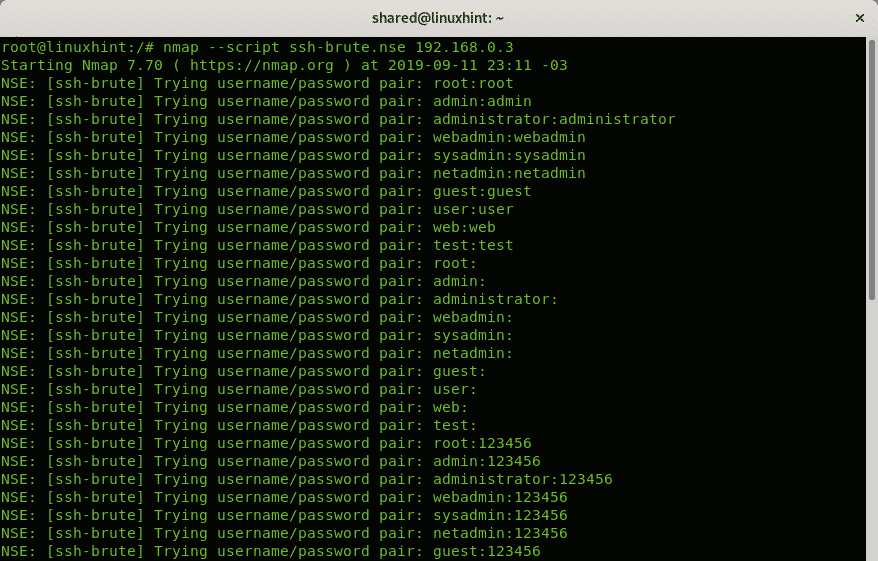
As you can see, NSE will read a list including username and password pairs. Of course, you can provide NSE your custom list.
Conclusion
I hope all Nmap examples shown in this tutorial were useful to you. Nmap is probably the best network scanner in the market. Despite faster solutions, like Mass Scan, Nmap leads with multiple features and additional scripts. You also can write your own NSE scripts to use with Nmap.
As you can see, despite its power, Nmap can be easily executed by any Linux level user. Deep Nmap learning is very advantageous for anyone dealing with networking.
Thank you for reading this tutorial showing 30 Nmap examples. Keep following Linux Hint for additional Linux tips and tutorials.