3 Different ways to power up the Arduino nano
The Arduino nano is a kind of Arduino Uno as they are similar in terms of specifications but differ in size. The Arduino nano is suitable especially for the projects in which you need to lower the size of the project. So, if you’re looking for way by which you can power up your Arduino then here they are:
- Power up Arduino nano using the USB port
- Power up Arduino nano using the Vin pin
- Power up Arduino nano using the 5V pin
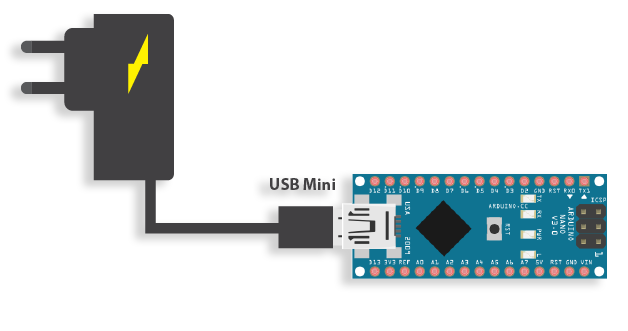
1 – Power up Arduino nano using the USB port
If you have used any of the Arduino boards previously then you might know that when you connect your laptop with the Arduino board to test your Arduino code, the Arduino also gets powered up. This is because the Arduino only requires 5 volts to operate, and this can be provided by the laptop USB port.
You can also power up the Arduino nano by using any USB charger or any battery that has a USB port but most of the time the USB port is used to only program the Arduino board.
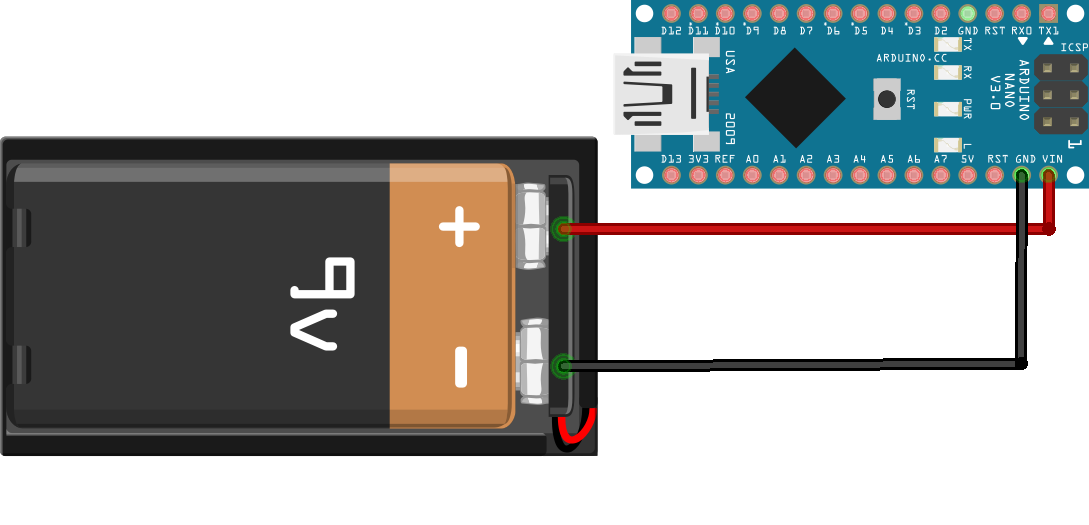
2 – Power up Arduino nano using the Vin pin
The Vin pin is provided on almost every board of the Arduino which can be used to power the Arduino nano. So, connect the Vin pin of the Arduino nano to the positive terminal of the battery and connect the ground pin of Arduino nano to the negative terminal.
Also remember that your input voltage must not exceed the safe voltage limit of the Arduino nano that is 12 volts and the minimum voltage for Vin is 7 volts.
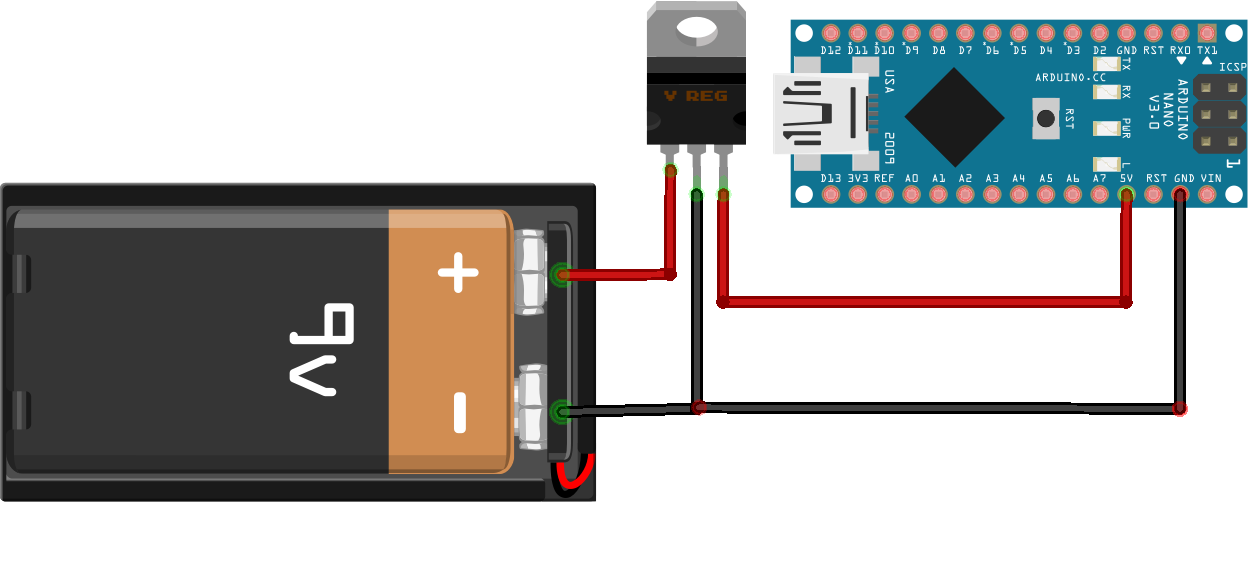
3 – Power up Arduino nano using the 5V pin
Another method that you might not be familiar with is using the 5-volt pin of your Arduino nano as it might seem strange that most of the time this pin is used to supply the voltage to the peripherals connected with Arduino.
So, to connect the Arduino nano with the supply, just connect the positive terminal of your external power supply with a 5-volt pin and the negative terminal of the external supply to the ground pin of Arduino nano. To stabilize the input from the 5 volts pin you can use LM7805 as a voltage regulator chip as in the image below and also you can use the capacitors at both input and output sides according to the datasheet of L7805.
Conclusion
To make the size of your project smaller you can use the Arduino nano as it has the same specifications as the Arduino Uno. There are different ways by which you can power the Arduino nano, we have explained three methods. You can use any method and if you try all the three methods the Arduino will choose the only one through which it will receive the highest voltage.