
Whichever the case may be, in situations like these, you’re going to need something that allows for interoperability between the two operating systems. The easiest and most accessible way of going about it is making a bootable USB.
WoeUSB is a convenient tool designed to create bootable Windows USB drives on Linux. In our case, we will use WoeUSB on Ubuntu to create a Windows 10 drive. However, the installation steps and using the program are relatively similar across the board, no matter the distro you’re on.
So, without further ado, let’s get into how we can use WoeUSB to make bootable media on Linux!
Installing WoeUSB
Installing WoeUSB is simple and straightforward. However, there is a catch. The program is no longer actively supported by the original creator. This means you can’t download and install it from the original Github repository.
Nonetheless, several people from the community have forked the app and continued its development. So, you can get it from their personal package archives (PPAs).
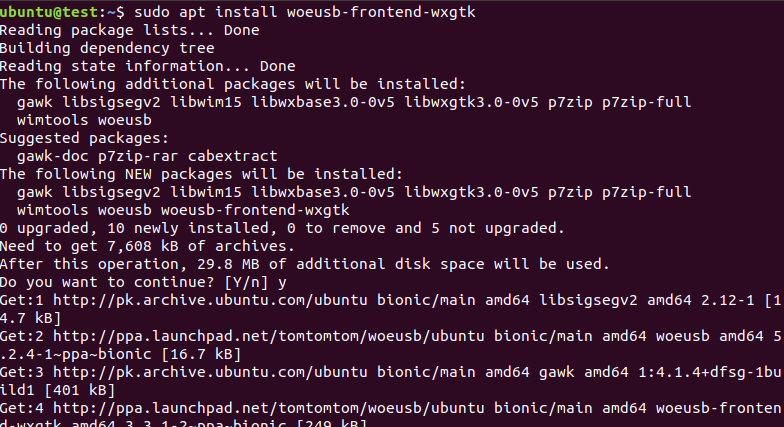
We will begin by installing WoeUSB on our system. All you have to do is run a group of commands in the Terminal. Start by opening a new Terminal either through the Activities menu or pressing Ctrl + Alt + T on your keyboard.
The first step is to add the WoeUSB repository to your software sources. This can be done by running the following command:

Next, we update our package information by running the command provided below:
Finally, we can install the package of our interest — WoeUSB:
With that done, you’ve successfully installed WoeUSB. If you want to skip adding the WoeUSB PPA to your repository, it’s possible to download its .deb package by clicking here.
Method 1: Using WoeUSB [GUI]
Having done that, you are now ready to start using this handy little tool to create bootable media on your Linux system. Run an instance of WoeUSB by locating it through the Activities menu. The starting application should look something like the following image:
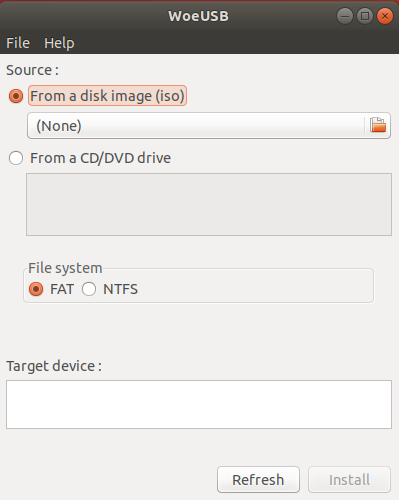
As you can see, there are several options here to select from. Initially, you have to select the disk image. These are usually .iso files that contain the operating system of your choosing. In this case, we’ll be burning the Windows 10 .iso file to a USB drive. Alternatively, you can also use a CD or a DVD drive as a source.
There is the option to select the file system of the bootable USB. Conventionally, modern Windows operating systems use the NTFS filesystem. However, UEFI systems cannot boot from a USB with an NTFS format. A typical example of such a system is Windows 8. On the other hand, Windows 10 prefers NTFS over FAT32.
Returning to creating our bootable USB, we will proceed by selecting the .iso file, using the NTFS filesystem, and choosing the USB of our choice as the target device.
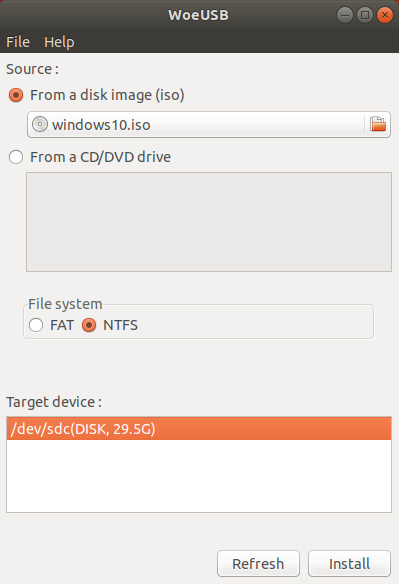
Once you’ve made your final configurations, make sure to double-check every single thing — especially the target device. The first course of action of WoeUSB and other similar programs is to completely erase all the data present on the subject USB drive.
Note: if you accidentally select the wrong USB drive, you will end up losing all your precious data.
If you’re sure you’ve got everything right, click the install button and let WoeUSB work its magic. It should take a few minutes to create your Windows 10 USB. Once it’s done, a small pop-up window may appear. Having dealt with that, you can safely eject your USB drive and start using it as a bootable Windows drive.
That’s all there is to using WoeUSB. However, if you run into some error or if you’re more of a Terminal user, there’s a command-line method of accomplishing the same thing too. The next section details it.
Method 2: Using WoeUSB [Terminal]
We’ve seen one method of using WoeUSB to create bootable USB drives, namely through the GUI. However, there is a way to achieve the same goal using the Terminal.
Let’s start by opening a new Terminal and getting help using the WoeUSB command:
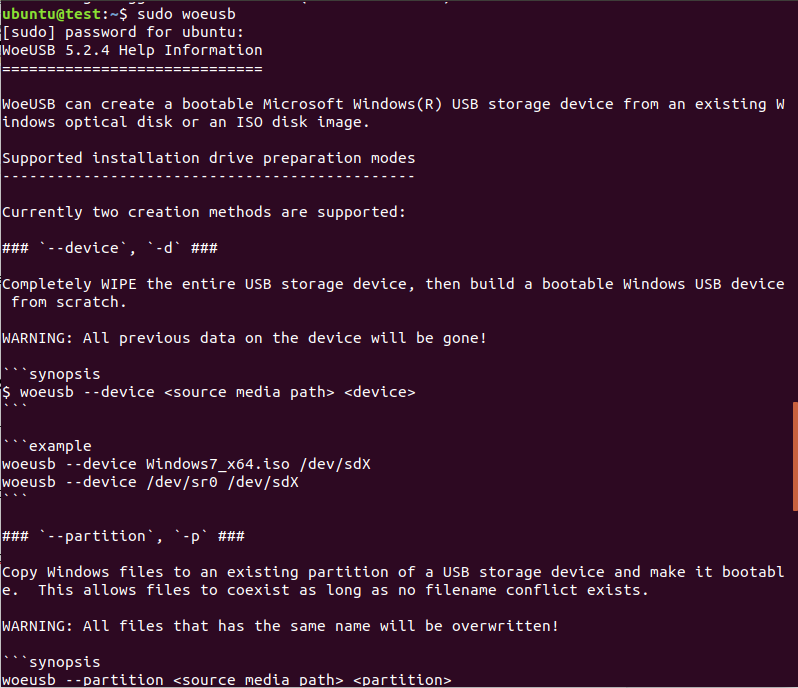
Here, you can see information about every parameter of the WoeUSB command. As it says in the screenshot, there are two ways to create bootable USBs. You can either create one from scratch using the first method (–device or –d) or the second method, which involves using existing partitions (–partition or –p).
In this tutorial, we’re focusing on the first method, where we build our USB drive from scratch.
The first thing to pay attention to is the source media path. This is the path to the directory where your .iso file is placed. Secondly, there is the device parameter. This one essentially just tells WoeUSB the target device you want to flash the OS on. All in all, the parameters correspond to the ones we dealt with in the GUI method. It’s the same thing but with a different interface.
For example, in our case, the following command can be run to create a Windows 10 USB.
Note that the .iso file was present in the Home directory, which is also the current directory of our Terminal — making it accessible when we run the command. Secondly, the /dev/sdc argument is the path to our USB. You can find yours by checking it in GParted. Finally, we passed our target filesystem — NTFS — to the command.
Conclusion
In this article, we’ve covered one of the most reputable and efficient tools used to create bootable USB drives — WoeUSB. It is easy to install, and even easier to use. There are two methods to use WoeUSB to create bootable media: one through the GUI and the other using the Terminal. Hopefully, you currently know how to use WoeUSB to create bootable USB drives. We hope you found this article helpful. Check out other Linux articles for more tips and information.