
Install Wine Using the Apt Repository
Utilizing Ubuntu’s default “apt” repository is the first and most basic approach to install Wine. Before starting with the Wine installation on Ubuntu, we need to ensure that the Ubuntu system is updated along with its repositories and packages. For this, we execute the “update” instruction via the “apt” package as displayed in the following image. This command starts its processing after adding the password for the currently logged-in user as depicted in the following. After a while, the system will be updated.

It’s time to look for the operational mode of our Ubuntu system using the “lspcu” instruction that is shown in the following image. It shows that our Ubuntu Linux system supports the 32-bit and 64-bit software per the “CPU op-mode” option. This means that we can install wine64 and wine32 in our Ubuntu system as per our choice.

We install wine64 which holds the 64-bit processing within our Ubuntu system using the “apt” Ubuntu repository. The installation instruction should be started with the “sudo” rights followed by the “apt” repository and the “install” and “wine64” keywords as depicted in the following image:

After a certain processing, it asks for confirmation to proceed with the installation of Wine on the Ubuntu system which requires 1750MB of disk at your end.

Until the installation is completed, wait for a while. The final stage of the installation process will show the progress made.

After the installation of wind64, you can look for its installed version via the version instructions that are displayed in the following image. The output of this instruction displays that the wine-5.0 version is installed.
![]()
Install Wine Using the WineHQ Repository
The first method demonstrates using the “Apt” package to install Wine on the Ubuntu system, not Wine’s latest version. Use the developer’s repositories to install the most recent version of Wine on your machine. If your system has only 64-bit support, make sure to enable the 32-bit support as well. The “dpkg” package can be utilized in a command that is shown in the following image to add the 32-bit architecture. After adding the support for 32-bit, make sure to update the repositories via “apt”.

Now, it’s necessary to install Wine from its developer site. For this, make sure to add its GPG key to your Ubuntu system first. To add a GPG key to an Ubuntu system, the following displayed command must be executed that has the URL to its GPG key:

There is a requirement to install some prerequisites in the Ubuntu system for the smooth installation of Wine through its source code. Use the “apt” package in the “install” command and the term “software-properties-common” to accomplish this.

Now, adding the WineHQ repository to our Ubuntu Linux system is necessary. This should be added using the apt-add-repository instruction that is displayed in the following image. This command is followed by the “deb” keyword to install the “Debian” type package of WineHQ, followed by the developer’s source URL. The command automatically gets the version of Wine to be installed using the “lsb_release” keyword followed by the “-cs” option.

After adding the WineHQ repository successfully, we need to update the repositories and packages of Ubuntu once again via the “update” instruction.

It’s time to install Wine’s most recent (latest) version on our Ubuntu Linux system. For this, we use the “apt” package within the installation instructions. This instruction uses the “—install-recommends” option that automatically recommends and installs the stable version of Wine on our system via the winehq-stable keyword as shown in the following:

This process also asks for confirmation from a user to proceed with the further processes. Hit the “y” key to confirm the process of installation.

The stable wine version is installed on our PC using the aforementioned command. To install the development release of Wine, we should use the same command by replacing the “winehq-stable” keyword with the “winehq-devel” keyword.

This process also requires confirmation as per the following-shown prompt during installation. You should use the “y” key upon this prompt display.

After installing Wine using the Developer repository, you can look for its installed version by utilizing the same version command that starts with the “wine” keyword. This time, we successfully installed the latest version of Wine which is version 8.0.2.
Update Wine
You can also upgrade the installed version of Wine to the latest and most stable version according to your Ubuntu system via the “apt-get” repository in the “upgrade” instructions. The following shown command displays the command and its processing:

The process of upgrading Wine through a command also requires confirmation. Therefore, you must press “y” upon being asked to continue its installation.

The upgrade instruction successfully upgraded the installed version 8.0.2 of Wine to version 8.18 in our Ubuntu system.
Use Wine on Ubuntu
To use Wine on your system, use the “wineboot” instruction and wait until it starts itself. Wine will be started with the prompt window that displays the configuration directory of Wine.
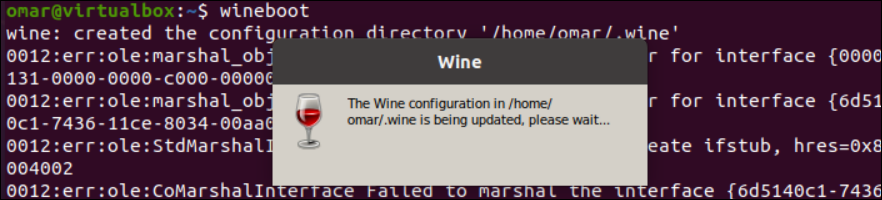
The following commands allow you to look for its contents in the configuration directory. Now, use the “wine” keyword with the file name that you want to launch in Ubuntu, i.e. “exe” files, etc.

Remove Wine
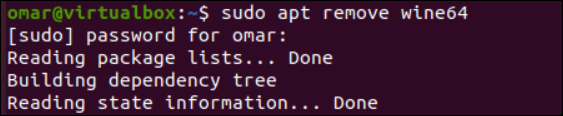
The simple “remove” command can be utilized to remove Wine from an Ubuntu system.
Removing its repositories via the “rm” instruction is also necessary.
Rm -rf $HOME/.config/menus/applications-merged/wine*
Rm -rf $HOME/.local/share/applications/wine
Rm -rf $HOME/.local/share/desktop-directories/wine*
Rm -rf $HOME/.local/share/icons/????_*.xpm
Conclusion
This guide demonstrates the use of Wine in the Ubuntu system, followed by its different installation methods. The first method elaborates on the conventional way of installing Wine like any other software while the other method depicts the use of a developer repository to install Wine.