After performing the merging operation, GitHub allows them to remove the branch. However, it exists in the local repository. In that situation, it is required to prune the remote branch. More specifically, the “$ git fetch –prune <remote-name>” command is utilized to perform this operation.
This blog will explain:
What is Git Pruning?
Git has multiple functions which the developers can use according to their needs. Git pruning is one such feature that is used to clean the stale objects from the Git repository. That stale object, such as commits, tags, branches, and changes in the Git log history, becomes unreferenced and can’t be reachable. Moreover, it is hard for developers to trace it. In this situation, developers need to prune them through the “$ git prune” command.
Example: Clean Up Remote Branches in Git Utilizing the “git prune” Command
To clean up the remote branches that are deleted and do not exist on GitHub, follow the provided instructions:
- Move to the Git repository.
- Connect the remote repository with the local repository.
- Check the GitHub repository and view the list of all branches.
- View all available local and remote branches using the “git branch -a” command.
- Execute the “$ git fetch –prune <remote-name>” command.
Let’s try them out practically!
Step 1: Change to the Desired Git Local Repository
Navigate to the Git local repository by providing its path:
Step 2: Clone Remote Repository
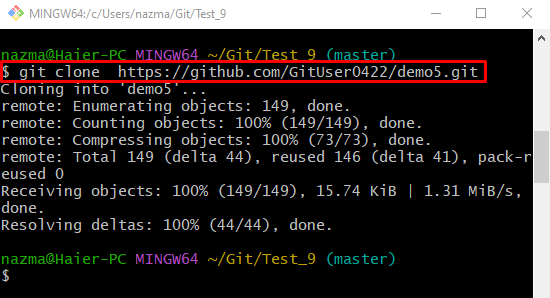
Next, clone the remote repository on the local machine by running the “git clone” command:
Step 3: Go to GitHub Hosting Service
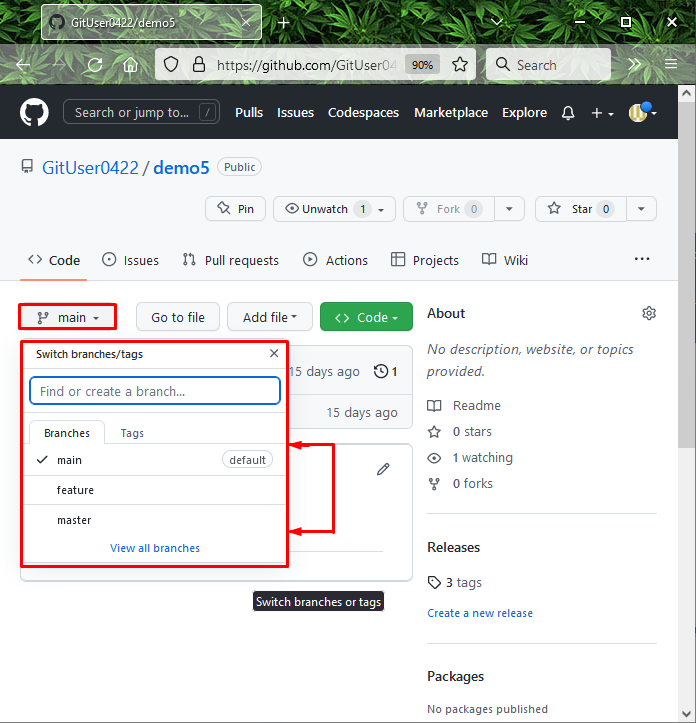
Now, open up a remote repository and check all the available remote branches in the list. Here, our remote repository contains three working branches:
Step 4: View the List of Remote and Local
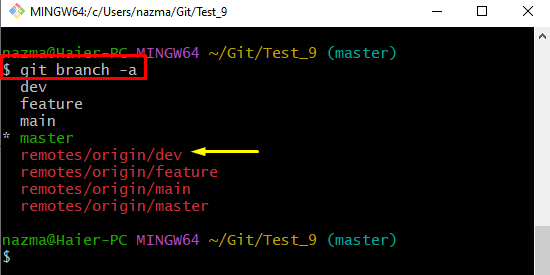
To view the list of all remote and local branches, execute the “git branch” command with the “-a” option that is used to show all branches:
As you can see, the “remotes/origin/dev” branch is present in the list. However, it does not exist in the remote branches list on GitHub, which means that it is deleted from the remote repository but exists in the local machine and needs to clean up from the local repository:
Step 5: Prune Remote Branch
Run the “git fetch” command along with the “–prune” option and remote name:
As a result, the local repository is updated with the new version of the remote hosting service, and deleted remote branch is pruned from the local repository:
Step 6: Verify Git Pruning
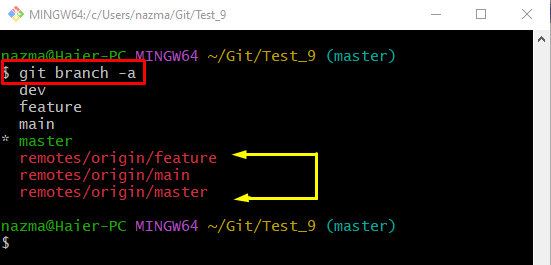
Lastly, check the list branches to ensure the pruning procedure by executing the “git branch” command with the “-a” option:
According to the below-provided image, the remote “dev” branch is pruned successfully and does not exist in the branch list:
That’s all! We have demonstrated the Git prune procedure and provided the method to clean up the remote branch using the “git prune” Command.
Conclusion
Git pruning is the most commonly used feature of Git that is utilized to clean stale objects from the Git repository, and the “$ git prune” command is specifically used for this purpose. Whereas the “$ git fetch –prune <remote-name>” command can be used if you want to clean the remote branches. This blog provided details about Git pruning and illustrated the method to clean up the remote branch using the “$ git fetch –prune <remote-name>” command.
Git pruning is the most commonly used feature of Git that is utilized to clean stale objects from the Git repository, and the “$ git prune” command is specifically used for this purpose. Whereas the “$ git fetch –prune <remote-name>” command can be used if you want to clean the remote branches. This blog provided details about Git pruning and illustrated the method to clean up the remote branch using the “$ git fetch –prune <remote-name>” command.


