Git users work on development projects to create several files, folders, and branches and perform multiple operations. Sometimes, they add changes in a branch and forget to push these modifications while switching to another branch. When they try to merge those files or branches, they encounter conflict. Thus, to resolve the conflicts, it is required to skip the merge operation and all changes that cause conflicts.
This tutorial will illustrate the working of the “git rebase –skip” command.
What Exactly Does “git rebase –skip” do?
While performing the merge or rebase operation, developers usually encounter some conflicts. This usually happens when more than one user commits the same content in the same file. Therefore, Git is unsure about the modification and unable to apply changes. The “git rebase –skip” command can overcome such conflicts and avoid/skip the commit that causes the merge failure.
Step 1: Redirect to Local Directory
First, run the following command in the Git bash terminal and move to the required repository:
Step 2: Create a New File
Then, create a new file and update it with some content using the “echo” command:
Step 3: Add File to Staging Index
Now, execute the below-stated command to add the “newFile” file to the staging area:
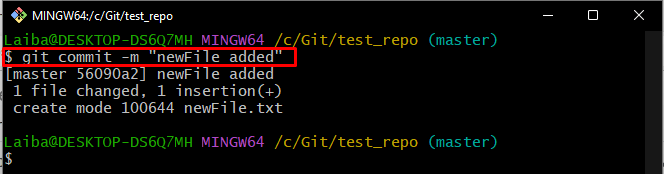
Step 4: Commit Changes
To save new changes in the local Git repository, utilize the “git commit” command:
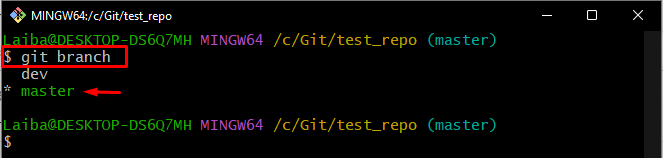
Step 5: View List of Branches
After that, check the list of available branches in the working repository using the “git branch” command:
It can be observed that the repository has “dev” and “master” two branches and the asterisk “*” symbol beside the “master” branch indicates that is a current working branch:
Step 6: Switch to Another Branch
Now, navigate to the “dev” branch utilizing the “git switch” command:
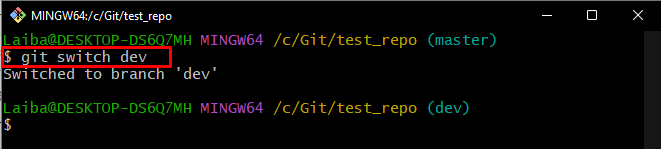
Note: We have switched to the “dev” branch and added some changes in the “newFile” file which will be merged with the “master” branch’s “newFile” file.
Step 7: Add Changes to the File
Utilize the “echo” command and add some content to the new file:

Step 8: Add New Changes to Staging Area
Then, push newly added changes to the Git staging index:
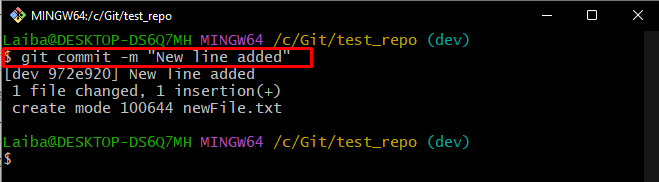
Step 9: Commit New Changes
To save staged changes to the Git repository, run the following command:
Now, let’s suppose users want to add more changes to the “newFile” file in the “master” branch. For this purpose, switch back to the particular branch and make desired changes.
Step 10: Switch Back to Old Branch
Utilize the “git switch” command to move back to the “master” branch:

Step 11: Update Content of File
Next, update the file by adding some content to it using the below-stated command:
Step 12: Add Updated Changes to Git Index
Update the staging area by adding working directory changes with the help of the “git add” command:
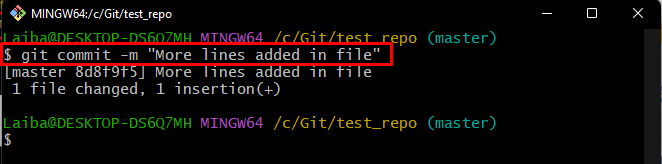
Step 13: Commit Updated Changes
Then, save all the newly added changes by typing out the “git commit” command:
Step 14: Merge New Content
In order to merge the new changes from the “dev” branch to the “master” branch, execute the “git rebase” command:
In the below-given output, it can be observed that the merge conflict occurred:
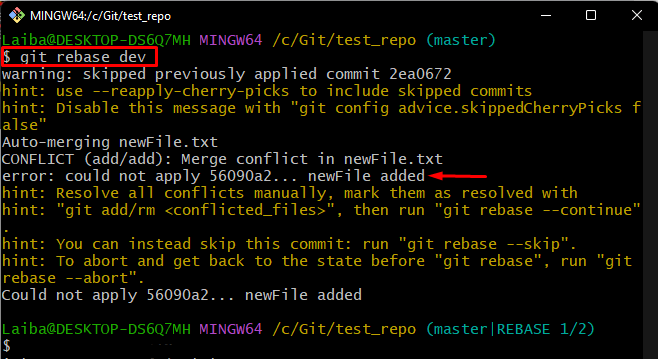
Now, to resolve it, move to the next step.
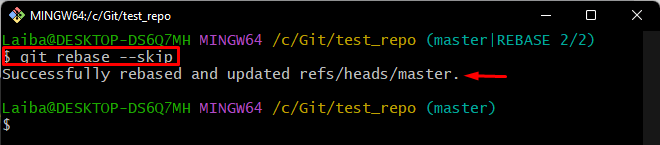
Step 15: Resolve Merge Conflict
Use the given-below command to skip the commit that was causing conflict and make sure that no changes are added to the file in the “master” branch:
The below screenshot indicates that the rebase skip operation has been performed successfully:
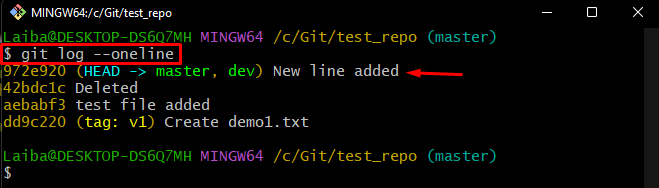
Step 16: Verify the Changes
Lastly, view the repository reference log history to ensure the newly added changes:
It can be seen that the conflicted commit has been removed from the commit history:
That’s all! We have efficiently explained the working of the “git rebase –skip” command.
Conclusion
The “git rebase –skip” command entirely skips the commit that causes conflicts. Therefore, none of the modifications made by the conflict commit will be applied. Conflicts usually occur while merging branches, files, or the content of files. This tutorial illustrates how merge conflicts occur and how to resolve such conflicts using the “git rebase –skip” command.