Ubuntu operating system is an open-source desktop platform with many releases from the official developer site. Ubuntu was initially a terminal-based (command-line) operating system that eventually evolved into a GUI-based desktop. Ubuntu can be installed on a PC just like you install a Windows operating system. However, you may alternatively install it alongside a Windows computer on a virtual platform like “VirtualBox”. This guide discusses the step-by-step installation of Ubuntu on VirtualBox.
Download the Ubuntu ISO Image
The very first step to installing the Ubuntu operating system on Virtual Box is to download the ISO image of Ubuntu through its official website. Open your browser and search the download page of Ubuntu’s official site as depicted in the attached photo. Many versions of the Ubuntu desktop image are available on the site. Select the version of your choice, and make sure to select the “Desktop” ISO image. Tap on the “Download” button to get the ISO image of the Ubuntu desktop.
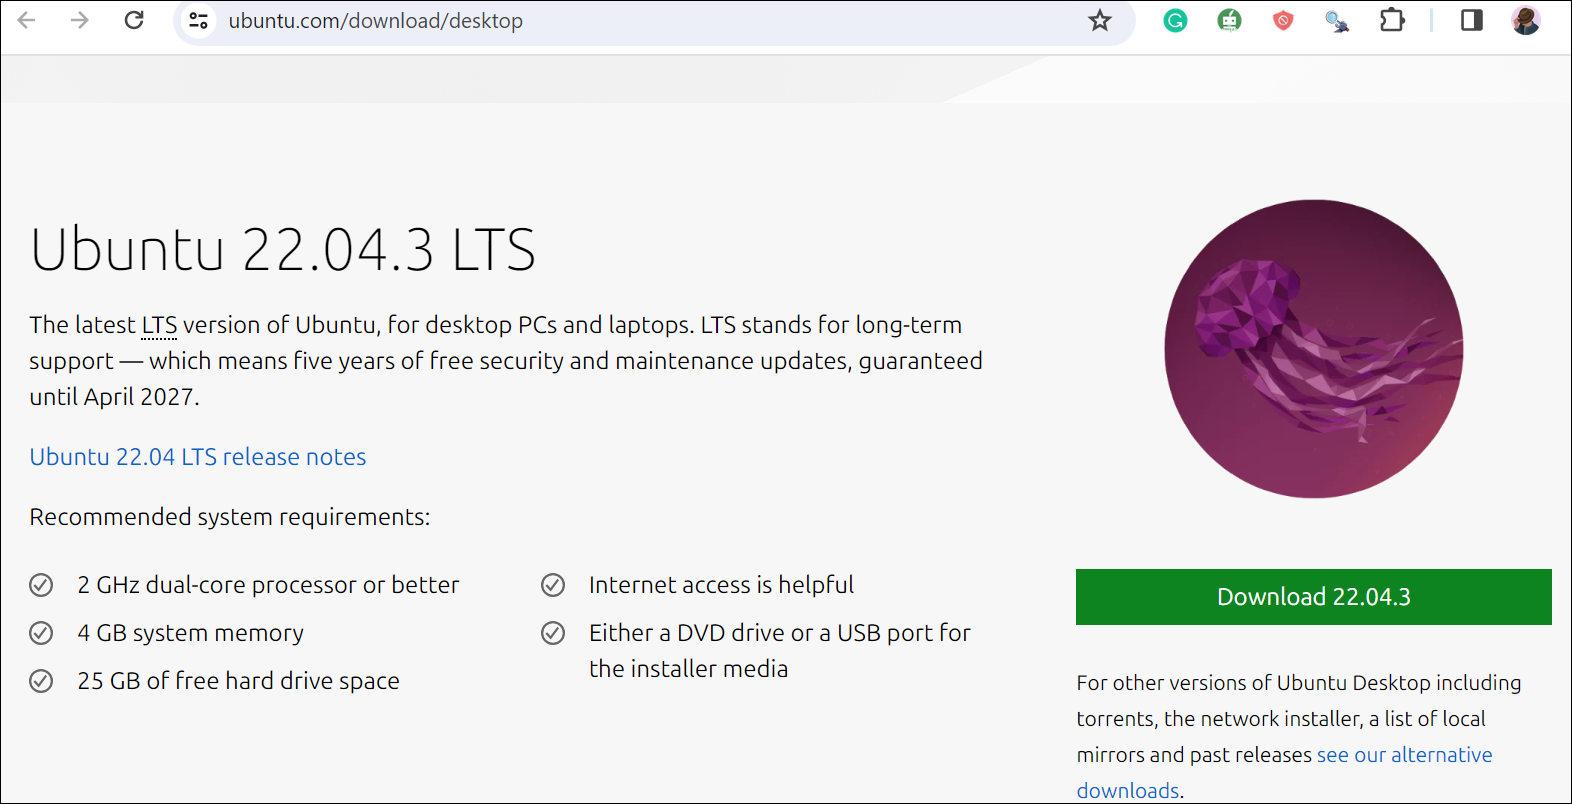
We now downloaded our system’s ISO image of Ubuntu version 20.02.1.
![]()
Set Up VirtualBox for Ubuntu
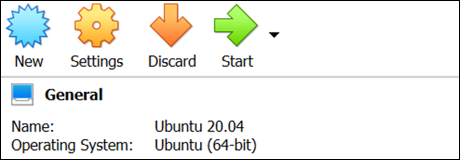
Ensure that the VirtualBox’s latest version is installed on your end. After successfully downloading the Ubuntu ISO image into our system, we need to set up the VirtualBox to install Ubuntu. Open the VirtualBox and tap on the “New” blue icon to create a new Ubuntu machine; you can add as many machines as possible.
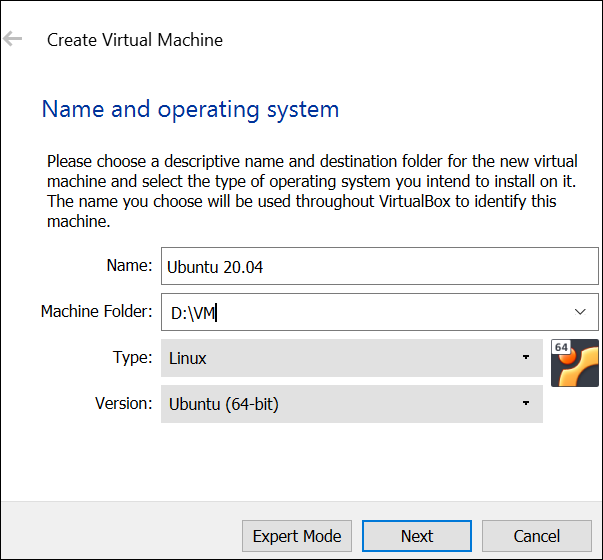
On the Virtual Machine creation window, you have to name the machine as Ubuntu 20.04, select the installation folder, select the type of the operating system, and select the version of the operating system, i.e. Ubuntu 20.04, D:\VM, Linux, and Ubuntu (64-bit).
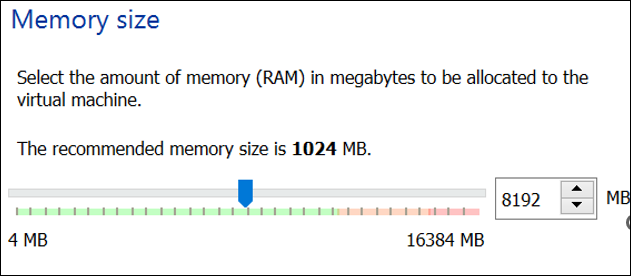
After proceeding to the next screen, you have to specify the RAM for a new Virtual Machine so that it can work smoothly. 8GB is more than enough for the Ubuntu system.
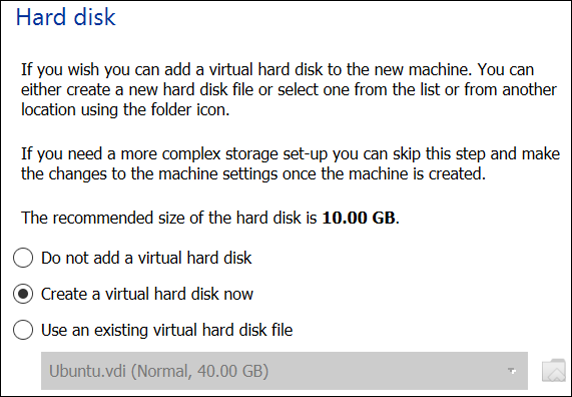
You can create a virtual hard disk for your Ubuntu system to be installed by choosing the second option available in the hard disk window and tapping on the “Create” button.
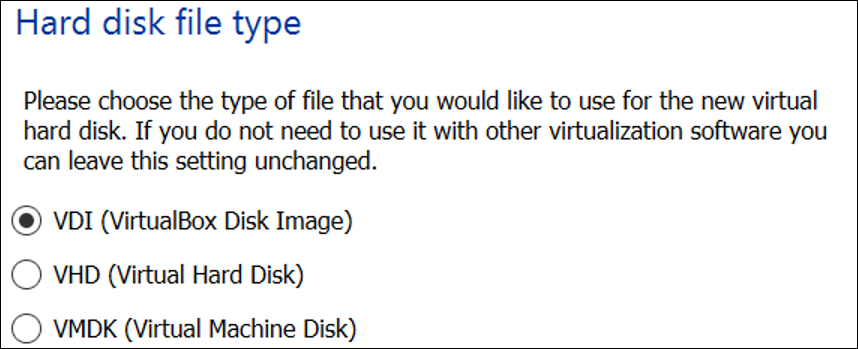
You have to select the type of hard disk that you install. In our case, it’s an ISO image file. Therefore, we proceed with the first option which is “Virtual Disk Image”.
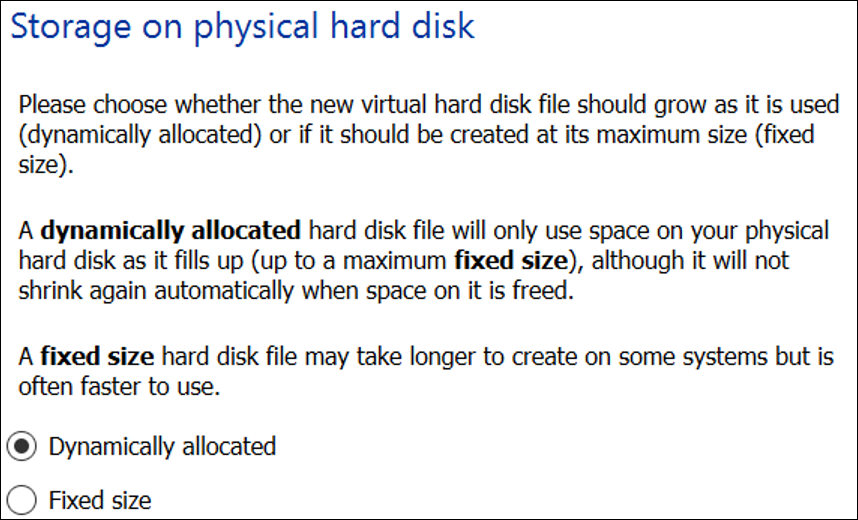
It’s time to choose whether you want to allocate the dynamic memory to your virtual hard disk or move with the fixed size. Using the “Dynamically allocated” option is recommended to avoid any inconvenience in the future.
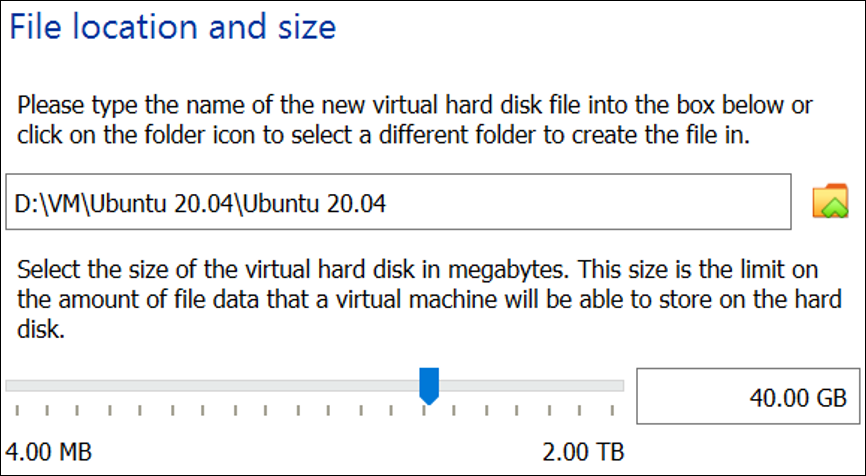
Select the location of a file to install and select the memory size; 40GB is recommended.
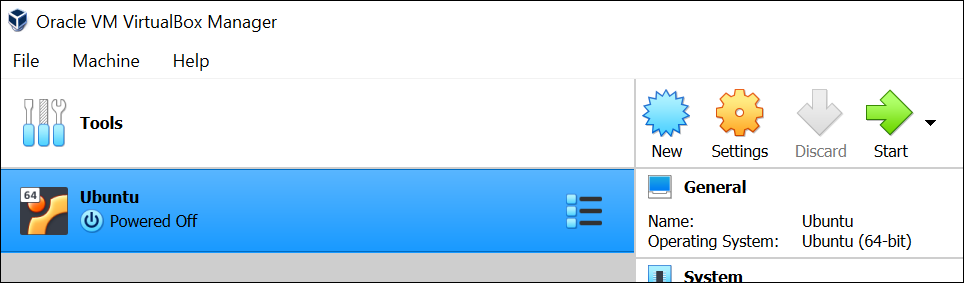
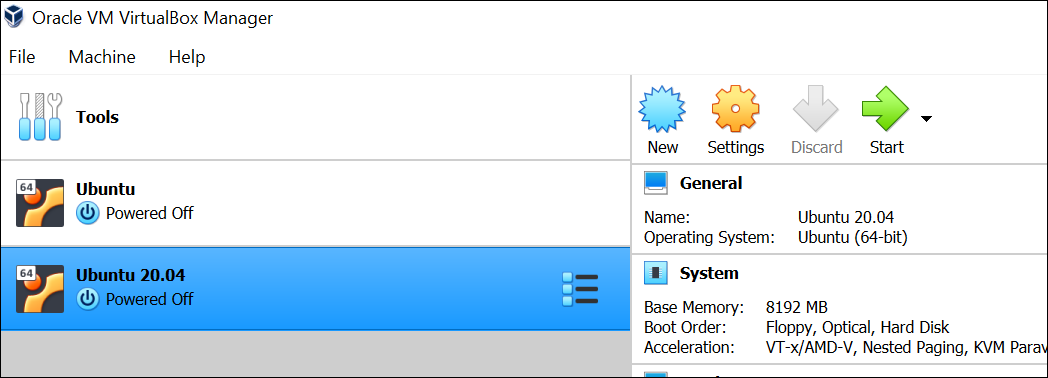
The VirtualBox is all set for the “Ubuntu” system as the right panel is displayed.
Set Up the Ubuntu Virtual Machine
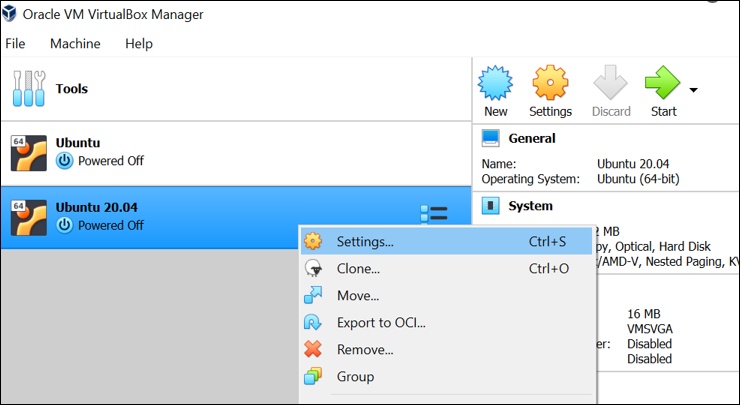
After successfully setting up the virtual box for the Ubuntu 20.04 ISO image, we also have to update some of the Ubuntu 20.04 internal settings. Select the “Settings” choice from the list by performing a right-click on the newly created virtual machine.
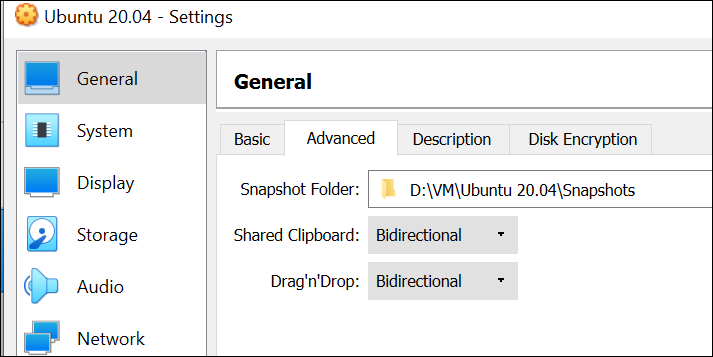
Within the “General” tab of the Ubuntu 20.04 settings window, we need to move to the “Advanced” menu. Make sure that the “Shared Clipboard” and “Drag’n’Drop” option is set to “Bidirectional” for smooth use of Ubuntu and Windows at the same time.
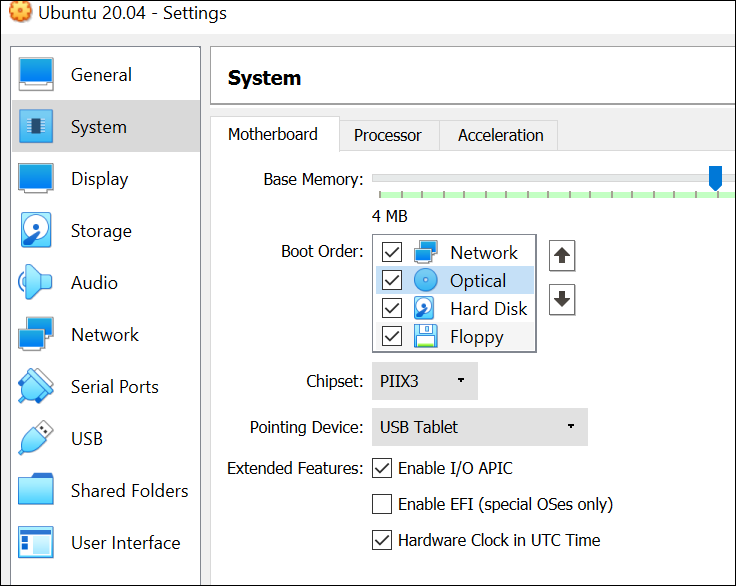
Moving toward the “System” tab of Ubuntu settings, make sure that the boot order is set according to the order as depicted in the following attached image. “Network” should be at the top, followed by “Optical”, Hard Disk, and then Floppy.
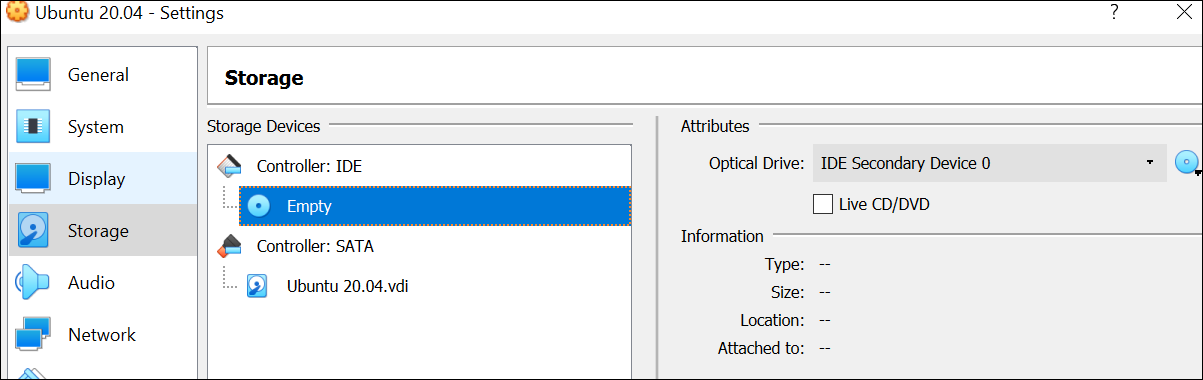
Expand the “Storage” setting of Ubuntu 20.04 and tap on the “Empty” icon that is highlighted in the following image. Now, tap on the blue Optical Disk image icon from the right panel named “Attributes” to choose the Disk Image file.
Click the “Choose/Create a Virtual Optical Disk..” option to select an ISO image.
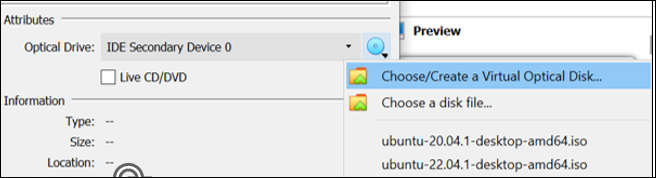
The Optical Disk Selector window will appear on your screen. Tap on the “Add” icon to add a new ISO image to the list of attachments. From the selection of images that are accessible, you can also choose the ISO image. We select the first option followed by the “Choose” button.

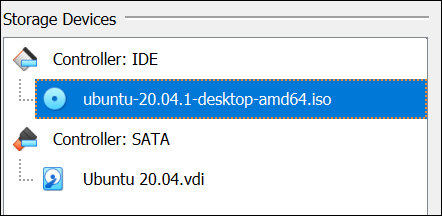
The “Storage” setting will not be empty after choosing the ISO image from a list. This time, the selected ISO image is displayed in the “Controller: IDE” section. Now, tap on the “OK” button to save the settings that are modified for the Ubuntu 20.04 Linux system.
Install Ubuntu Via VirtualBox
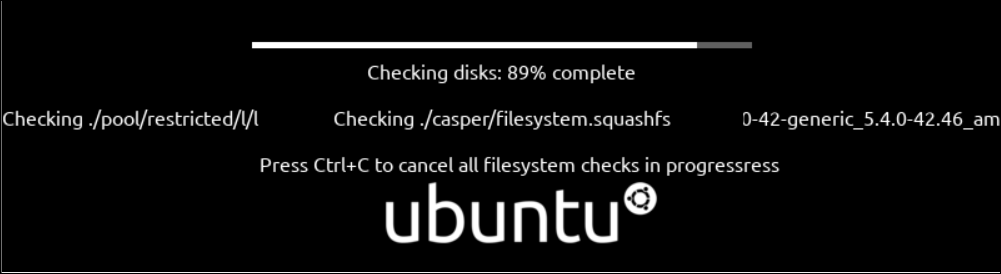
After setting up Ubuntu 20.04 successfully, select the newly set Ubuntu machine and tap on the green “Start” icon on VirtualBox to start its installation process.
The process of installation starts by checking the disks. This process takes up to 2 minutes to fully check the disk, i.e. storage, etc.
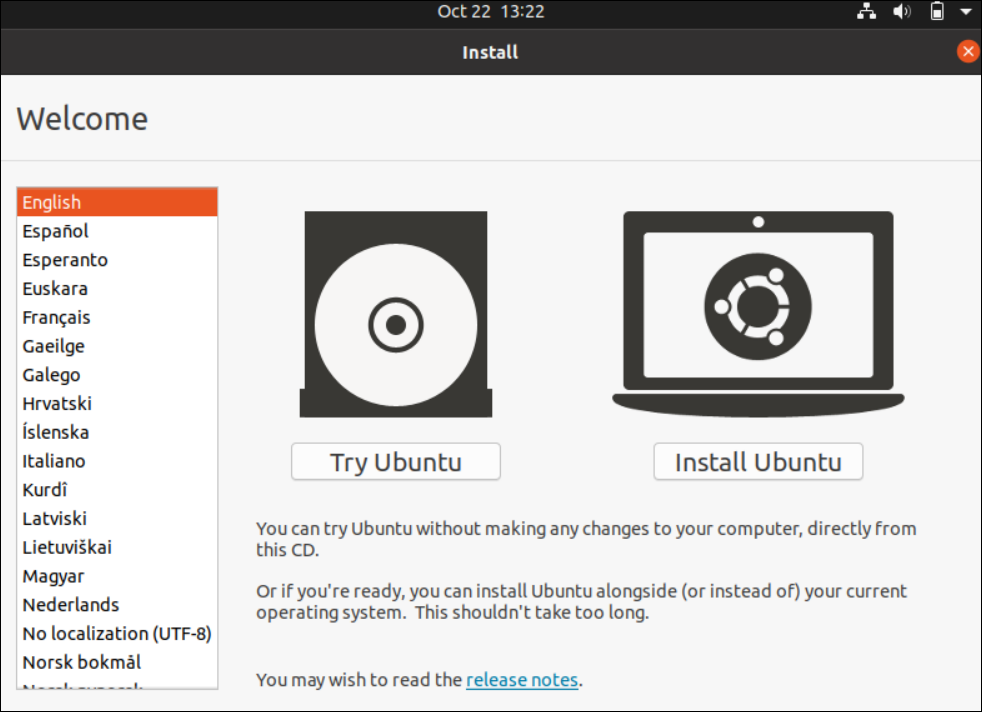
After waiting for 3-4 minutes, you will get the installation window for the Ubuntu 20.04 virtual machine. It has two options which are “Try Ubuntu” and “Install Ubuntu”. To install Ubuntu 20.04 on a VirtualBox, select the language as “English” and use the “Install Ubuntu” button to continue.
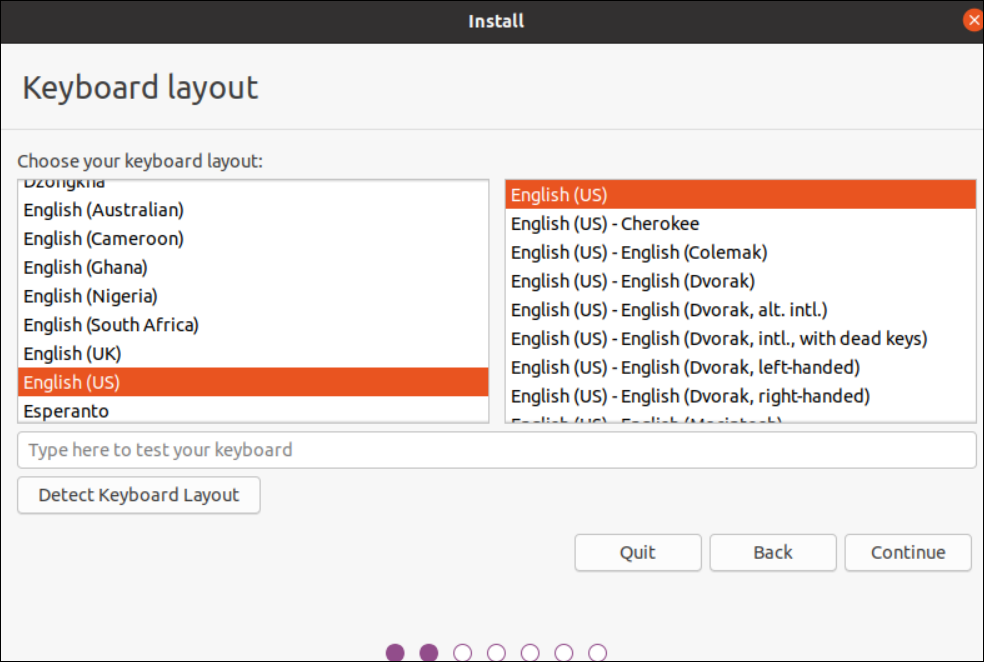
The very next screen displays the available layouts for the keyboard to be used in the Ubuntu 20.04 virtual machine. Choose according to your preference, i.e. “English”.
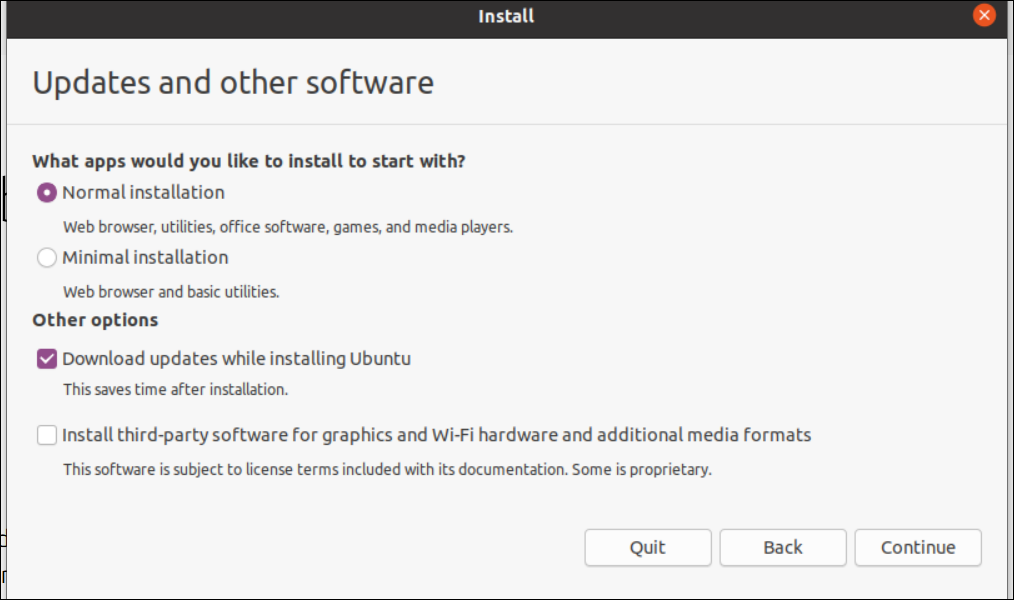
Select “Normal Installation” and the first checkbox from the displayed installation screen.
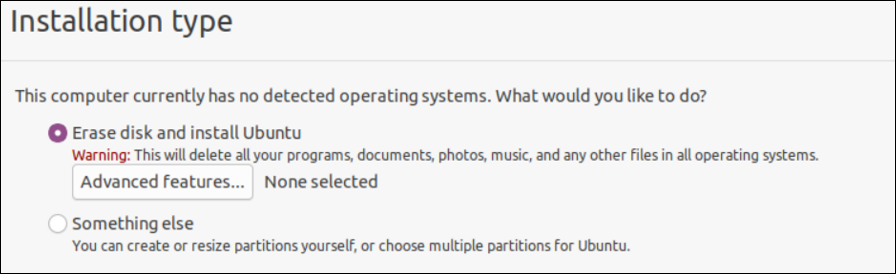
We need to keep up with the default settings which is “Erase disk and install Ubuntu”, followed by the “Install Now” button.
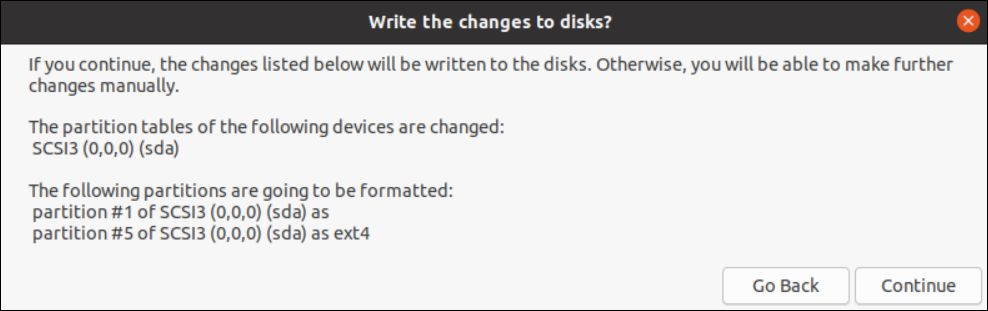
The installation process automatically creates the partitions for the Ubuntu 20.04.
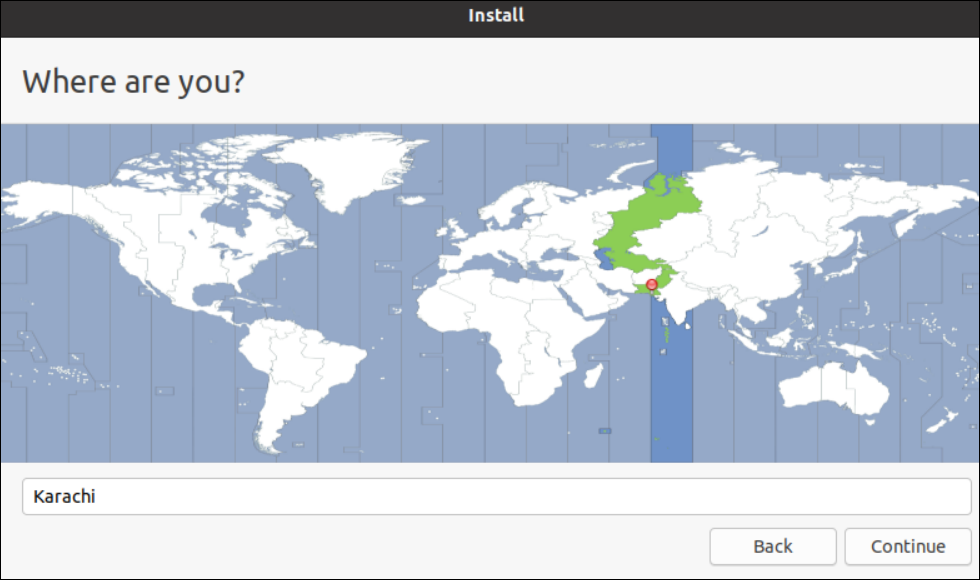
Select your current location and move forward.
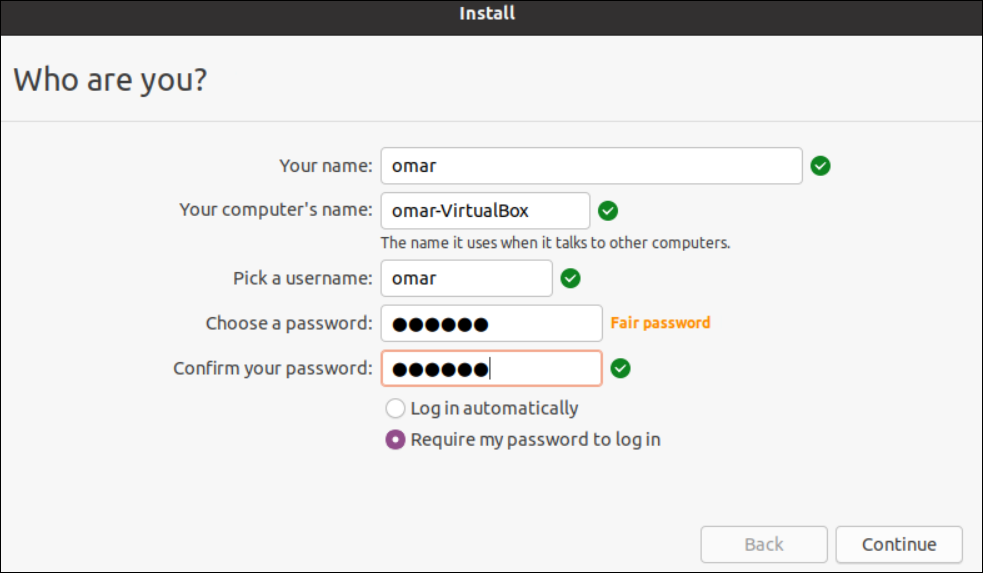
Create a root user for your Ubuntu machine by setting up its username and password.
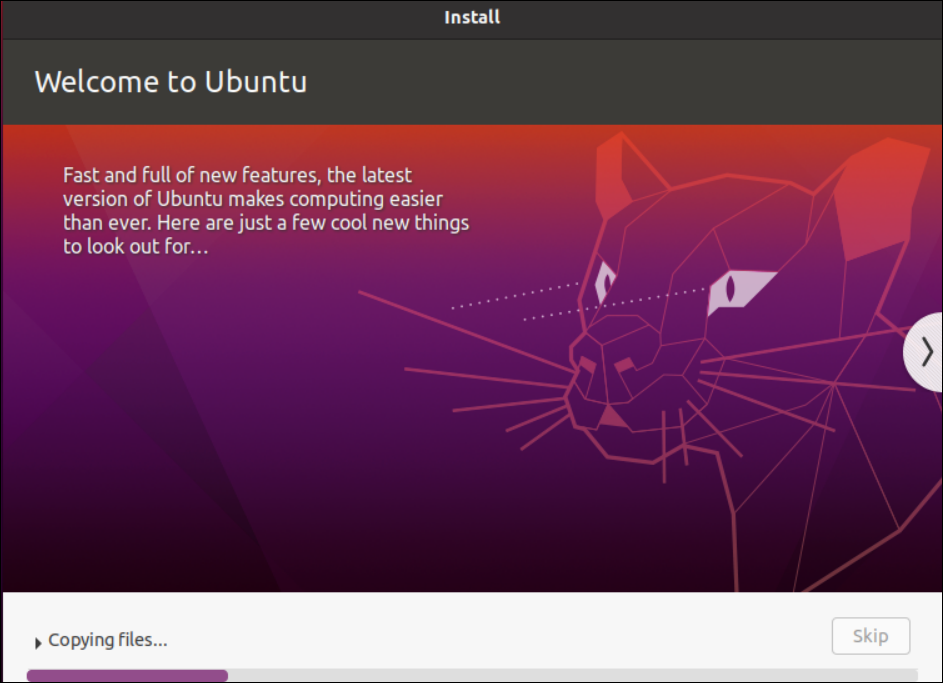
Upon tapping on the “Continue” button, the installation process of the Ubuntu system will start automatically and you need to wait for at least half an hour.
Tapping on the “Restart Now” button will prompt you to restart the computer.
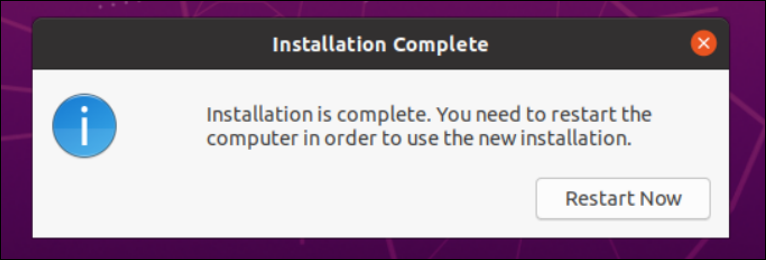
Prior to moving on to the login screen, be sure to remove the installation media.
Conclusion
This is about installing Ubuntu on VirtualBox to use the Linux and Windows operating systems side-by-side. Make sure to not miss any steps during the installation of Ubuntu 20.04 that are depicted in this guide. However, you have the ability to personalize the Ubuntu settings according to your preferences.