Vim is one of the most used and efficient tools for text editing. With all its great functionalities, Vim spell check is a very helpful feature. When editing the text files using Vim, it assists you in avoiding embarrassing spelling errors or typos.
In this article, we will discuss the utilization of the Vim spell check feature with practical step-by-step implementation on Linux Mint 21.
Enabling the Spell Check in Vim
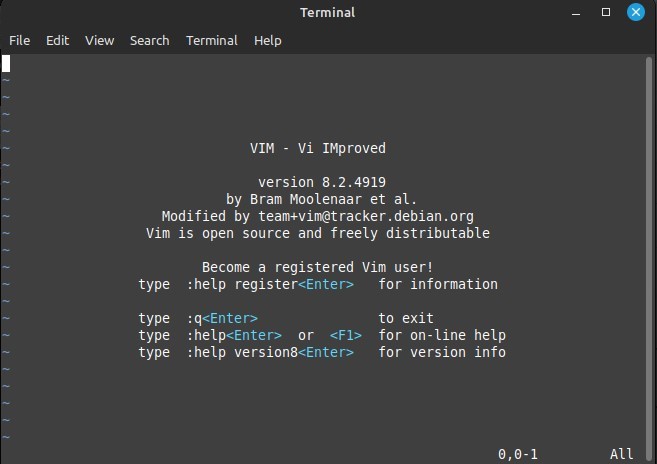
To utilize the spell-check feature of Vim, we first need to have the Vim text editor installed on our machine. In our instance, it was previously installed on our machine so we launched it.
The home screen shows us a help guide. Vim operates two main modes which are the Command mode and Insert mode. The Command mode allows a user to execute different commands which are related to the files whereas the Insert mode is exercised when we want to write something. When you launch Vim, it is in Command mode by default. Whenever needed, you can shift between the modes. Change the mode to Insert mode from the Command mode by simply hitting the “i” key, and then hitting “Esc” to return to the Command mode.
To enable the spell check feature in Vim, the operating mode has to be in Command mode. Now, write the following command:
The “spell” option specifies if the spell-checking feature is enabled on Vim or not. The “:set spell” command turns it on. We have another command which is “:setlocal spell” which also enables the spell checker but for a particular buffer only. Whereas, if we want the spell checker to be always enabled, the “:set spell” command is used.

Hit enter and the spell-check feature is enabled on the Vim text editor.
Also, Vim allows us to set the language to check the spelling. The “spelllang” option determines which spell file does Vim looks for to check the spelling mistakes in a document. Write the following command:
This helps you in checking the spelling for a particular language region. For example, in the previous command, the spell check language is specified as the US (United States) region.
Utilizing the Vim Spell Check
To implement the spell-check feature, we add some text in Vim. If you remember, we are in Command mode since we enabled the spell-check feature in Vim. As we know, whenever we need to add a text into Vim, the mode of operation shall be switched to “Insert mode”. Simply hit the “i” key and we will be in the Insert mode.
Since we are currently in Insert mode, let’s start writing some text. We intentionally add some typing mistakes to try the spell check feature of Vim to detect the misspelled words from the specified text.
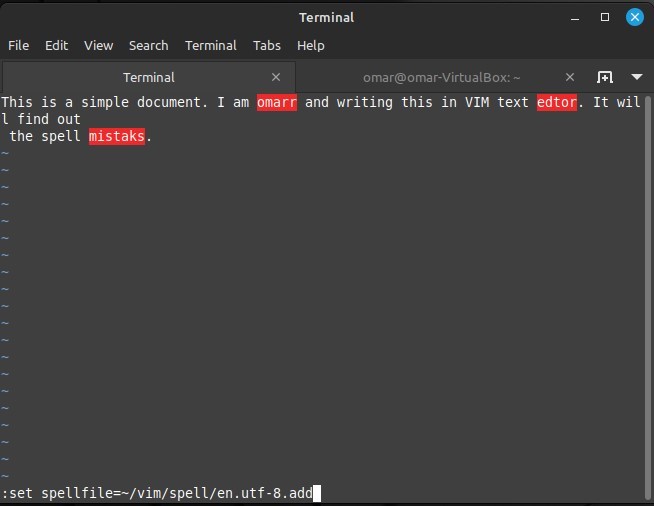
The text that we add is “This is a simple documnet. I am writing this in VIM text edtor. It will find out the wrongly spelled wrds.”
Now, this text surely has misspelled words. The Vim spell check feature highlights the words that are incorrectly spelled.

The previous snapshot shows us that Vim highlights the words “documnet”, “edtor”, and “wrds” in red color because they are misspelled.
Correcting the Misspelled Words
Vim found the mistakes in the text. The following step is to correct them one by one. We first switch the mode from Insert to Command by pressing the “Esc” key.
Vim needs us to use some commands to navigate through the incorrectly spelled text. To make a forward search for the misspelled word or the word next to the cursor, we hit the “]” with the “s” letter. This leads you to the next incorrect word. To move backward to the misspelled word, the key is “[s”. Every time you hit this key, it takes you to the wrong word before the cursor. Also, “[S” does the backward search.
Now that we learned to reach out to a particular misspelled word, it’s time to correct the mistakes.
Once you find the misspelled word, press “z” with “=” to see all the suggestions for that specific word correction.
We choose the first misspelled word which is “documnet” and press the “z=” key to see the suggestion list for this word.
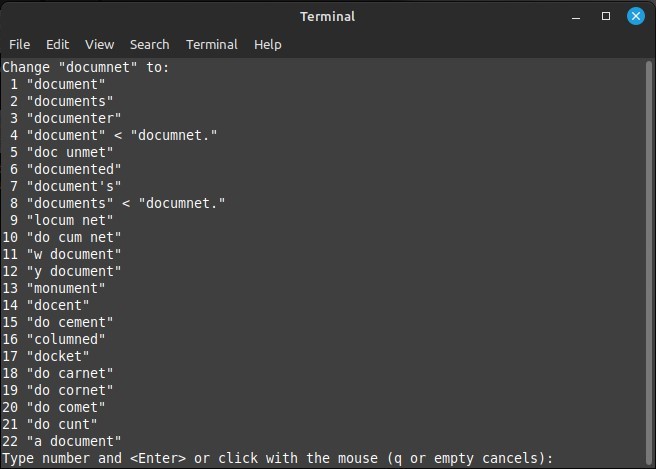
Here, we get the list of all the suggested words that can be replaced with the misspelled word, “document”. We need to search out the correct spelled word that we want to use from this list.
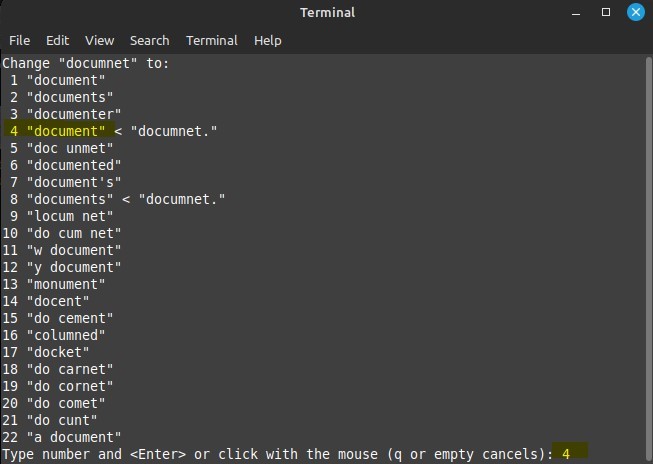
From the provided list, we found the correct spelling at number 4 which is “document”. So, we simply type the number of the correctly spelled word as “4” and hit “Enter”.

As you can see, the word “documnet” is replaced with the correct spelling of the word which is “document” by the Vim spell check feature. Following the same steps, you can correct all of the misspelled words from your file in Vim.
Adding Specific Words to the Spellfile
You might find words in a document that are not in dictionary like the name of a person. These could be handled as exceptional words. You can add these words to spellfile so Vim won’t highlight them as misspelled.
For doing this, we must have a “~/.vim/spell/” directory in our Linux system. To create the directory, run this command:
Now, write the following command on Vim to set the spellfile:
In this file, we type the “omarr” name and Vim shows it highlighted. But as we know, it is an exceptional word and not a dictionary word. So, we add it to the spellfile by hitting the “zg” command.
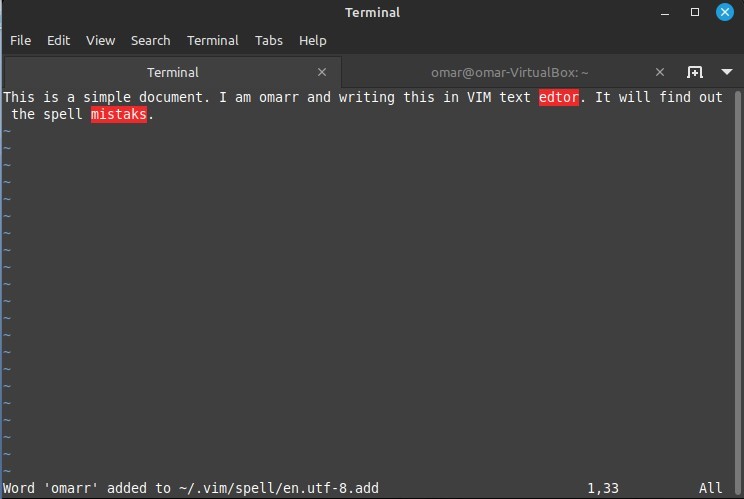
In the previous image, you can see that the name “omarr” is now added to the spellfile so Vim is not highlighting it as misspelled.
Disabling the Spell Check
Spell check can be disabled at any time by simply typing the following command on the Vim editor:
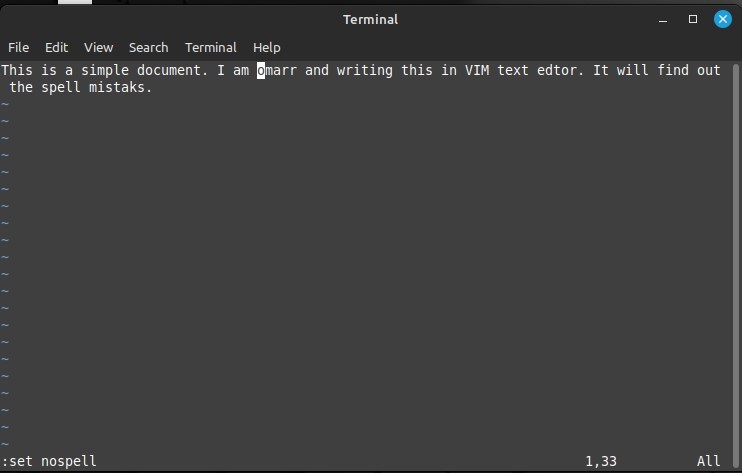
Vim immediately takes off all the highlights from the misspelled words. Now, we are back in the normal mode.
Conclusion
The Vim spell-check feature is discussed in this article. The initial section of the article discussed how to enable the Vim spell-check feature. Then, we learned the commands that allow us to navigate through the misspelled words. To get the suggestion for correction of misspelled words and their replacement is elaborated with snapshots of every step that is carried out. Lastly, we learned to disable the spell-check feature in Vim.