
Before starting this tutorial you have to check vim editor and python are installed and working properly in your Ubuntu operating system. Run the following commands to confirm that both packages are installed.


Run the following command if vim is not installed.
Run the following command if python3 is not installed.
***Note: if the old version of python is installed before then make it confirm that python3 is working as default.
Configuring vimrc file for python
.vimrc file contains all configuration settings of vim editor. If you are running vim editor for the first time, then this file will be empty. If you used vim editor before and added any setting, then the file will contain some text. I have added some syntax highlighting settings before. So the file contains some settings. Run the following command to open .vimrc file in vim editor to add setting for a python script.
Include the following settings at the end of the file for creating a python development environment. Save and close the file by pressing ‘😡’.
let python_highlight_all = 1
" Display line numbers in each line
set number
" Display an underline where the cursor is located
set cursorline
" Add 4 spaces for each tab
set ts=4
" Highlight the matching part of the brackets, (), {} and []
set showmatch
" It is used to control the number of tabs that will be used by vim when tab
key will pressed
set softtabstop=4
"It is used to control the number of columns when left or right shift is pressed
set shiftwidth=8
"It is used for automatic text wrapping
set textwidth=79
"It is used to convert all new tab character into space
set expandtab
"It is used for adding automatic indention in vim
set autoindent
"It is used to inform vim about the file format and how to read the file
set fileformat=unix
Check the effect of the settings
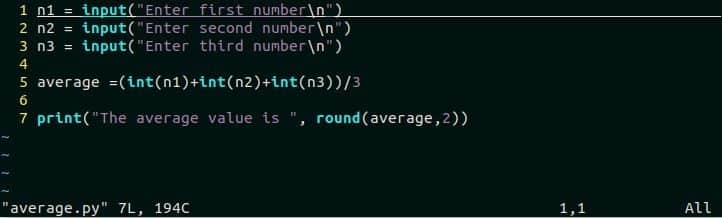
Open any python script in vim editor and check the effect of the new settings. Here, average.py file is opened on vim editor. The content of the file is given below.
average.py
n2 = input("Enter second number\n")
n3 = input("Enter third number\n")
average =(int(n1)+int(n2)+int(n3))/3
print("The average value is ", round(average,2))
The effects of the settings will be shown after opening the file in vim editor. The line number is added in each line of the file for number setting. Underline is added where the cursor is located for cursorline setting.
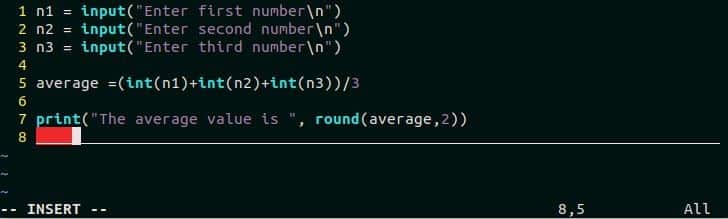
When the tab key is pressed then 4 spaces will be added for ts setting like the following image.
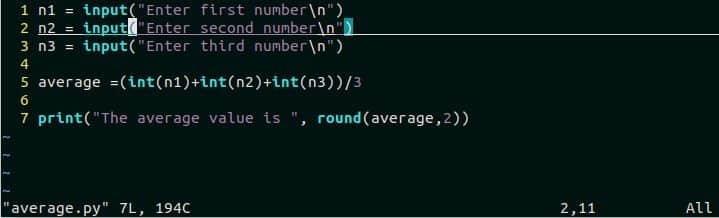
When the cursor is set at the position of any starting bracket then it will highlight both starting and ending brackets for showmatch setting.
Using auto-complete feature
vim editor has built-in auto-complete feature. This feature works after entering in INSERT mode. Ctrl+n is used to open the drop-down list and the user can select any word from the list to enter as the next word. Ctrl+p is used to select the last word from the list. Some uses of the auto-complete feature of vim are shown in the next part of the tutorial.
Open any new or existing python file in vim editor to test the auto-complete feature. Here, average.py file is opened in vim editor. Press i to enter in the insert mode and move the cursor where you want to add the code. Press Ctrl+n to open auto-complete list. It will display the list of all declared variable and function names.
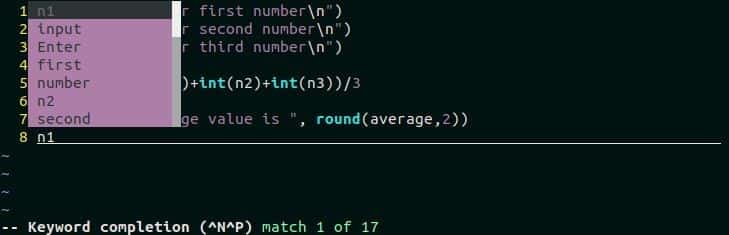
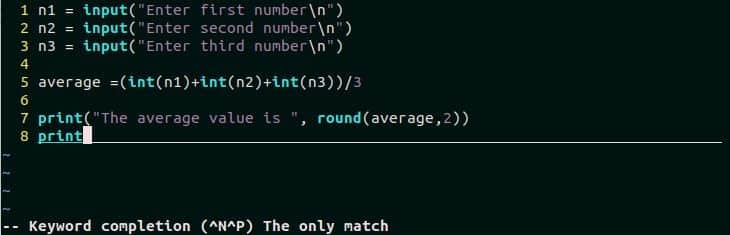
To select any particular variable or function, type the first character of the variable or function name and press Ctrl+n to open the auto-complete list. If Ctrl+n is pressed after typing ‘p’ then ‘print‘ function will be auto-selected like the following image.
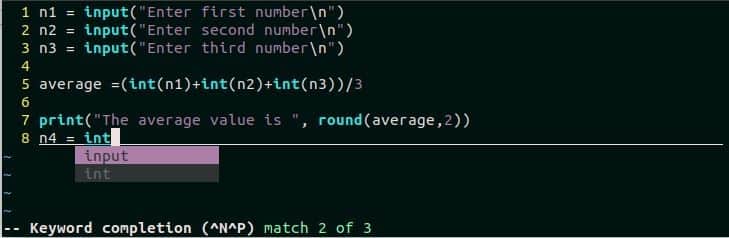
The following image shows the use of Ctrl+p command of vim . Enable the insert mode, type the character ‘i’ and press Ctrl+n to display the auto-complete list. Press Ctrl+p to select the last item from the list. Here, int is selected.
The main limitation of the built-in auto-complete feature of vim is that it has limited options for doing auto-complete tasks. If you want to do auto-complete tasks more efficiently then it is better to use an auto-complete plugin of vim editor. The names of some auto-complete plugins are jedi-vim, youcompleteme, pythoncomplete etc.
Conclusion
The coder needs less time and effort if any good editor is used for writing the code. Vim editor is one of the popular editors for writing python script. This editor has many useful features that help the coder to write or edit python code more efficiently. If you want to use vim editor for python programming or want to create a python development environment in vim then this tutorial will help you to do that task.