This post will explain the “Wait-Process” cmdlet in-depth.
How to Use the Wait-Process (Microsoft.PowerShell.Management) Cmdlet in PowerShell?
To wait for a process in PowerShell, first, specify the “Wait-Process” cmdlet. Then, use the process by its name or ID. After that, mention the “-Timeout” parameter to specify the time to wait for a process. The “Wait-Process” cmdlet is only supported on PowerShell version 7.3.
To learn further about the stated cmdlet, overview the below-given examples.
Example 1: Use the Wait-Process Cmdlet to Wait for Specified Time
Execute the below-stated command to wait for a specified period of time:
According to the above command:
- First, use the “Wait-Process” cmdlet.
- Then, place the “-Name” parameter and assign it a process.
- Lastly, use the “-Timeout” parameter and provide it a specific time:
Example 2: Use the Wait-Process Cmdlet to Wait for Two Processes
In order to wait for two processes, simply, specify the two processes separated by a comma to the “-Name” parameter:
Example 3: Use the Wait-Process Cmdlet to Wait for a Process to Stop and Then Display the Text
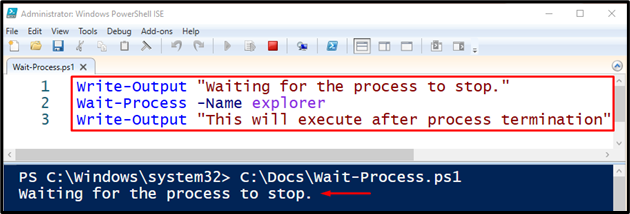
First, write a text string using the “Write-Output” cmdlet. Then, use the cmdlet “Wait-Process” and mention the process waiting to be stopped. Lastly, add a “Write-Output” cmdlet to display a text that will appear after the termination of the process:
Wait-Process -Name explorer
Write-Output "This will execute after process termination"
We have provided a brief explanation of the “Wait-Process” cmdlet in PowerShell.
Conclusion
PowerShell’s “Wait-Process” cmdlet is used to wait for a process to be stopped before more inputs. A process is specified to the stated cmdlet by using its name or ID. Moreover, this cmdlet only works on local computers. This tutorial has explained PowerShell’s “Wait-Process” cmdlet.


