Vim Modeline
Vim modeline is a set of commands that is added at the top or end of the file to make file-specific changes. For example, to enable the Vim line numbering, include the following line:
This line, known as a modeline, should start with vim: followed by space-separated settings. Ensure the modeline option is enabled in Vim for this to work.
Similarly, if you are a programmer and using the Vim editor for coding that requires specific indentation spaces, then you can set these settings in the file without messing up the other files.
Modeline Forms in Vim
Two main forms can be used to set modelines in Vim:
Form 1:
Here, the can be replaced with any text or symbol, and conventionally hash (#) symbol is used.
For example:
Or:
Note that you need to add the colon (:) if you use the set command in the modeline.
Form 2:
In the above form again the can be any text of symbols and traditionally the slash star (/* */) is used.
For example:
You can also set empty but ensure there is at least one space before the vim. While the space after the vim is optional.
The following modelines will work:
| # vim: set cursorline: |
| . vim: cursorline |
| \ vim: cursorline |
| ~ vim:cursorline |
| vim: cursorline |
| vim:cursorline |
| /* vim: set cursorline: */ |
| // vim: set cursorline: // |
As you can see, you can put modelines in different ways in a Vim document.
Check Modeline Status in Vim
To use the Vim modeline first it has to be enabled. To check the modeline status, use:
The modeline is disabled if you receive a 0 value.
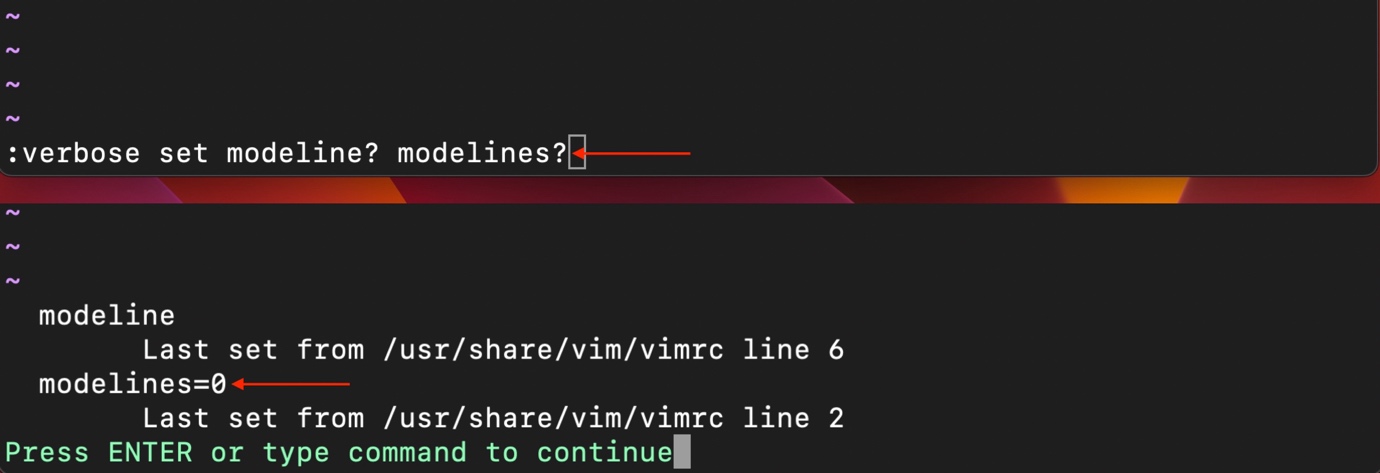
Alternatively, use the following command to check the modeline status in Vim.
If you receive modelines=0, then the Vim modeline is disabled.
Enable Modeline in Vim
The modeline option can be enabled by opening the vimrc file and setting the modeline and modelines to an integer value.
set modelines=4
The modelines=4 means the first or last 4 lines of the file can be used to insert the modelines. This value is capable of being set to any numerical value.
Save the vimrc file by pressing the shift+zz keys or typing the :wq command. Let’s verify whether the modelines have been set or not:
Here you go, the modeline is enabled, and 4 lines have been assigned to insert them.
Use Modeline Option in Vim
To use the modeline option in Vim, add a comment at the top or bottom of your file with the desired settings.
In the previous section, we have set the first or last 4 lines of the document to be used for modelines.
Let’s set a modeline with the cursorline enabled and textwidth to 80 characters for our current document.
The same modeline can also be set in the following way:
Or use the following approach to set the modeline.
Let’s create another modeline to enable the mouse option for the current file only.
Mouse functionality is quite useful, especially if you are dealing with multiple windows.
To create a modeline with custom tab space, use ts command with a value that signifies the tab spaces. For example, to set the tab spaces to 2 instead of 5, use:
Moreover, you can set multiple options in the same modeline; for example:
Note: It is necessary to close and re-open the file to use the modeline function.
Why Vim Modeline Feature is Restricted
The Vim modeline feature is very restricted. You can’t use modeline to map keys or set a custom function because hackers have used this feature to inject commands that compromise security. Fortunately, this issue has been resolved, thanks to the many restrictions contained in the most recent updates.
Conclusion
The modeline is one of the useful features that Vim offers to make file-specific changes. The modeline option in Vim requires initial activation, as it is disabled by default in many Linux distributions. To enable it, use :set modeline, and to enable the number of modelines use :set modelines=[value]. Two different forms or syntaxes are used to set the modeline in Vim. There were certain security concerns about modeline functionality in Vim, however, these have been rectified in the most recent versions of the software.


