
Assume you are working on GitHub project with other developers. It is difficult to check and test everyone’s contribution to the project manually, especially when you have a lot of contributors to a project. That’s where GitHub actions come in handy.
GitHub actions are the CI/CD (Continuous Integration/Continuous Delivery) pipeline that permits you to automate the project by creating workflows. Keeping it concise, workflows comprise jobs and are triggered by specific events like pull/push requests.
In this guide, we will provide the usage of the GitHub actions for various tasks.
How to Use GitHub Actions for Various Tasks?
There are various workflows in GitHub actions that can be used or you can create your own manually. Workflows are created with an extension of the “.yml” file and stored in the “.github/workflow/<file>” directory within the main project. Let’s break down the usage of GitHub actions practically in the below-given steps.
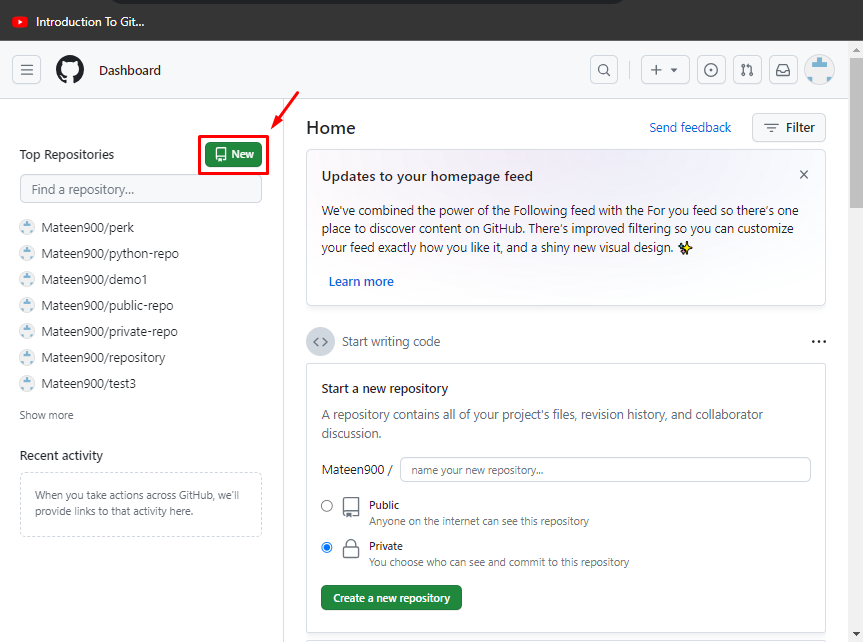
Step 1: Create New Repository
First, open the GitHub platform and create a new repository by pressing the “New” button. You can skip this step if you want to work on the existing repository:
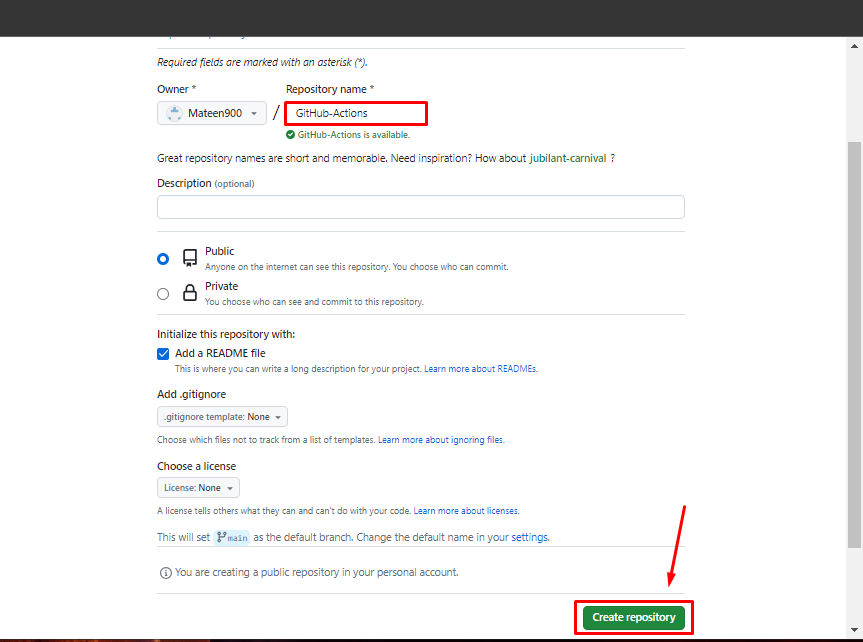
Specify the name of the repository and hit the “Create Repository” button. For instance, we are creating the repository with the name “GitHub Actions”:
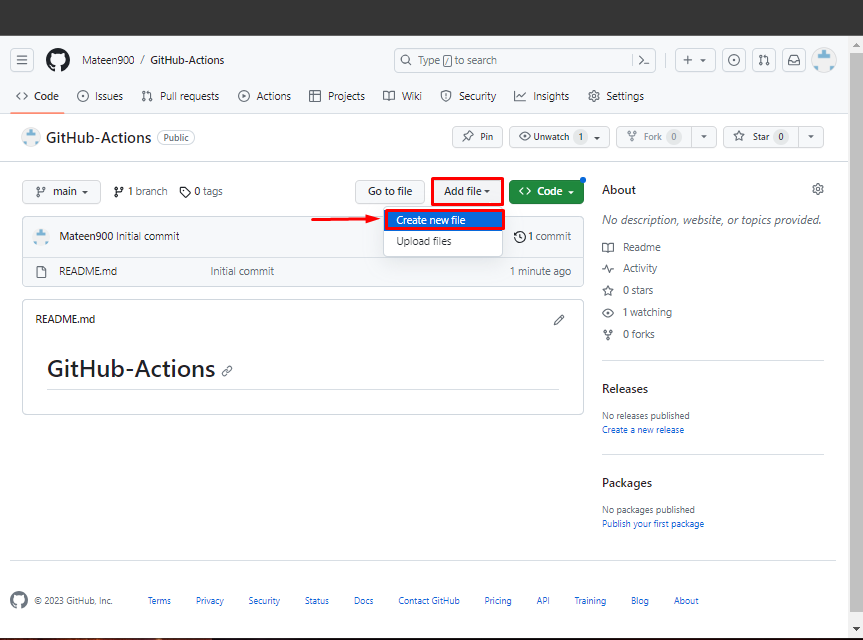
Step 2: Create a “.yml” File and Add Workflow Path
Afterward, create the new file with the “.yml” extension for creating the workflow. Then, click on “Add file” and hit the “Create new file” option:
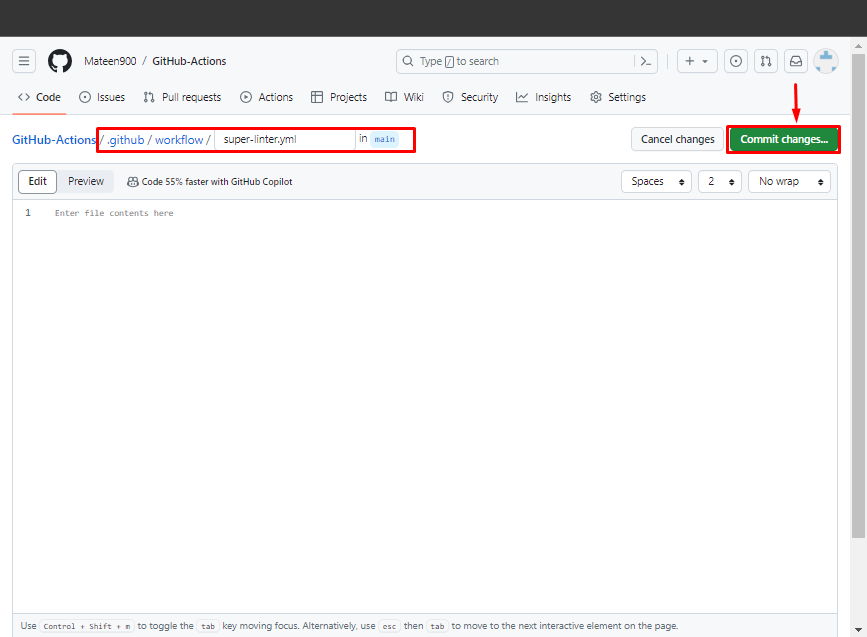
As we mentioned earlier, the workflow file should be created in the “.github/workflow/” directory. To specify this path for creating the “.yml” file and hit the “Commit changes…” button. In our case, the file name will be “super-linter.yml” as we will configure this workflow in the project:
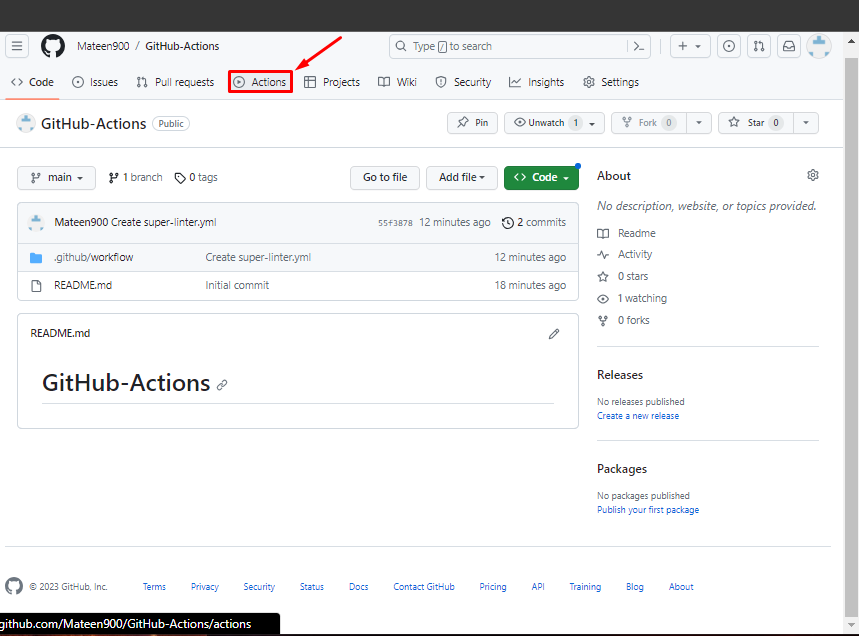
Step 3: Go to Actions
Once the workflow directory is created, navigate to the “Actions” tab:
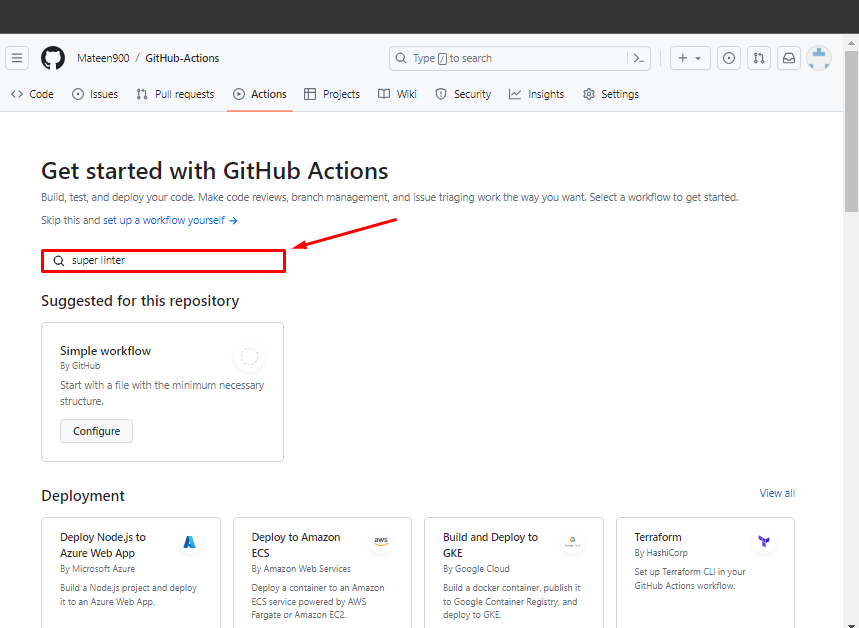
Step 4: Search and Select Action
After that, search for the particular GitHub actions and select it. As we discussed earlier, we will configure the “super-linter” workflow. It is the workflow that is considered for checking the error in the project code. So, search for “super linter” in the given field:
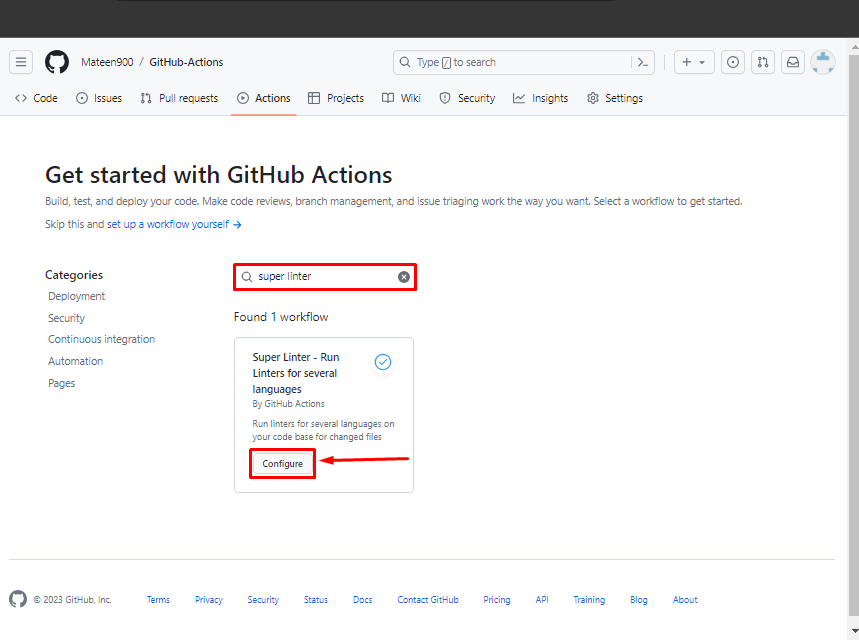
Select and configure the super linter workflow by pressing the “Configure” option:
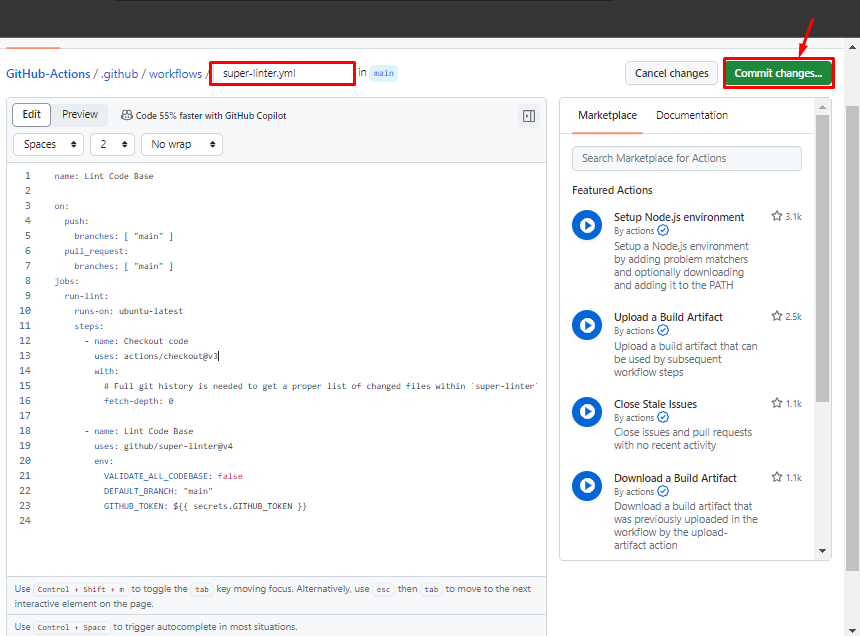
Step 5: Commit Changes
Upon doing so, it will automatically detect the created workflow file and put the workflow code in the .yml file. This GitHub action code is executed whenever the push/pull request is called in the ”main” branch of the repository.
For an understating of code, the “name” attribute is the name of the GitHub actions, “on” specifies the events (pull/push requests) and the “jobs” contain the actions to be performed on the code. Lastly, commit the changes to continue:
Step 6: Create and Push the Project File
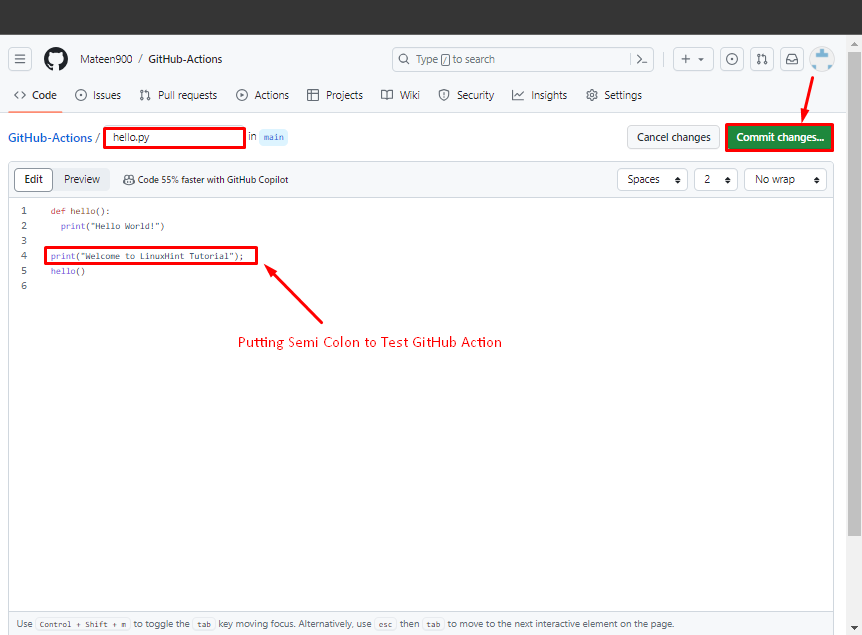
Let’s create and push the project file in the repository to test this workflow and because this workflow checks the errors in the code, we’ll define some errors inside our file. For instance, we are creating the Python file that prints some messages and we have add the extra semicolon for the error recognition:
Step 7: Open the Project File in the Workflow
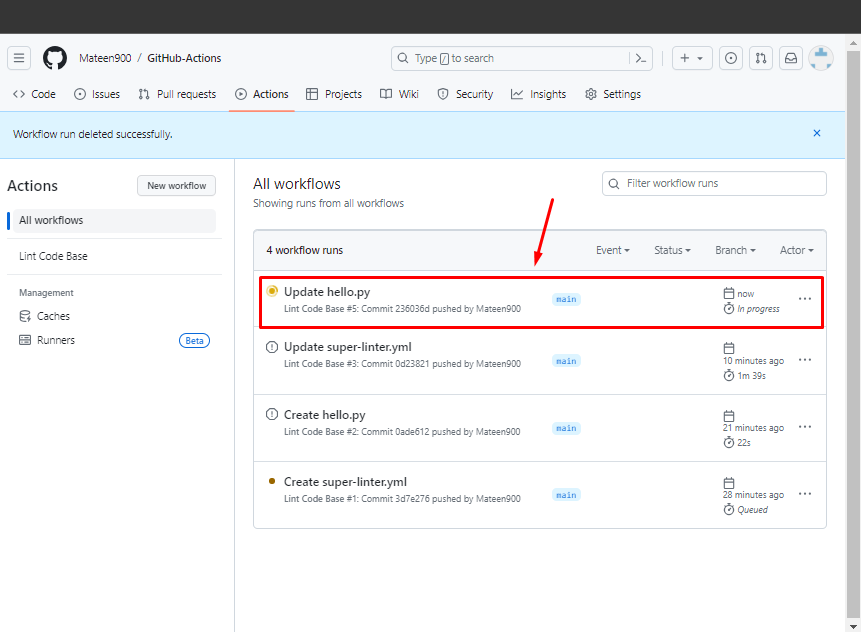
After pushing the project file, go to the “Actions” tab and it will be exist in the workflow. Click on this file and open it:
Step 8: Run GitHub Action
Once opened, you will see the workflow file and hit the “run-lint” option to run it:
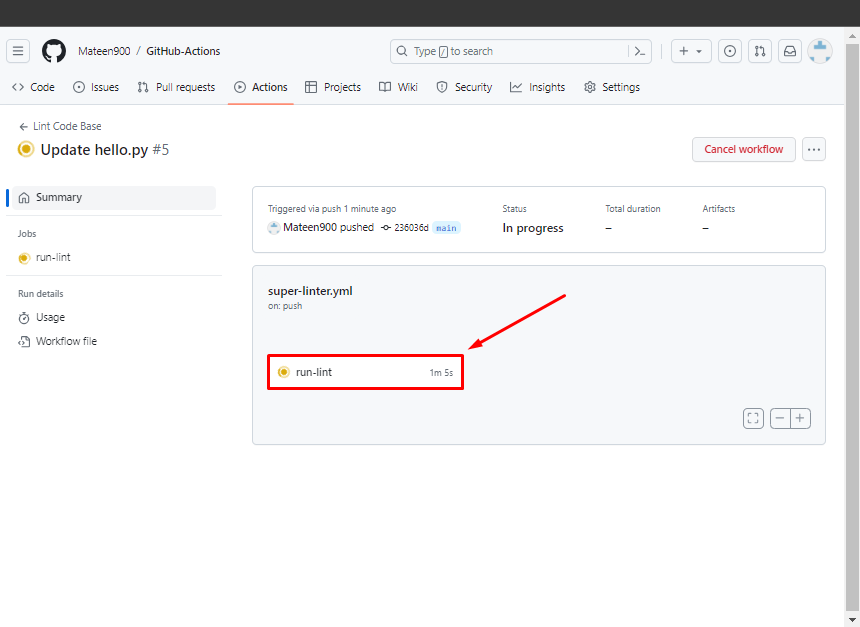
Running the workflow file will take some time to test, so wait for a while to see the results:
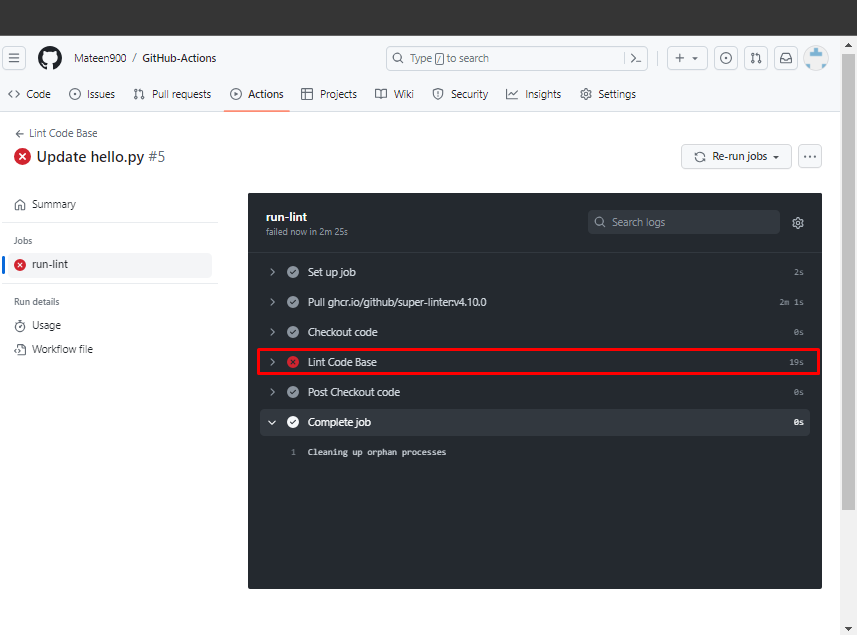
Step 9: Check Results
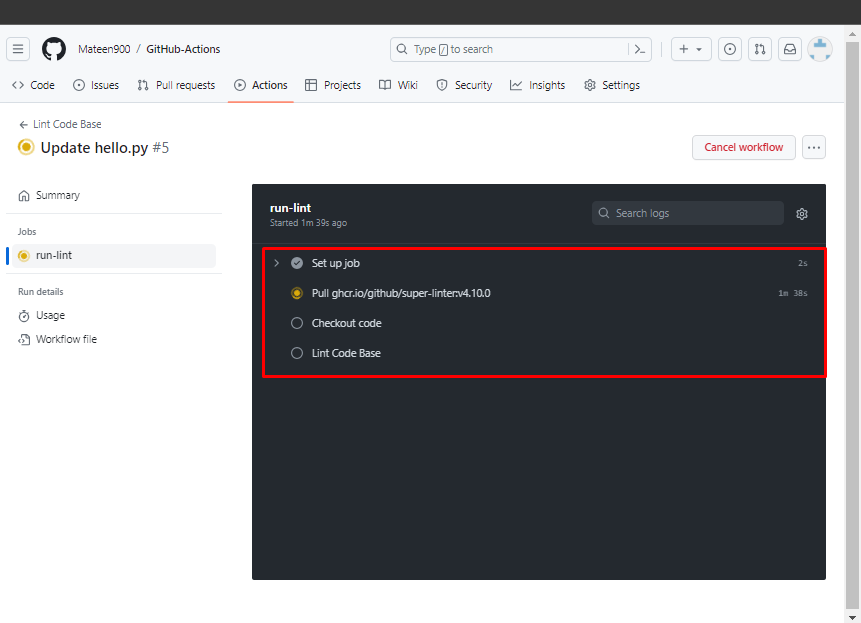
As you can see there’s a cross sign on the file means that the pushed file contains some error in the code:
This is how you can configure the GitHub actions workflow in your projects.
Conclusion
To use GitHub actions in GitHub, create a new repository or open the existing one. Afterward, create the “.yml” file in the “.github/workflow/” directory manually in the main project. Then, go to the “Actions” tab and select and configure the particular GitHub actions workflow. This guide has practically performed the instructions to use GitHub actions for various tasks.