This blog post will demonstrate:
What is “git lfs clone”?
The “git lfs clone” is a command utilized for cloning a Git repository that uses Git Large File Storage (LFS). Git LFS is an extension to Git that enables the versioning and management of large files, such as multimedia or binary files more efficiently. When a user clones the repository with the help of the “git lfs clone” command instead of a regular cloning command “git clone”, it determines that the stated directory contains files tracked by Git LFS. Git LFS replaces a large file with small pointer files. Furthermore, the actual content is stored on a separate Git LFS server.
How to Use “git lfs clone” in Git?
To use the “git lfs clone” command in Git, try out the below-mentioned instructions:
- Open GitHub on your browser.
- Navigate toward a GitHub repository.
- Copy the “HTTP” URL of the selected repository.
- Launch the Git Bash tool and move to the Git local directory.
- Utilize the “git lfs clone” command for efficient cloning.
- Navigate to the cloned repository and list all available content.
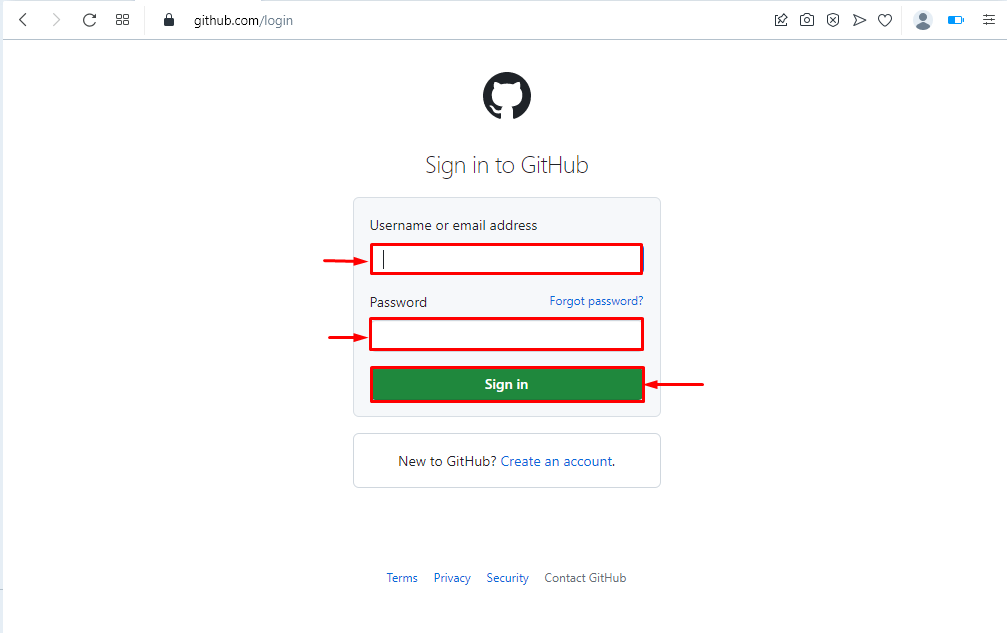
Step 1: Open GitHub Account
Open your preferred web browser and launch the GitHub account by providing the required credentials. Then, hit the “Sign in” button:
Step 2: Choose a Repository
Navigate to “Your repositories> Select a repository”. For instance, the “testrepo” repository has been selected:

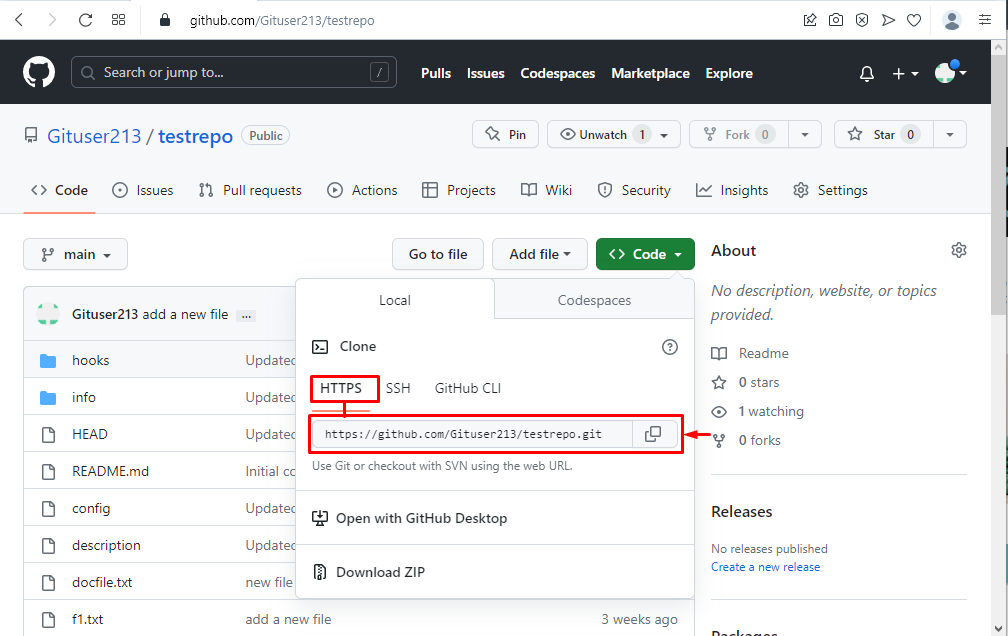
Step 3: Copy HTTPS URL
On the main page of the repository, click on the “Code” option and copy the “HTTPS” URL of the selected repository:
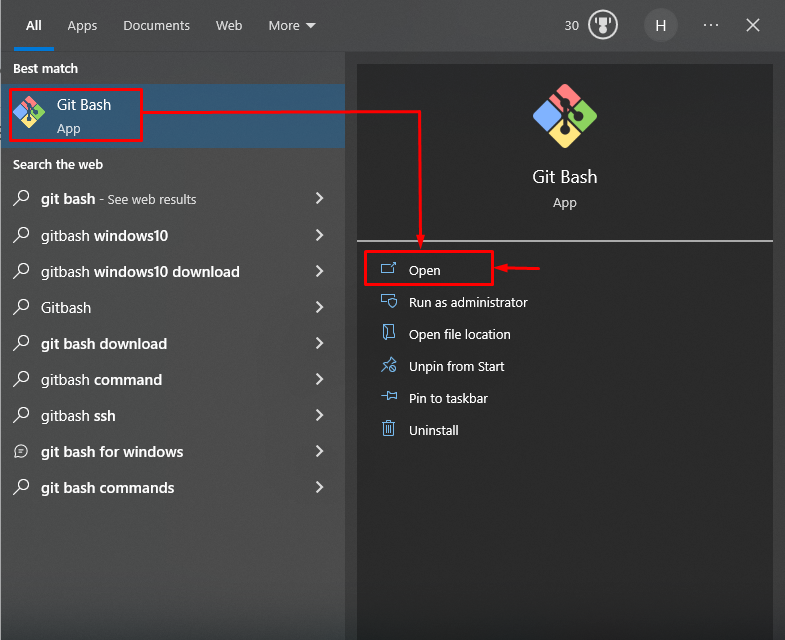
Step 4: Launch Git Bash Tool
Next, open the Git Bash tool on your system by using the “Startup” menu:
Step 5: Navigate to Git Local Directory
Execute the “cd” command along with the local Git repository path and move toward it:
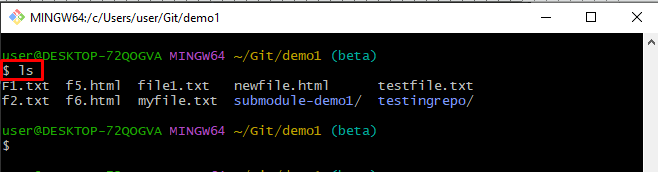
Step 6: List Content
After that, check the available content on the Git local directory by running the “ls” command:
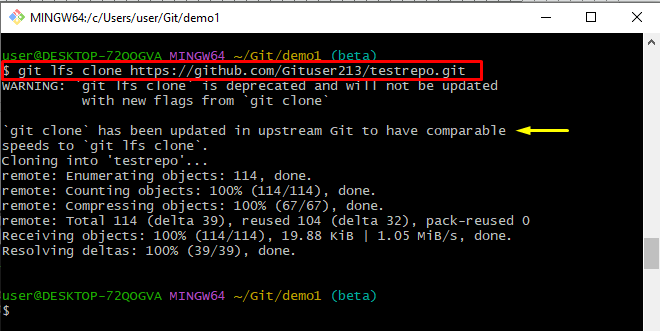
Step 7: Clone Repository
Paste the copied URL along with the “git lfs clone” command to perform cloning. It will clone all data including hidden files:
It can be noticed that the stated repository has been cloned successfully:
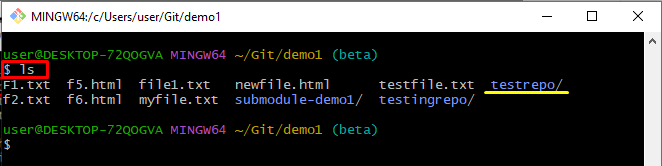
Step 8: Verify the Cloned Repository
For verification, run the “ls” command and check whether the repository has been cloned or not:
The below-stated output determines that the repository has been cloned successfully:
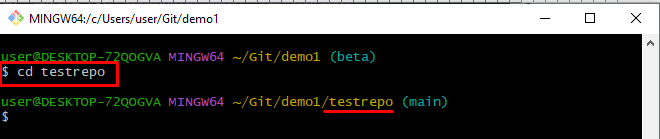
Step 9: Navigate to Cloned Repository
Execute the “cd” command along with the name of cloned repository for moving toward it:
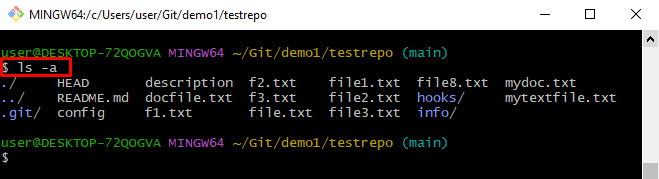
Step 10: List Available Data
List all the available content including hidden files with the help of the “ls -a” command:
The resultant image shows that all the available content has been listed successfully:
That’s all about using the “git lfs clone” command in Git.
Conclusion
To use the “git lfs clone” command in Git, first, open GitHub on your browser and copy the “HTTP” URL of the desired repository. Then, launch the Git Bash tool on your system. After that, move to the Git local directory and utilize the “git lfs clone” command for efficient cloning. Lastly, navigate to the cloned repository and list all available content. This guide illustrated the complete method for using the “git lfs clone” command in Git.