This tutorial will provide the process of using Git in PowerShell.
How to Use Git in PowerShell?
To use Git in PowerShell, check out the below-stated procedure:
- Launch Windows PowerShell from the startup menu.
- Navigate to the Git root directory.
- Initialize a new Git repository and navigate to it.
- Check status.
- Generate a file and add content.
- Track the created file and commit all changes.
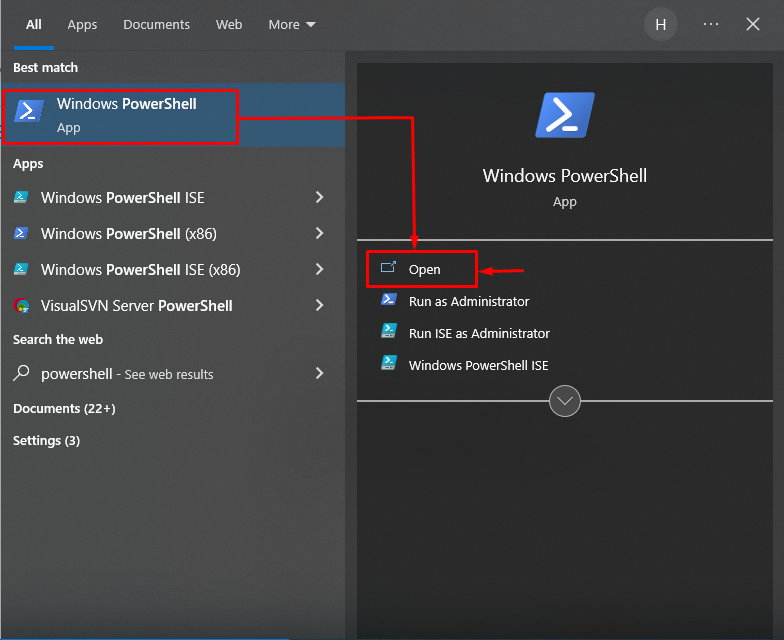
Step 1: Launch Windows PowerShell
First of all, search for “Windows PowerShell” through the startup menu and launch it:
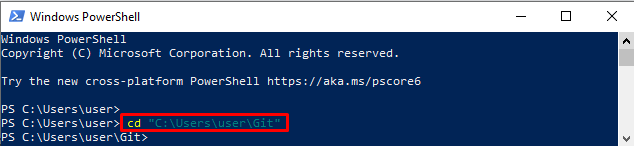
Step 2: Go Toward Git Root Directory
Provide the Git root directory path along with the “cd” command and redirect to it:
Step 3: Make a New Repository
Utilize the “git init” command for initializing a new Git repository:
The resultant image shows that an empty Git repository has been initialized successfully:

Step 4: Navigate to the Newly Created Git Repository
Move toward the newly created Git local repository using the “cd” command:

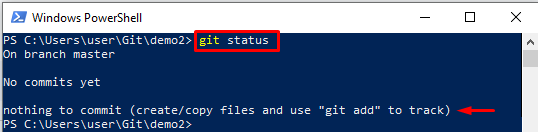
Step 5: Check Working Area
Execute the “git status” command for viewing the status of the current working repository:
The below-stated output indicates that the working area is clean and there is nothing to commit:
Step 6: Generate a File
Use the “echo” command to create and edit the file simultaneously:

Step 7: Verify the Created File
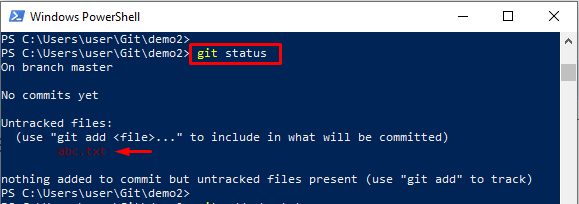
Check the Git status to ensure that whether the file has been created or not:
The given output shows that the file has been created successfully:
Step 8: Track the File
Track the created file from the working area to the staging area with the help of the “git add” command:

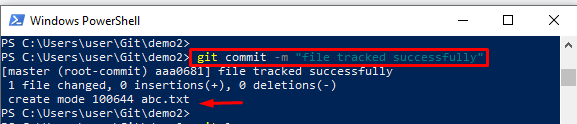
Step 9: Commit Changes
Execute the “git commit” command along with the “-m” option to commit changes:
It can be observed that all the changes have been committed successfully:
Step 10: View Git Log
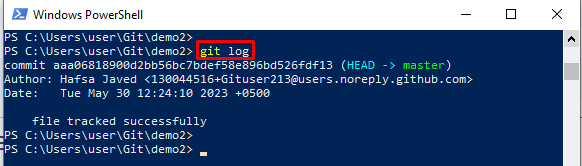
Run the “git log” command to check the complete Git log history:
As you can see, the recent commit has been saved in the Git log history:
You have learned about using Git in PowerShell.
Conclusion
To use Git in PowerShell, first, launch “Windows PowerShell” using the startup menu. Then, navigate to the Git root directory and initiate a new Git repository for moving to it. After that, generate a file and add content using the “echo” command. Next, track the created file and commit all changes. This tutorial has explained the complete method for using Git in PowerShell.