Updating your kernel is necessary when you need to add functionalities or device support, patch bugs, or increase your system performance.
After reading this article, you will be able to update your Linux kernel in a few steps.
For this tutorial, I will upgrade to kernel 5.16, but the instructions provided are helpful for other kernel versions too. Just replace the 5.16.15 version in this article for your version.
All instructions are also useful for previous Debian versions. You can ignore the fact this article was written using Debian Bullseye.
The tutorial includes screenshots for all described steps, making it easy for any Linux user to follow them.
Upgrading the Kernel in Debian 11 Bullseye:
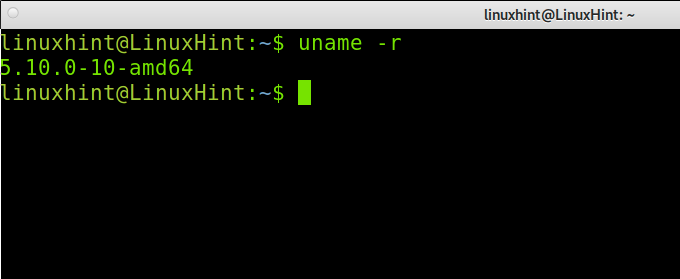
To begin, let’s see how to determine your current kernel. You can use the uname command followed by the -r parameter, as shown below:
As you can see above, the current kernel is 5.10.0. Let’s download a newer kernel.
You can check the last kernel at https://cdn.kernel.org/pub/linux/kernel/v5.x/
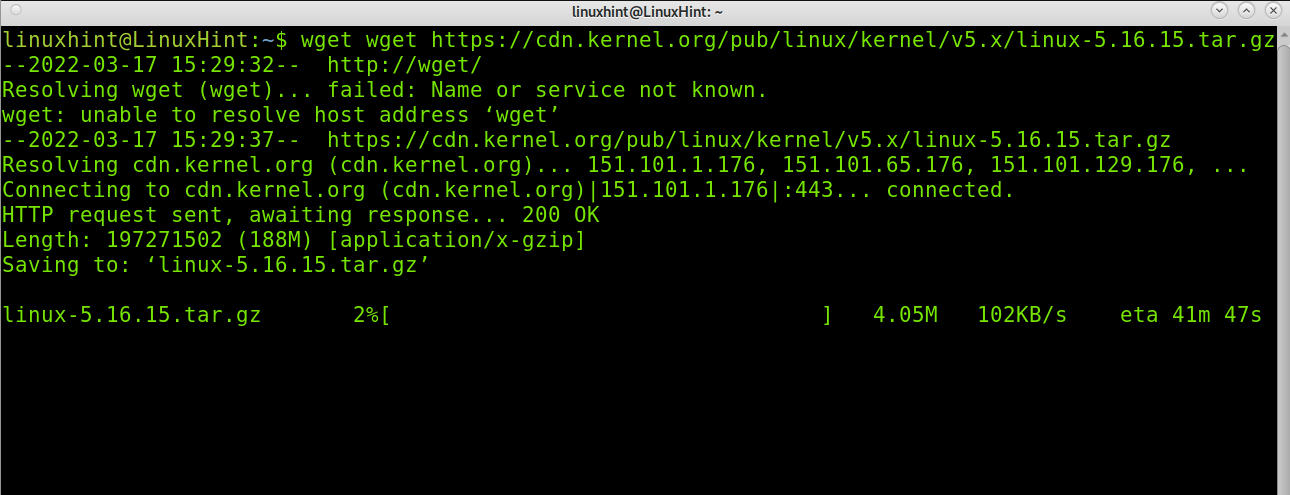
For this Debian tutorial, I will upgrade to the 5.16 kernel. To download it from the source mentioned previously, you can use the wget command as shown below:
Note: You can use this tutorial to install other kernel versions, just replace the path and kernel name.
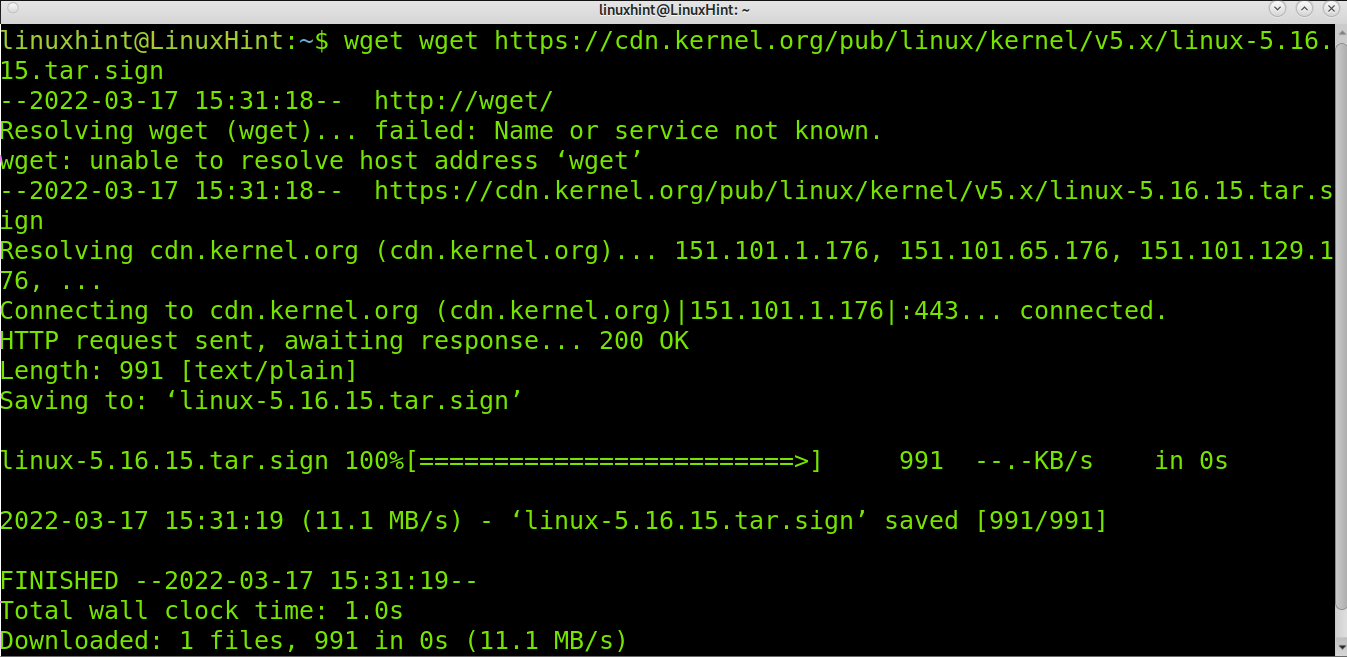
Also, download the kernel signature with the command, as shown below:
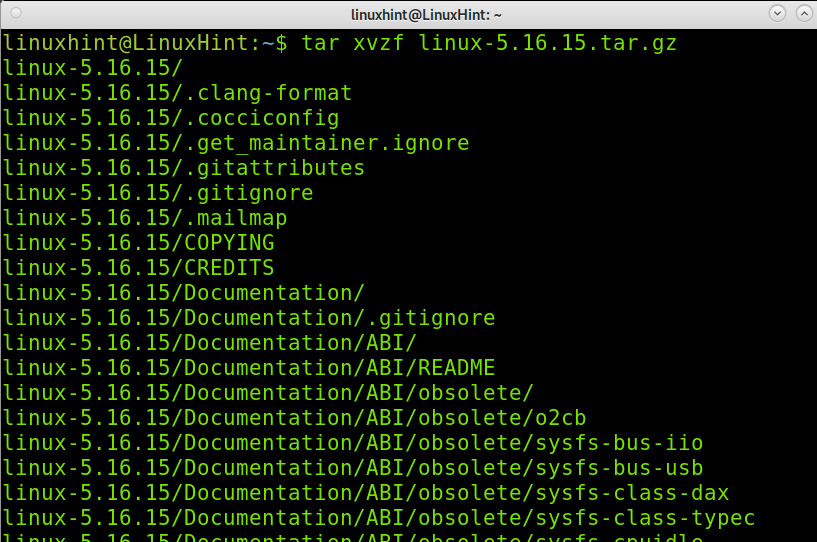
Extract the kernel you downloaded by running the following command (The command below assumes you have the .tar.gz package):
Or
Where “Version” must be replaced with the actual kernel version, you downloaded.
Enter the directory with the files you extracted by running the following command:
Update the configuration file by running the command shown in the following image:
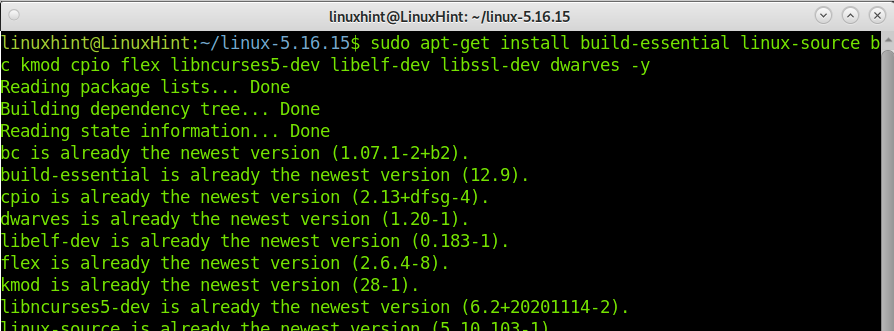
Install the needed packages to compile the Linux kernel by executing the following command:
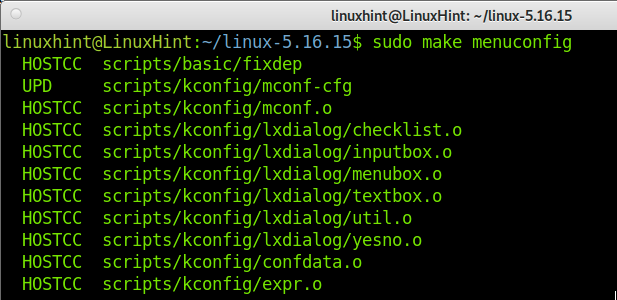
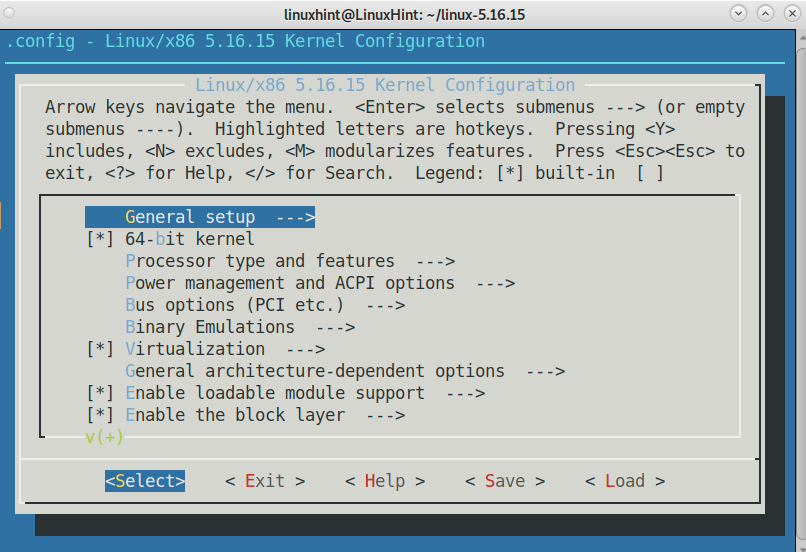
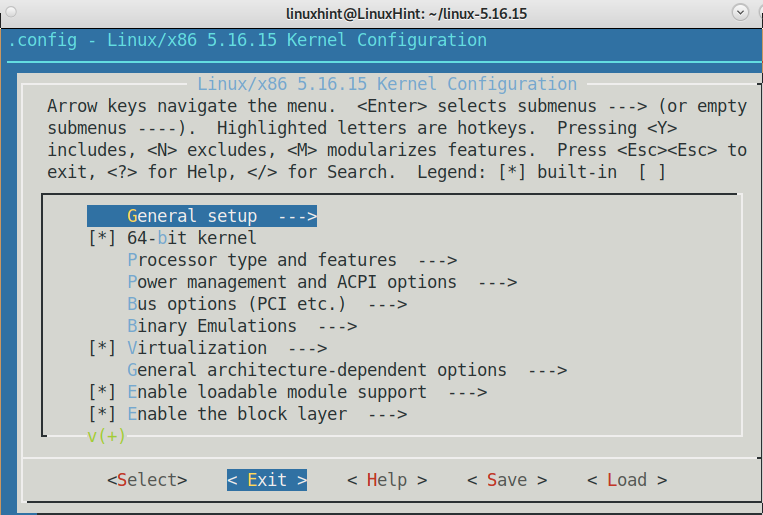
To configure the kernel and adding or removing devices support, run the following command:
You can explore all options on this screen to customize the kernel according to your needs. Once you finish, press the Save button:
Press the OK button to save the configuration file.
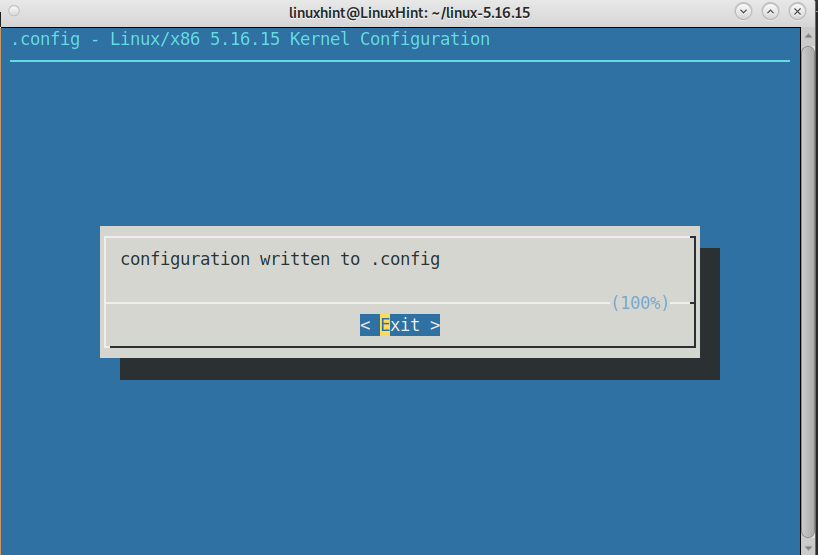
Press the Exit button to finish the process.
Press the Exit button again to return to the terminal.
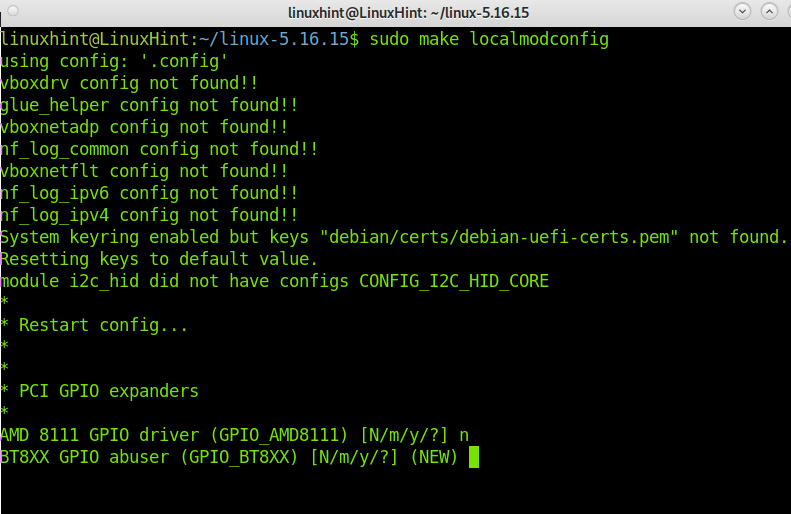
Disable unnecessary modules and create a .config file based on your kernel’s current configuration by executing the following command:
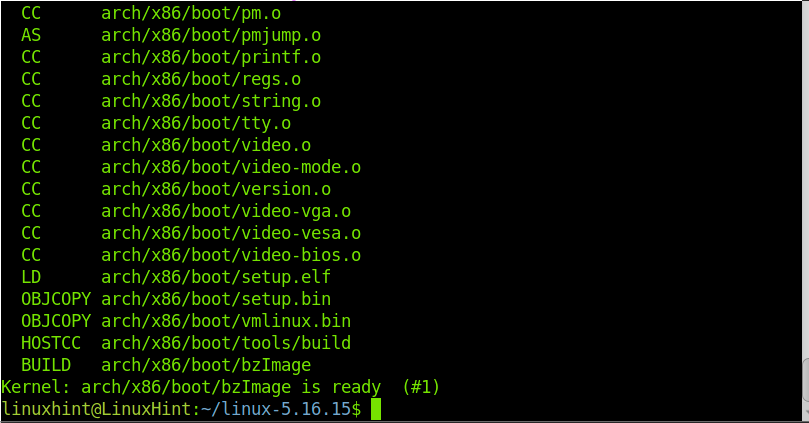
Now, start compiling the new kernel by running the command shown in the following image. This process may take several minutes.
You will get a similar output as shown below:
Install the kernel modules by running the following command:
If you used the sudo command during the process, you might be required to type your sudo password, as shown below:
Finish installing the new kernel by executing the following line:
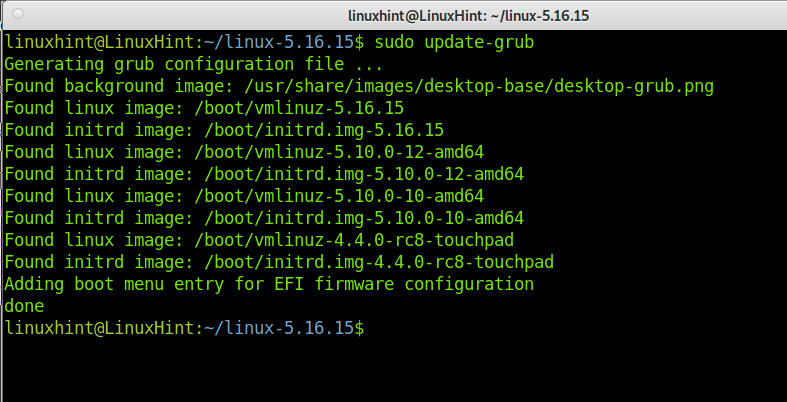
You need GRUB, a bootloader, to incorporate the new kernel to boot it.
To do it, just update GRUB by running the following command:
Now, reboot your system to load the new kernel.
After booting, recheck your kernel by running the following command:
As you can see, the kernel was successfully updated. Now, you can enjoy your upgraded system.
What Is the Linux Kernel?
The Linux kernel is the system’s core, whose main task is to allow interaction between hardware and software. It defines the processes that can pass through the CPU and the amount of available resources for each one. It also analyzes the memory and manages drivers.
You can consider part of the kernel function as a translator between different components, including abstract components like the rest of the operating system.
The Linux kernel is free and open-source, and it’s written in the C language. It was developed by Linus Torvalds. It is licensed under the GNU General Public License V2. Today, it is widely supported, and new releases are published periodically. Currently, the community behind the kernel development has over 6,000 collaborators.
Some experts argue the kernel is the operating system, while Linux is an addition.
When compiling it, you can add support for unsupported hardware, add features and patch bugs and security issues, as shown previously in the make menuconfig step. This is especially useful for systems like Debian using old kernel versions.
You can include different kernel versions in your bootloader to choose between them when booting your system.
For additional information on the Linux kernel and releases, visit https://kernel.org.
Conclusion:
As you can see, upgrading the Linux kernel in Debian 11 Bullseye is a long but easy task any Linux user can achieve. There are many steps as described above, but the process is easy by following the steps explained in this tutorial.
If you are using Debian 10 or Debian 9, you can still compile a new kernel by following the instructions above. The process is even similar for other Linux distributions except for the steps using the apt/apt-get packages manager and for systems using a different bootloader than GRUB (In such a case, you only need to replace the GRUB update for your bootloader update). After updating your kernel, you may feel the performance of your system improve the support selected in the configuration step.
Thank you for reading this article explaining how to upgrade the kernel in Debian. I hope this article was useful for you. Keep following Linux Hint for more professional Linux tutorials.

