This post will discuss about updating and committing only file permissions using Git version control.
How to Update and Commit Only a File’s Permissions Using Git?
To update and commit only file permissions using Git version control, check out the following steps:
- Move to the required repository.
- View the list of content.
- Display the file where HEAD is pointing with default permissions by running the “git ls-tree HEAD” command.
- Execute the “git update-index –chmod=+x <file-name>” command.
- Lastly, commit changes and verify them.
Step 1: Redirect to Desired Repository
At first, switch to the particular Git repository by running the “cd” command:
Step 2: List Available Content
Next, execute the “ls” command to display the all existing content of the current working repository:
According to the below-given output, repositories contain “file1.txt” and “file2.py” files:
Step 3: Display HEAD Pointing SHA-Hash
Now, to show the SHA-hash of the commit where HEAD is pointing which contains the file by utilizing the “git ls-tree” command:
As you can see, the “file1.txt” contains the “644” permissions mode by default:
Step 4: Update Index
After that, execute the “git update-index” command to update the permissions of the file where HEAD is pointing:
Here, the “–chmod=” will take the desired permissions mode. For instance, we specified the “+x” which indicates the “755” permission mode:
Step 5: Commit Permission Updated Changes
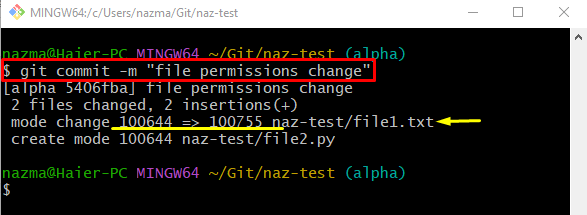
Finally, commit the added changes to the Git repository by running the “git commit” command along with the particular commit message:
It can be observed that specifically file mode changes are committed:
Step 6: Verify File Change Permissions
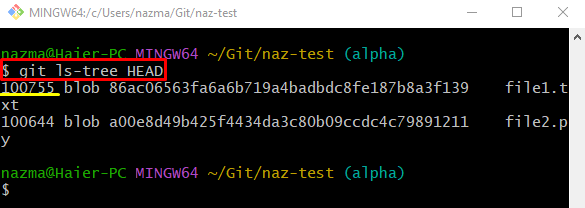
Lastly, use the “git ls-tree” command along with the “HEAD” pointer:
As you can see, the permissions of the “file1.txt” are changed successfully from “644” to “755” mode:
That’s it! We have explained the easiest way to change and commit file permissions using Git.
Conclusion
To update and commit only file permissions using Git version control, first, move to the required repository and list its content. Then, execute the “git ls-tree HEAD” command to display the file where HEAD is pointing with the default permissions. After that, use the “git update-index –chmod=+x <file-name>” command. Lastly, commit changes and verify them. This post demonstrated the method of updating and committing only file permissions using Git version control.


