Check Current Kernel Version
Before updating the kernel version, it is better to check the current version. It will help you to decide which new version to update the kernel to. Open the command line by using the Ctrl+Alt+T keyboard shortcut.
Now, check the current kernel version directly from the command line, as follows:
You can also check the kernel version with the following command:
Using either of the above commands will show you the kernel version of your OS. From the above output, you can see that the kernel version used in this article is 5.4.0-28-generic.
Update Ubuntu Kernel Version via Command Line
In the following methods, I will show you how to update the kernel version using the Command line.
Method # 1: Ubuntu Kernel Team Site
In the following method, we will update the kernel version by first downloading the latest version from the Ubuntu kernel team site and then installing it.
For this method, follow these steps to update the kernel version:
- Open the Ubuntu kernel team site to download the latest Linux kernel for Ubuntu. Select the version you wish to download and then download the .deb files for the generic version.
- linux-headers-<version-number >-all.deb
- linux-mage-unsigned-<version-number>-amd64.deb
- linux-modules-<version-number>-amd64.deb
We want to update our kernel to latest stable kernel version 5.6.10. So, we have downloaded the following .deb files.
linux-headers-5.6.10-050610_5.6.10-050610.202005052301_all.deb
linux-image-unsigned-5.6.10-050610-generic_5.6.10-050610.202005052301_amd64.deb
linux-modules-5.6.10-050610-generic_5.6.10-050610.202005052301_amd64.deb
Alternatively, you can use the wget command to download the following mainline packages for kernel version 5.6.10:
5.6.10-050610_5.6.10-050610.202005052301_all.deb
$ wget https://kernel.ubuntu.com/~kernel-ppa/mainline/v5.6.10/linux-image-unsigned-
5.6.10-050610-generic_5.6.10-050610.202005052301_amd64.deb
$ wget https://kernel.ubuntu.com/~kernel-ppa/mainline/v5.6.10/linux-modules-5.6.10-
050610-generic_5.6.10-050610.202005052301_amd64.deb
- Once all packages are downloaded, you can verify them using the “ls –l” command:
- The next step is to install all the downloaded packages. If you have downloaded the files on a directory other than the Home directory, then first navigate to it using the cd command:
$ cd /path/to/directory
Now, install all the downloaded .deb files. You can do so via the following command:
$ sudo dpkg –i *.debWait for a while until installation of all packages is complete.
- Reboot your system. Once the reboot is completed, log in to your system and check the kernel version with the uname command, as follows:
$ uname –rThe output will show the updated kernel version that is 5.6.10.
Method # 2: Using the Bash Script
In the next method, we will use the bash script in order to install a new kernel version. Follow these simple steps to do so:
1. Download the bash script using the following command:
master/ubuntu-mainline-kernel.sh
2. Copy the script to the “/usr/local/bin/” directory. You can do so with the following command:
3. Now, you can update the kernel version as follows:
It will search for and provide you with the latest kernel version number, e.g. v5.6.10, in the following output. If you want to install this version, hit B, upon which the installation will begin.
Once installed, reboot the system. Then, check the kernel version with the uname command as follows:
The output will show the updated kernel version
Method # 3: Update Ubuntu Kernel Version via GUI
In the following method, we will discuss the GUI method to update the Linux kernel. We will use the graphical Mainline tool for installing the latest version of the kernel. Here are the simple steps to do so:
1. The Mainline tool is not available in official Ubuntu repositories, so we will need to manually add its PPA to the sources.list file in our system. Use the apt-add-repository command for this purpose:
2. Once you have added the mainline repository, the following step is to update the system’s repository index:
3. Next, install the Mainline tool with this command:
The system might ask for confirmation by providing you with a Y/N option. Hit Y to continue, after which the Mainline tool will be installed on your system.
4. Launch the mainline tool from the Ubuntu search bar as follows:
5. When the Mainline tool is launched, you will see the following installer window with a list of new and available kernel versions. You may install a new version by selecting the version from the list and clicking the Install button on the bar to the right.
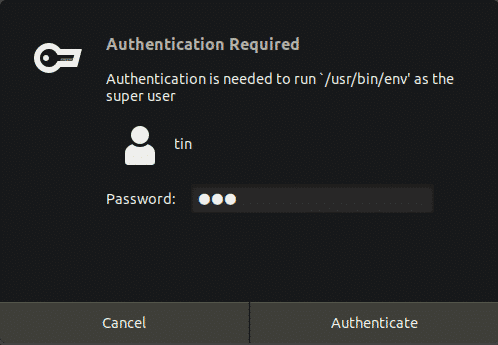
After this step, the following Authentication dialog will appear. Enter the super user password and click the Authenticate button.
The installation of the selected kernel version will begin, and you will be able to see the installation process in a new window.
Now, reboot your system and verify the new kernel version:
In this article, we have explained three different methods to update the kernel version on Ubuntu 20.04 LTS. After updating the kernel, sometimes you may face issues in booting the system. In this case, switch back to the old kernel by hitting the Shift key at boot, and select the older version from the list.


