This write-up will explain the method to update local tags to match the remote.
How to Update Local Tags to Match Remote in Git?
To update local repository tags to match the remote repository tags, try the following steps:
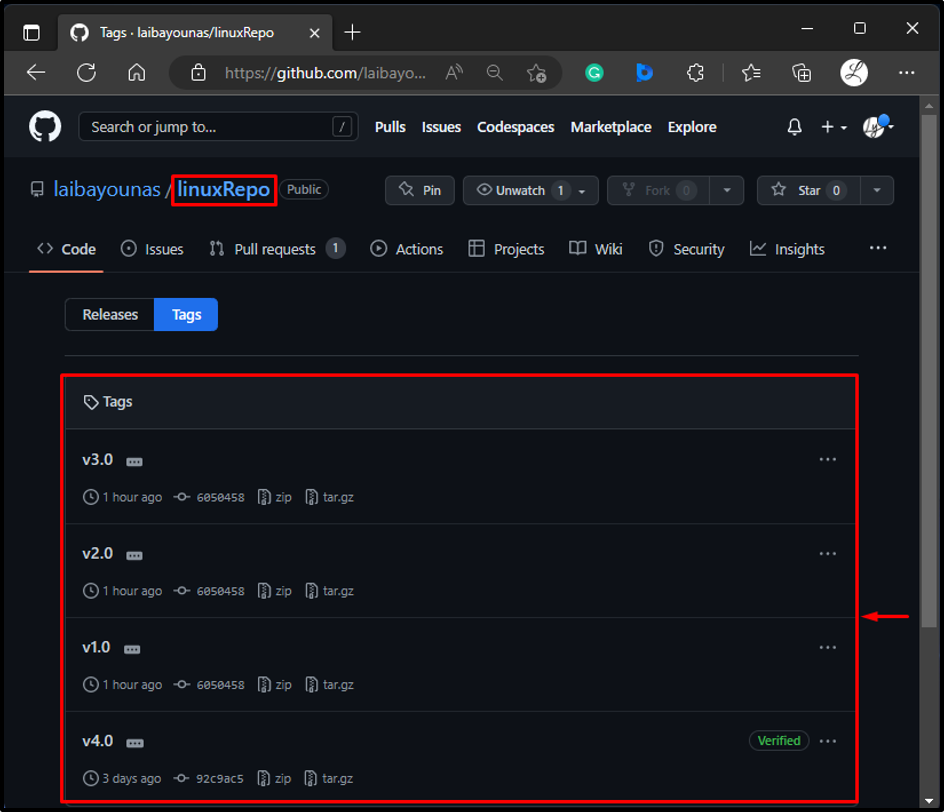
- Navigate to the remote repository and view its tags.
- Redirect to the local repository and list its tags.
- Update local tags using the “git fetch –tags –all” or the “git fetch origin –tags –force” command.
- Ensure changes.
Step 1: View Remote Tags
First, navigate to the desired remote repository, and view its tags. For instance, it can be seen that our remote repository contains four remote tags:

Step 2: Redirect to Local Repository
Now, utilize the below-listed command and switch to the particular local directory:
Step 3: View Local Tags
Then, list the local tags using the following command:
The below output indicates that the current local repository contains two local tags:
Note: Our local repository’s tags are not updated with the remote repository’s tags. To update it, follow the next provided steps.
Step 4: Update Local Tags
To update local tags to match with the remote tags, utilize the “git fetch” command with “–tags” and “–all” options:
Alternatively, the “–tags” and “–force” options can also be used with the “git fetch origin” command to update the local tags to match the remote:
Step 5: Verify Changes
Lastly, list the local tags to ensure that they have been updated with remote or not:
According to the below output, the local tags have been successfully updated with the remote tags:
That was all about updating local tags to match the remote.
Conclusion
To update the local tags to match the remote, first, view the remote and local tags. Then, utilize the “git fetch –tags –all” or the “git fetch origin –tags –force” command. Lastly, verify changes by displaying local tags. This write-up explained the procedure to update local tags to match the remote.


