Want to unzip a file using PowerShell? If yes, then follow this post! This article will teach you how to unzip a file using the “Expand-Archive” PowerShell command.
How to unzip a File using PowerShell?
To unzip a file using PowerShell, you can utilize the “Expand-Archive” command. The Expand-Archive command unzips or extracts the content of a zipped or archived file to its destination folder.
In order to use the Expand-Archive command, follow the below-given syntax.
Syntax
The syntax of the Expand-Archive cmdlet to unzip a file in PowerShell:
Here, “<SourcePathofZipFile>” represents the actual path of the zipped file, and the “<DestinationPath>” points to the destination path where you want to extract the file.
Example
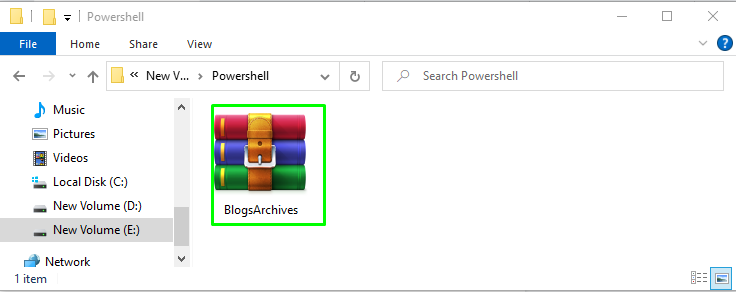
Let’s try an example to unzip files by using the PowerShell Expand-Archive cmdlet. Here, in “E:\Powershell\”, we have a zipped folder named “BlogsArchives”, which we want to unzip in drive “D:\Archives\PowerShell”:
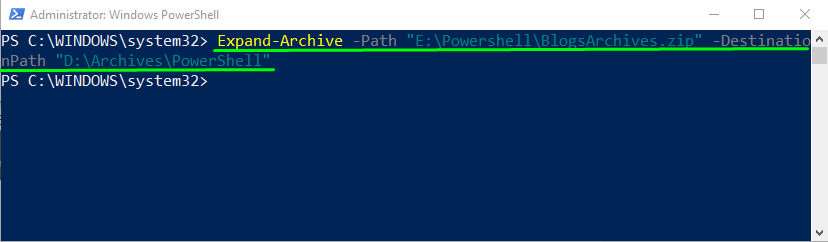
Now, in the PowerShell window, type the following command for unzipping the specified folder to “D:\Archives\PowerShell”:
After executing the given command, switch to the File Explorer and verify the presence of the extracted “BlogsArchive” folder in “D:\Archives\PowerShell”:
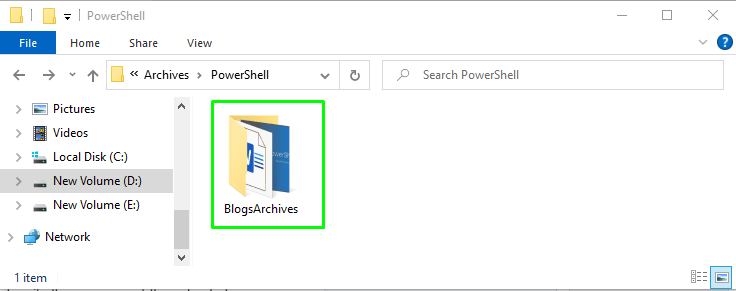
As you can see, we have successfully extracted the “BlogsArchive” folder using the “Expand-Archive” command. However, in case you want to overwrite an existing extracted folder, add the “-Force” parameter in the same “Expand-Archive” command:
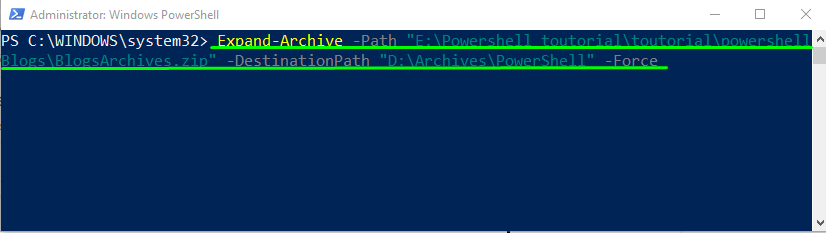
Without using parameter “-Force”, you will encounter an error stating that the extracted folder already exists at destination path:

We have provided all the essential information related to unzipping files in PowerShell by using Expand-Archive cmdlet.
Conclusion
In PowerShell, the “Expand-Archive” command is used to unzip files or folders. The syntax of the Expand Archive command is given as: “Expand-Archive -Path <SourcePathofZipFile> -DestinationPath <DestinationPath>”, where <SourcePathofZipFile> represents the actual path of the zipped file and the “<DestinationPath>” points to its destination path. The “-Force” option can also be added in the Expand-Archive command to overwrite an existing extracted folder. This article discussed how to unzip a file using the Expand-Archive PowerShell cmdlet.