This article will demonstrate different methods to unstash only specific files in Git.
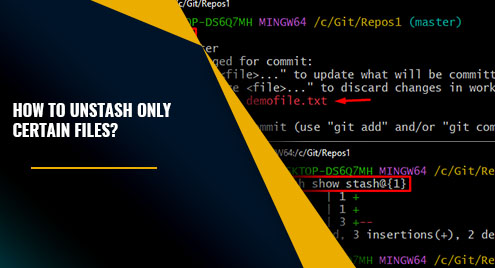
How to Unstash Only Certain/Particular Files?
Different Git commands can be used to unstash only certain files, such as:
- “git checkout stash@{<index-no>} — <filename>” command
- “git restore –source=stash@{<index-no>} — <filename>” command
Method 1: Unstash Certain Files Utilizing “git checkout” Command
To unstash only certain files:
- First, switch to the local directory and view its current status.
- Then, list all the available stashes.
- After that, choose the particular stash and view its changes.
- Next, select the files that need to be unstashed.
- Finally, execute the “git checkout stash@{<index-no>} — <filename>” command and verify changes.
Step 1: Navigate to Local Repository
First, redirect to the desired local repository by writing out the below-provided command:
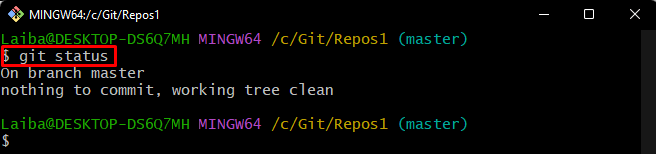
Step 2: View Current Status
Next, check the current status of the working repository:
According to the below output, the current repository status is clear:
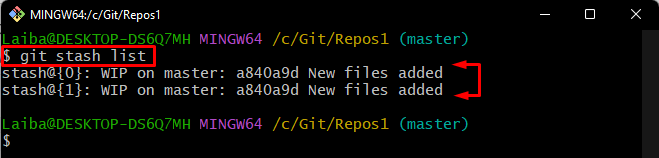
Step 3: View List of Stashes
Then, display the list of available stashes in the current repository:
It can be observed that the repository contains two stashes, i.e., “stash@{0}” and “stash@{1}”:
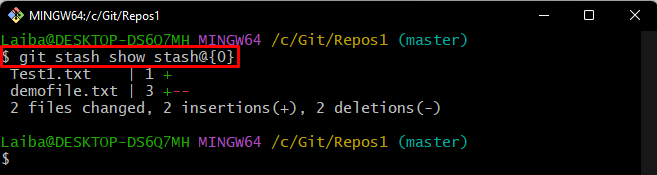
Step 4: View Particular Stash Changes
Now, run the following command and specify the particular stash index to view its changes. For instance, we have specified “stash@{0}” stash:
It can be observed that the “Test1.txt” and “demofile.txt” file changes are stored in the current stash:
Step 5: Unstash Certain File
After that, unstash a particular file by executing the “git checkout” command along with the desired stash id and file name:

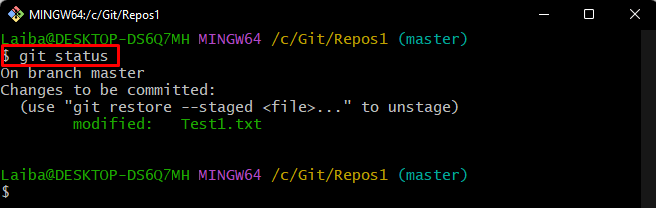
Step 6: Verify Changes
Finally, ensure that the particular file has been unstashed by checking the Git status:
It can be seen that the “Test1.txt” file has been unstashed successfully:
Method 2: Unstash Certain Files Utilizing “git restore” Command
Users can also use the “git restore –source=stash@{<index-no>} — <filename>” command to unstash only the particular files in Git. Follow the provided steps for practical demonstration.
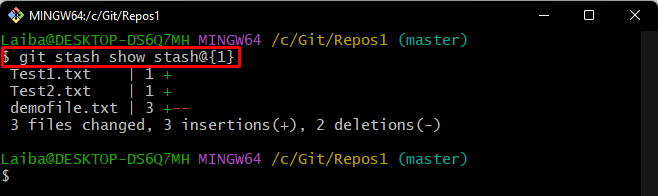
Step 1: View Specific Stash Changes
First, choose the particular stash and display the changes stored in it using the following command:
The below output displays the list of files stored in the “stash@{1}” stash. Select the particular file that needs to be unstashed:
Step 2: Unstash Particular File
Then, type out the given-provided command along with the desired stash id and particular file name to unstash it. For instance, we want to unstash the “demofile.txt” file:

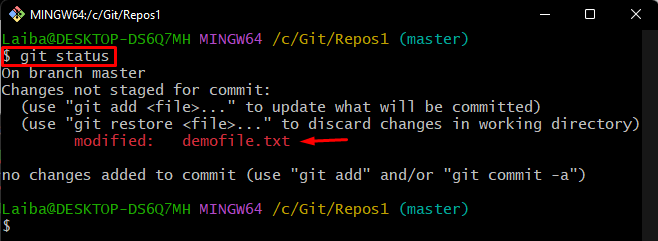
Step 3: Ensure Changes
Lastly, check the status of the current repository to verify new changes:
As you can see, the desired “demofile.txt” file has been unstashed successfully:
We have explained the easiest methods to unstash only certain files in Git.
Conclusion
To unstash only certain files, Git provides different commands. These command include “git checkout stash@{<index-no>} — <filename>” command and the “git restore –source=stash@{<index-no>} — <filename>” command. This article explained the methods to unstash specific files in Git.