
This guide will elaborate:
How to Shelve Changes Using Git?
To shelve changes using Git, check out the below-given steps:
- Go to the Git local directory.
- List all files using the “ls” command.
- Select a file and modify it.
- Track the file in the staging area using the “git add” command.
- Stash the changes with the help of “git stash” to save the files in temporary memory.
Step 1: Redirect to Git Local Directory
First, open the Git Bash tool and navigate to your preferred Git local directory by specifying the path along with the “cd” command:
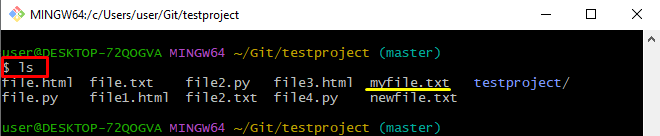
Step 2: List all Files
Execute the “ls” command to list all data using “ls” command:
As you can see, the whole content of the current Git repository has been listed successfully and we have selected the “myfile.txt” file for further use:
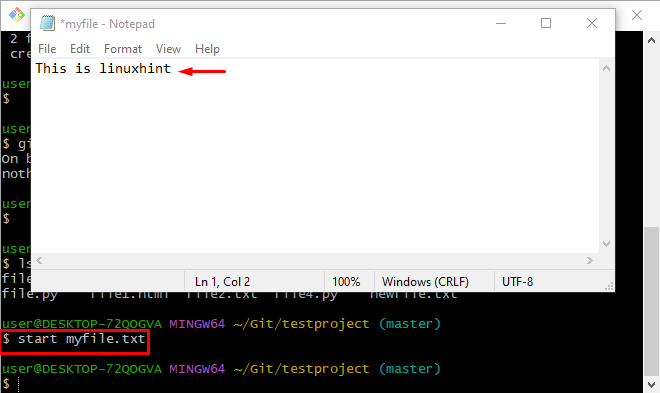
Step 3: Modify a File
Open the previously selected file for modification by running the “start” command:
Now add some text in the opened file, save changes, and close it:
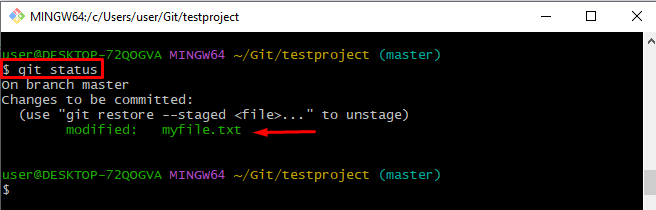
Step 4: Track the File and Verify the Status
Now, track the modified file to the staging area by executing the “git add” command:

Then, check the status of the Git repository to verify the tracked changes:
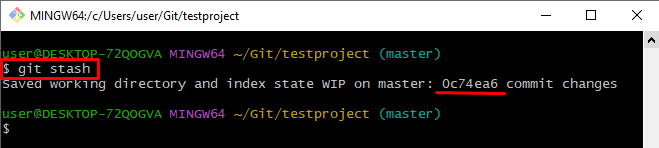
Step 5: Shelve/Stash Changes
Run the “git stash” command to save the tracked file into a temporary shelve for later usage:
The stated output indicates that the file has been temporarily saved:
Step 6: View Git Status
Check the current working status by executing the below-stated command:
It can be noticed that the tracked file has been saved in a temporary shelve and there is nothing to commit in the Git directory:

How to Unshelve Changes Using Git?
To unshelve changes using Git, try out the given instructions:
- Go to the Git working directory.
- Check Git status.
- List all available shelves using the “git stash list”.
- Unshelve the changes with the help of “git stash pop” along with the stash id.
Step 1: Redirect to Git Local Directory
Move toward the Git local directory using the “cd” command:
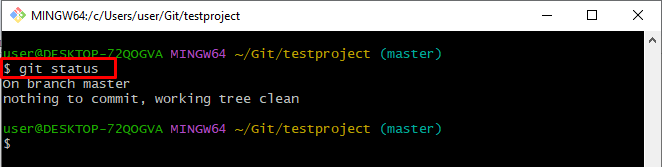
Step 2: View Git Status
Display the current working status of the Git directory by using the “git status” command:
It can be noticed that the working area is clean and there is nothing to commit:
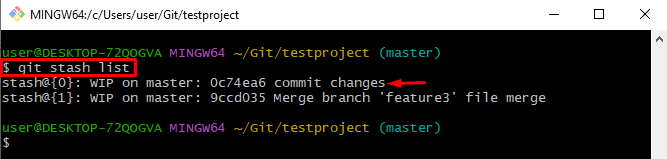
Step 3: List All Shelves
View all available shelves/stash by running the “git stash list” command:
The resultant image shows that there are two stash indexes available and select one of them to unshelve it:
Step 4: Unshelve/Unstash Changes
Execute the “git stash pop” command along with the stash index id to unshelve and store it back in the working directory:
The stated output indicates that the file has been stored back in the Git working directory as an untracked file:

That’s all about the easiest way to unshelve the changes using Git.
Conclusion
To unshelve changes using Git, go to the Git working directory and check Git status. Then, list all available shelves/stashes using the “git stash list”. Next, unshelve the changes with the help of the “git stash pop” command along with the stash id. This tutorial demonstrated the method to unshelve the changes using Git.