How to uninstall Java from Ubuntu
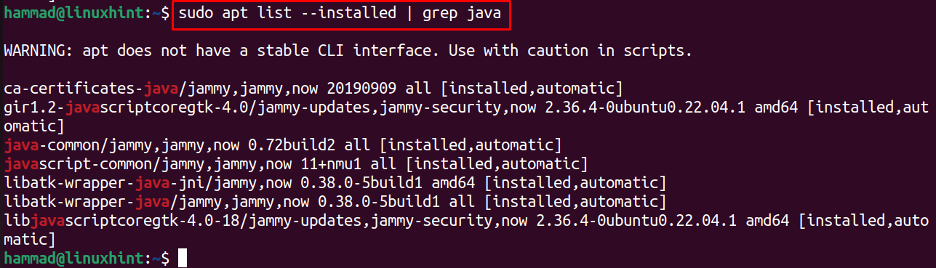
To uninstall the package of Java from Ubuntu, we will first confirm that it is being installed or not, for which there are two different commands, first one is to list down all the installed packages and then filter out only the packages that include java using the grep command:
Another way to confirm the installation of Java is by displaying the installed version of Java by running the command:

Now, we will find out the location of the java packages on Ubuntu. Commonly they are present either in the /opt/ directory or in the /usr/lib/ directory which can be found out by hit and trial methods. In our Ubuntu machine, it is being stored in ls /usr/lib/jvm that can be listed down by running the command:

As we can see that all the packages and configuration files are located in this directory so we will remove the directory of jvm using the command:

To confirm the uninstallation of the java, we will display the version of Java using the command:

The output is the confirmation that there is no package of Java installed anymore.
Conclusion
To uninstall the Java package from Ubuntu 22.04, we will run the command “sudo rm -r /usr/lib/jvm ” after confirming the directory of jvm. In this write-up, the method of uninstalling Ubuntu has been explained in detail.