This guide will explain how to undo the Git add command.
How to Undo Git Add Command?
To undo the Git add command, firstly, we will move to the repository and display the existing content of it. Then, create and add a file to the staging area. Next, commit all made changes to the repository and check the status. Lastly, undo the add command by executing the “$ git restore –staged <file-name>” command.
Let’s move ahead to perform the above-provided operation!
Step 1: Navigate to Git Local Directory
Move to the desired local directory by utilizing the provided command:
Step 2: List Content
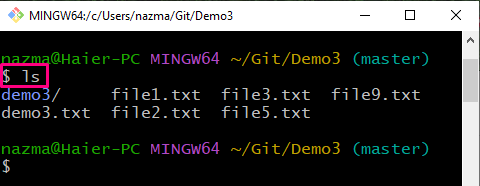
Next, run the “ls” command to list the content of the current repository:
Step 3: Create File
Create a new file in the repository using the below-given command:
Step 4: Track File
Now, add the created file to the staging area:
Step 5: Check Status
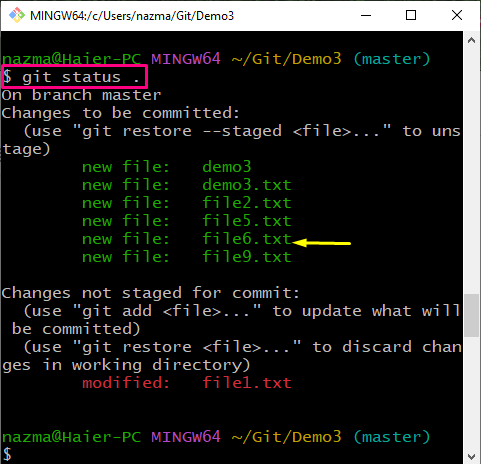
Check the repository status by executing the “git status” command:
Step 6: Undo Git Add
Now, run the “git restore” command with the “–staged” option to undo the add file operation:
Step 7: Check Status
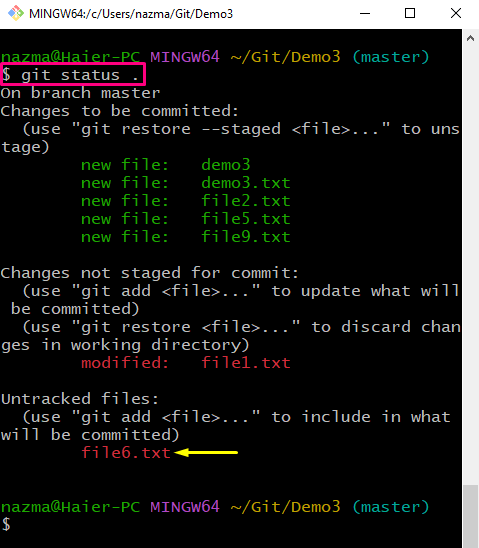
Again, check the repository’s current status through provided command:
According to the below output, the “file6.txt” tracked file is reverted into the working directory from the staging area:
We have offered the procedure to undo the Git add command.
Conclusion
To undo Git add command, firstly, navigate to the repository and list the existing content. Next, create a file and add it to the staging area using the “$ git add <file-name>” command. Then, commit all added changes to the repository and check the status. After that, undo the add command operation by utilizing the “$ git restore –staged <file-name>” command. This guide illustrated the method to undo the Git add command.


