In this post, we included three methods to record the screen in Ubuntu. Most users may find the built-in recorder enough. But if you’re looking for extra features, you may also use the third-party apps.
Method 1: Screen Recording Using the Default GNOME Shell’s Screen Recorder
With Ubuntu (and other Linux distributions), you don’t need to install an extra software to record the screen. The Gnome Shell in Ubuntu includes a built-in screen recorder. In Ubuntu, you may start the screen recording instantly with a hotkey like on Windows and macOS.
The advantage of this method is that it enables the screen recording in all three modes: full-screen, window, and customizable partial area. The only limitation of this screen recorder is that it saves the recordings in WEBM format and does not support the audio recording. Let’s learn how to record your screen in Ubuntu.
Step 1: Launch the Built-In Screen Recorder
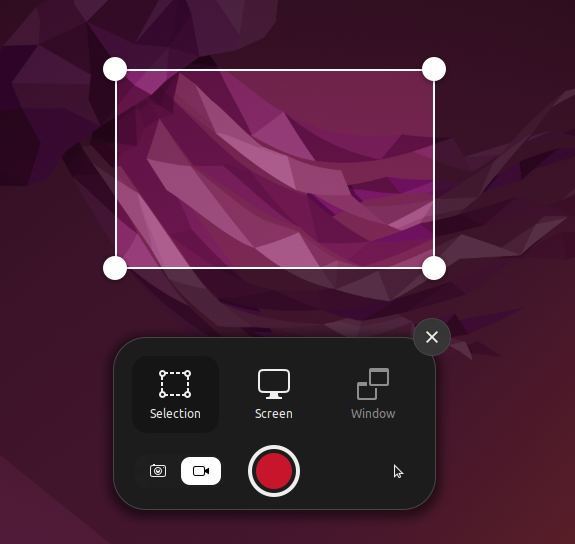
Navigate to the screen or window that you want to be recorded and press the “Ctrl + Alt + Shift + R” shortcut keys to launch the GNOME Shell’s Screen Recorder. You will be directed directly to the video recording screen (the video option is already selected by default).
Alternate:
Using the “PrtScr” shortcut key, the GNOME Shell Screen Recorder can be launched or opened. The recorder interface will open; you should choose the “Video” option.
Step 2: Select the Video Record Area
You can choose a specific window, the entire screen, or a particular part of the screen to record the screen.
Step 3: Start Recording the Screen
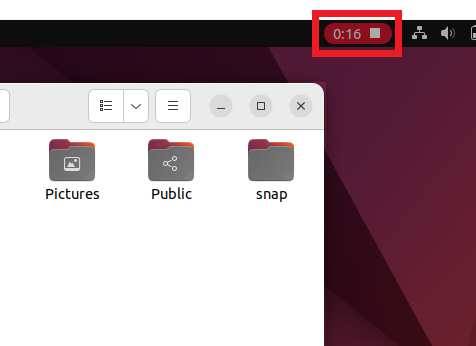
Press the red “Start” button to start recording the screen. The GNOME Shell will then begin to record the screen, as shown in the upper-right corner of the following image, where the recording duration shows.
Step 4: Saving Your Recording
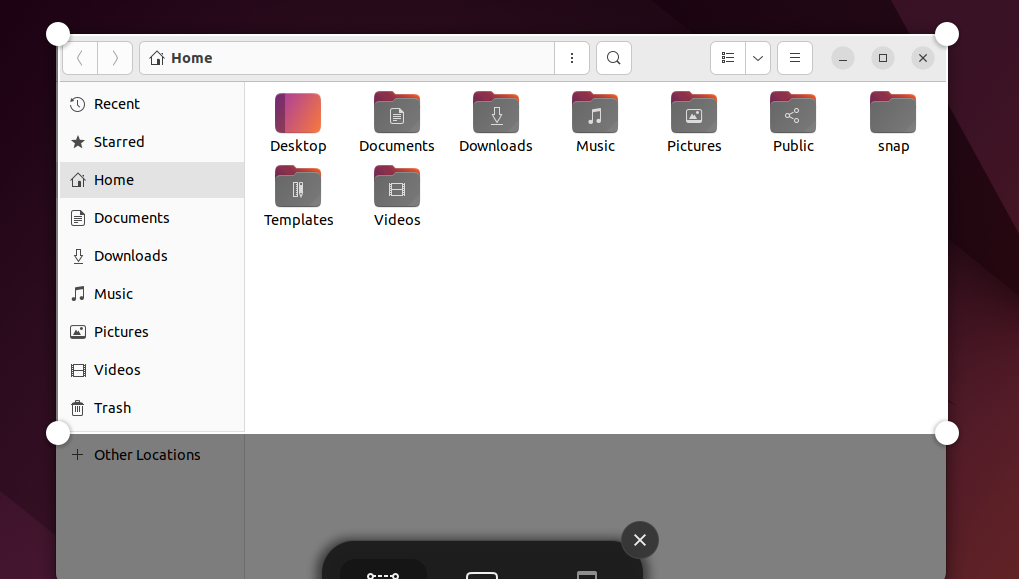
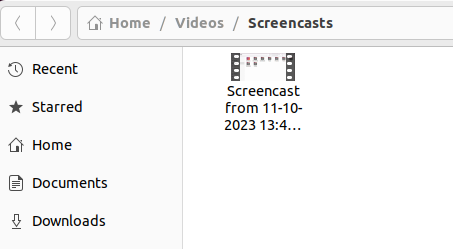
Click the white square icon on the top-right corner of the system tray to end the screen recording. The recordings are stored in the Home/Videos/Screencasts directory.
All done! You can record your screen using Ubuntu Linux’s Screencast utility in this way. Now, let’s explore how to record your screen using a third-party software.
Method 2: Screen Recording in Ubuntu Using a Third-Party App
If you require an advanced tool to record your screen on Ubuntu, we recommend the SimpleScreenRecorder. Numerous features are included in it such as frame rate setting, audio recording, bitrate customization, cursor recording, specific part selection, etc.
Additionally, many media types including WEBM, MP4, MKV, and many others are supported by SimpleScreenRecorder. The only concern is that if you use the Wayland display server, you might encounter problems. However, it functions flawlessly for the great majority of people who are still using X11/Xorg. Here’s how to record the Ubuntu screen with the SimpleScreenRecorder.
Step 1: Launch the Ubuntu terminal and type the command provided in the following. When prompted, enter your password and press “Y” to approve the installation. Within seconds, Ubuntu will have the SimpleScreenRecorder installed.
Output:

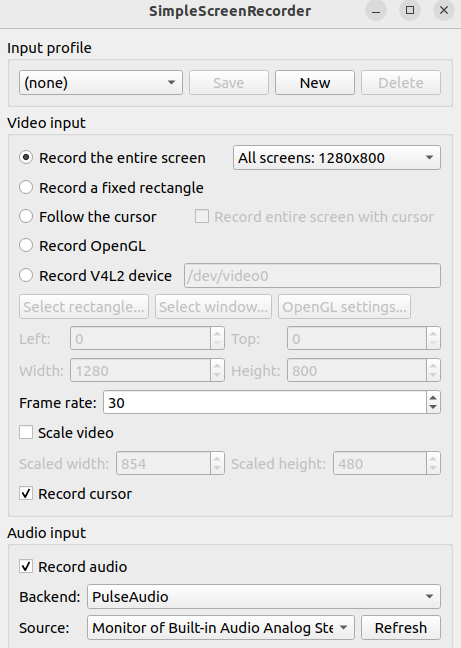
Step 2: Open the SimpleScreenRecorder by selecting it from the app launcher. Select whether to record the full-screen, a specific area/region, or an active screen or window. In addition, you can alter or specify the frame rate, recording cursor, and input audio.
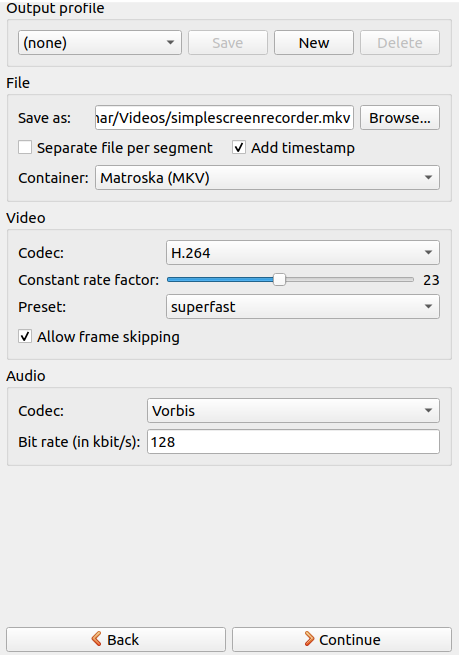
Step 3: After clicking on “Continue”, you will be taken to a page where you can choose the media format, the location where the screen recording will be saved, the audio and video codec, and more.
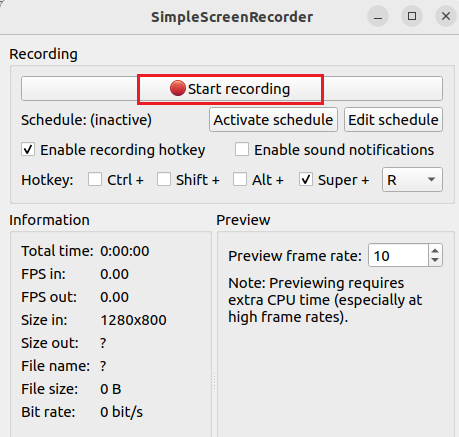
Step 4: Click on “Start recording” at the top of the following page, and your screen will begin to be captured.
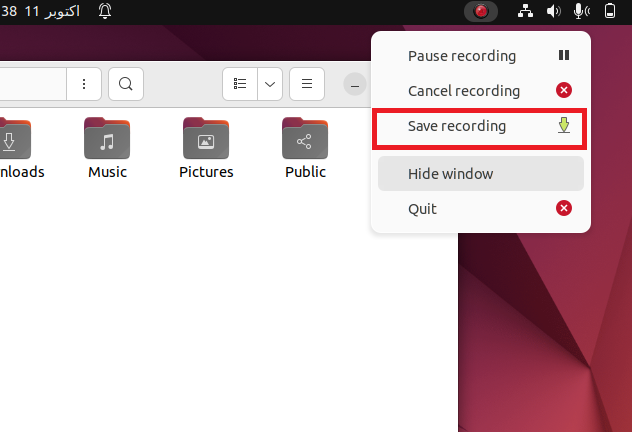
Step 5: The system tray’s top-right corner contains the progress bar. It is always accessible by clicking on it. When you’re finished, select “Save recording”.
Step 6: The “Home/Videos” directory stores the screen recording.

Method 3: Screen Recording in Ubuntu Using the OBS Studio
OBS Studio is an advanced screen recording tool/software that is often recommended for advanced users. However, if you want more features like camera or webcam support and Wayland compliance, you should definitely check out the OBS Studio. Here’s how to use the OBS Studio to record the screen in Ubuntu.
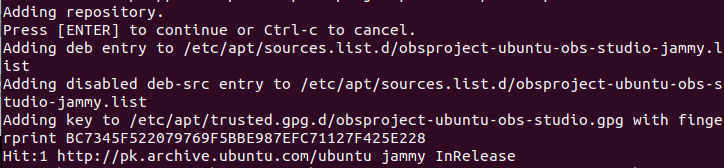
Step 1: To install the OBS Studio in Ubuntu, launch the Terminal and type the commands that are listed in the following, one by one:
$ sudo apt update
$ sudo apt install obs-studio
Output:
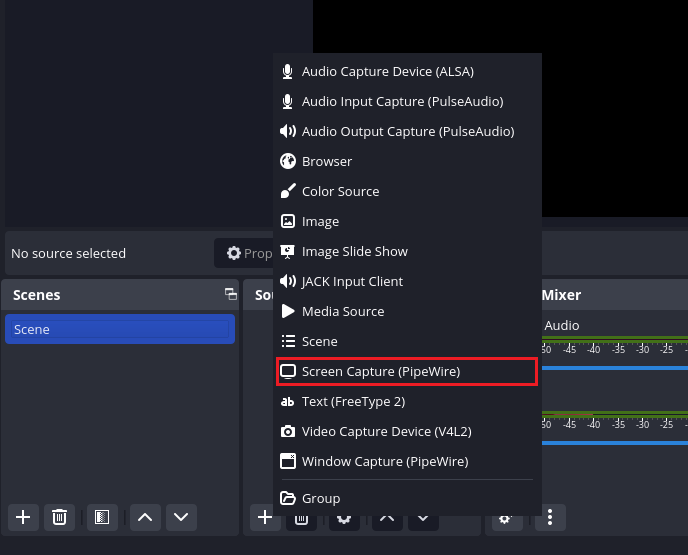
Step 2: Choose “Optimize just for recording” during the first configuration of the OBS Studio after installing it. Then, under “Sources”, click the “+” icon and select “Screen Capture (PipeWire)”. Alternatively, you can choose “Window Capture (PipeWire)” for window and partial selection.
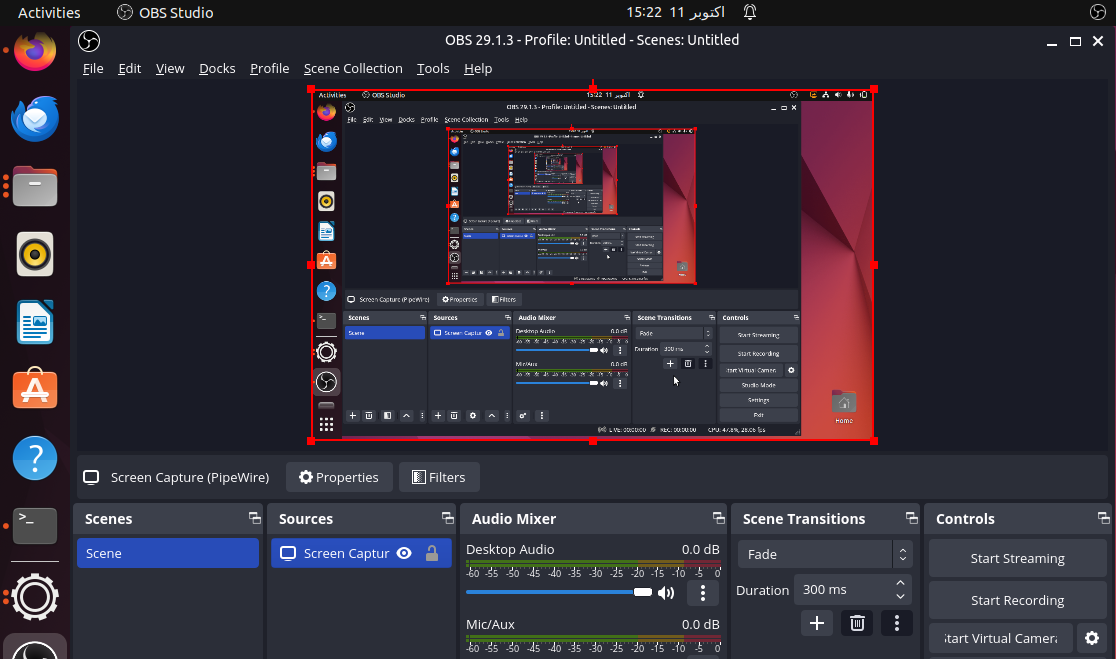
Step 3: After adding the Screen Capture source, the entire screen will be seen in OBS Studio’s preview window.
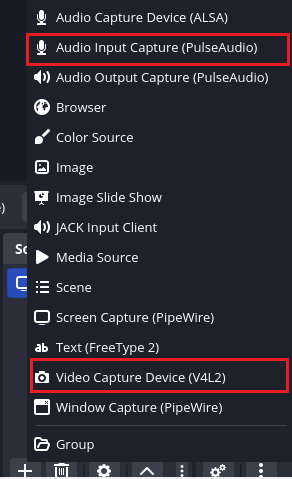
Step 4: Click “+” under “Sources” once more. Then, select “Video Capture Device” to add a webcam. If you want to record a sound that employs an external microphone, you may select “Audio Input Capture (PulseAudio)”.
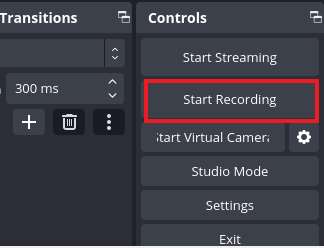
Step 5: Finally, select “Start Recording” to capture the screen with audio and a webcam view.
To capture a section or the whole window, select “Window Capture (PipWire)”.
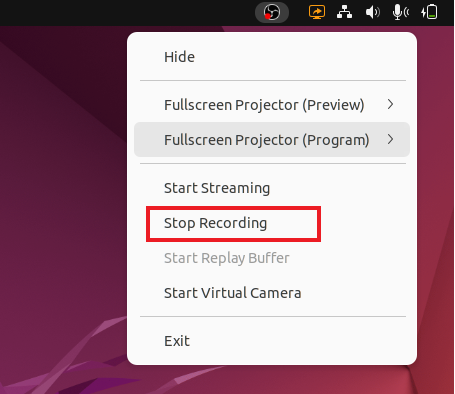
Step 6: To stop and save the recording, click the “Stop” button next to the Studio’s icon in the Ubuntu system tray. The screen capture will be placed in Home/Videos.
Conclusion
This article explored the three ways to record the screen in Ubuntu: the built-in GNOME Shell screen recorder, the SimpleScreenRecorder third-party app, and the OBS Studio. The built-in screen recorder is simple and user-friendly but does not include many features. SimpleScreenRecorder is a good option if you need more features such as audio and cursor recording. However, it may not work properly with the Wayland display server. OBS Studio is the most advanced screen recorder with the most features, but it can be more complex.