Prerequisites of Ubuntu 22.04 LTS
Download any recent release or version of Ubuntu from the official Ubuntu website. In this tutorial, we’ll install Ubuntu 22.04.
The minimum specifications to run and install Ubuntu are as follows:
- A dual-core processor 2 GHz
- 4 GB RAM
- Free 25 GB of disk space
- A USB bootable medium
- An internet connection (optional)
How to Install Ubuntu
You must first download the Ubuntu ISO. Then, you can use the ISO file to make a bootable USB storage device. However, you can skip the media creation stage and boot up the ISO image if you install and test Ubuntu on a hypervisor like Virtualbox, KVM, or Vmware.
Since Ubuntu is a user-friendly Linux distribution, installing it will be simple. You can succeed if you carefully follow the provided steps.
Step 1: Booting the Ubuntu ISO
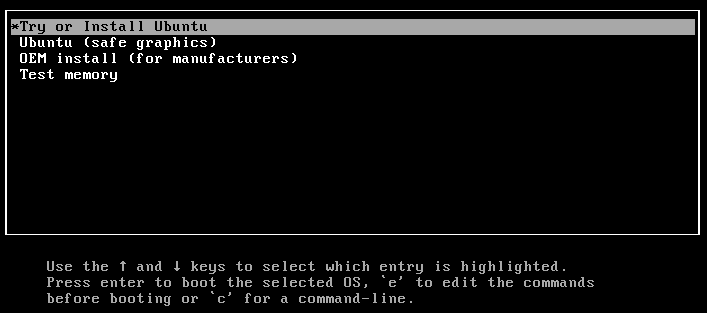
Boot your machine using the newly created bootable USB device (with Ubuntu ISO). The following menu appears. The first option, “Try or install Ubuntu”, is selected by default.
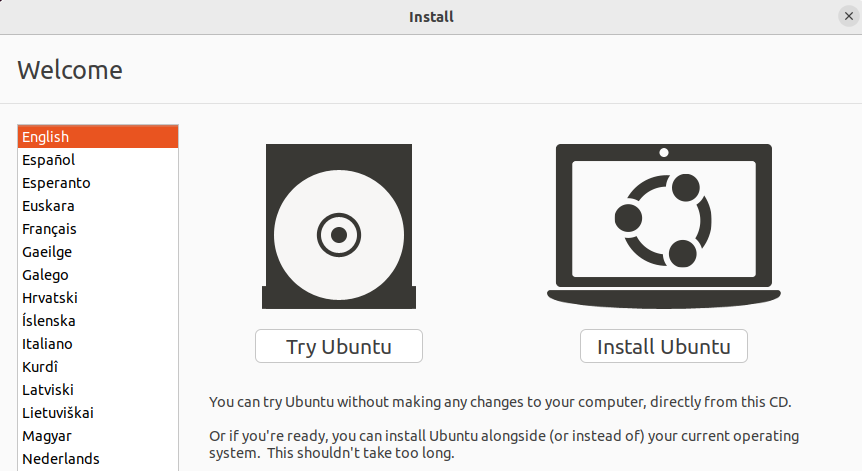
By clicking the “Install Ubuntu” button, you can launch the live Ubuntu edition and explore what’s available there or immediately begin the installation process. Here, we use the “Install Ubuntu” option.
To experience Ubuntu without altering your hard drive, select “Try Ubuntu”. If you like the live OS and you want to install Ubuntu from the Ubuntu dashboard, simply click on the “Install Ubuntu” button after specifying the desired language.
Step 2: Select a Keyboard Layout
You can choose the keyboard layout for your Ubuntu system. The default layout is English (US).
Step 3: Select Updates and Additional Software
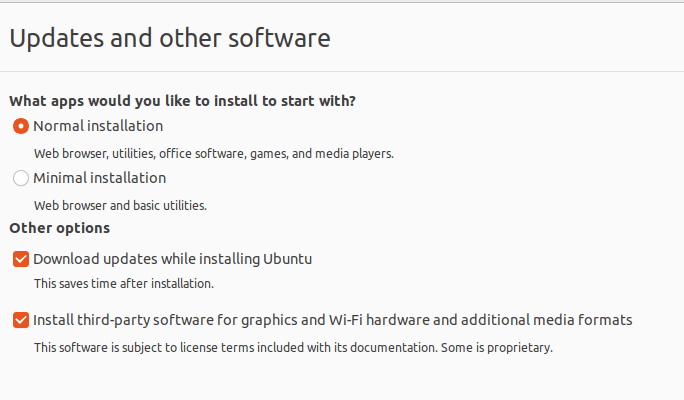
Here, you can choose what apps you would like to install. Choose between a normal or minimal installation:
- Normal Installation: This installs a full-featured Ubuntu desktop with all the essential programs including a web browser, office suite, games, and media players.
- Minimal Installation: This installs a simple web browser and a limited set of essential programs.
Additionally, you have the following options:
- Get and apply the updates while installing Ubuntu 22.04
- Installing the third-party software and apps like Wi-Fi drivers, graphics drivers, etc.
Step 4: Select the Installation Type
You have two options:
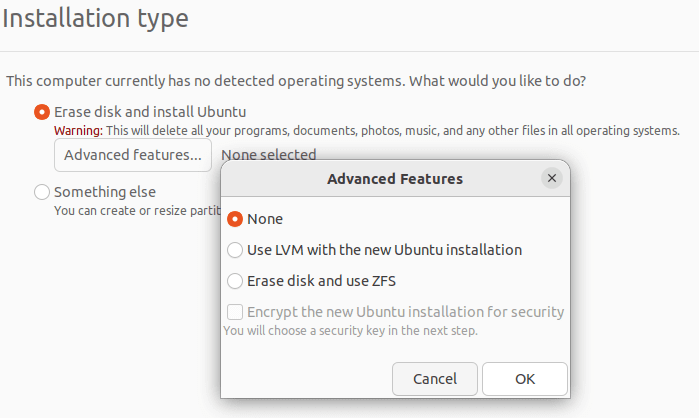
- Automatic partitioning method: This installs the Ubuntu OS, automatically partitions the disk, and then erases the entire disk. Beginners should choose this.
- Install Ubuntu after manually partitioning the disk: This is for experienced and intermediate users.
Option 1: Automatic Partitioning
All of the software and data on your hard drive will be erased if you select option 1. Only choose this if you have no essential data or you aren’t interested in any data that is stored on your hard drive.
The automatic partitioning approach is advised if you’re a beginner. The installation automatically generates the required partitions. There is absolutely no need to create the partitions manually.
Advanced features such as LVM, ZFS filesystem, and encryption can be enabled in the “Advanced Features” tab.
After choosing the features that you desire, press “Install Now”. The installation then begins when you click on the “Continue” button to save the disk’s partition adjustments.
Now, proceed to Step 6 to complete the remaining steps.
Option 2: Manual Partitioning
Using this technique, several partitions can be created of any size. Only the experienced and intermediate users should utilize this option.
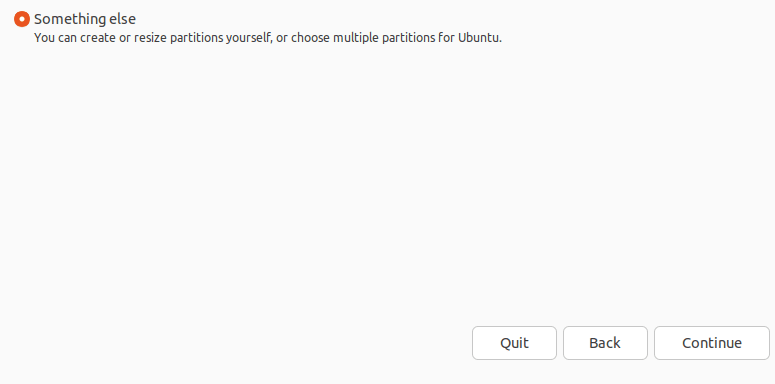
Press “Continue” after selecting the “Something else” option.
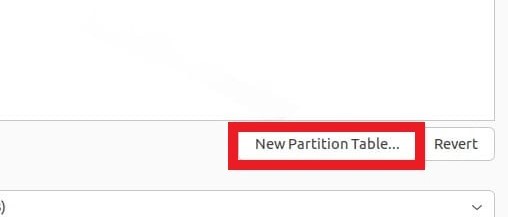
Select the “New Partition Table” option.
To create an entirely new, empty partition table on the chosen disk, press the “Continue” button.
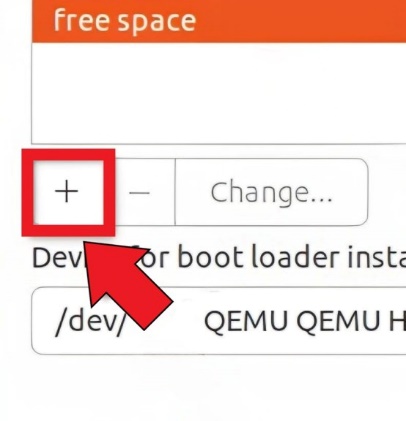
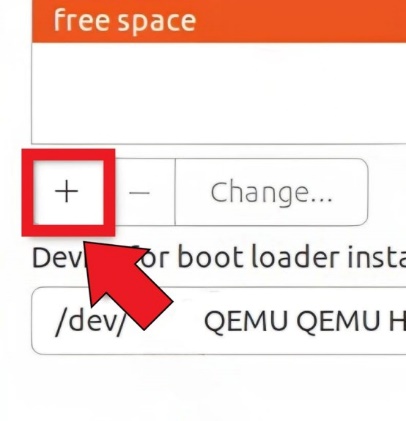
To create a new partition, choose “free space” and press the (+) button.
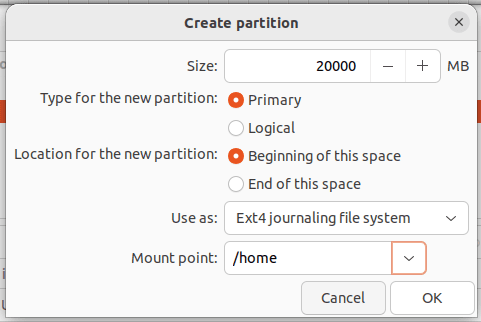
After choosing the file system, partition type, size, and mount point, click on “OK”. We will make a HOME partition here.
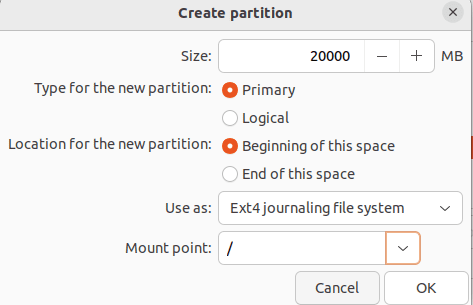
This partition is shown in the “Device” section. To make another partition, choose the empty space once more and click on the plus (+) sign.
Once the partition’s details are entered, click on “OK”. We will make a root (/) partition right now.
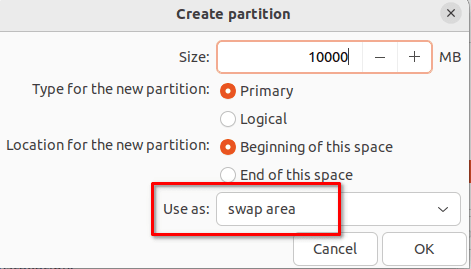
Next, we’ll make a Swap partition. To create a Swap partition, simply follow the same procedure that is previously described. The only difference is that you must select swap as the filesystem. The Swap partition should have a size that is at least equal to your RAM.
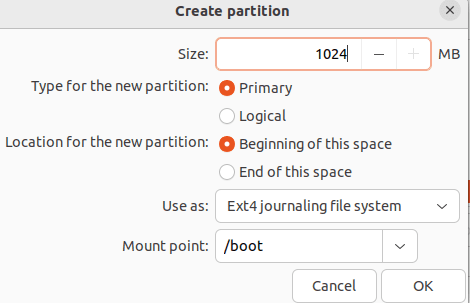
Next, a boot partition has to be made. As the mount point, make sure that the “/boot” is entered.
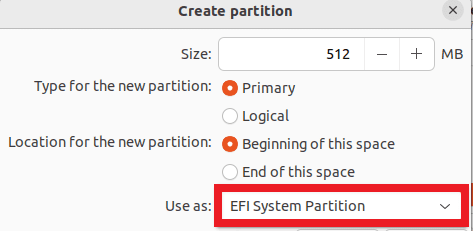
The steps to create an EFI partition are indicated in the following. Make sure that you selected the “EFI System Partition” for the filesystem type.
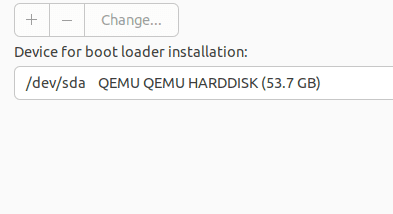
Review all partitions before proceeding. To delete a partition, click on the minus (-) sign. To modify any partition, select it and then click on “Change”.
If you are satisfied with the partitioning scheme, click on “Install Now” to proceed.
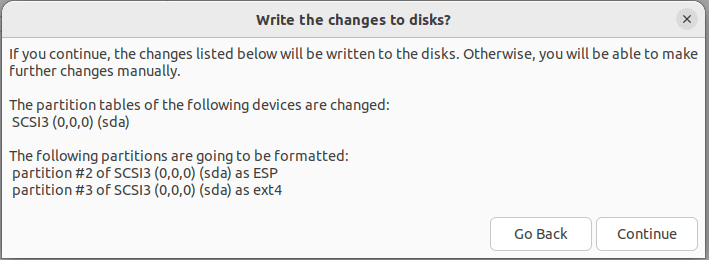
In order to save the changes to disc, choose “Continue”.
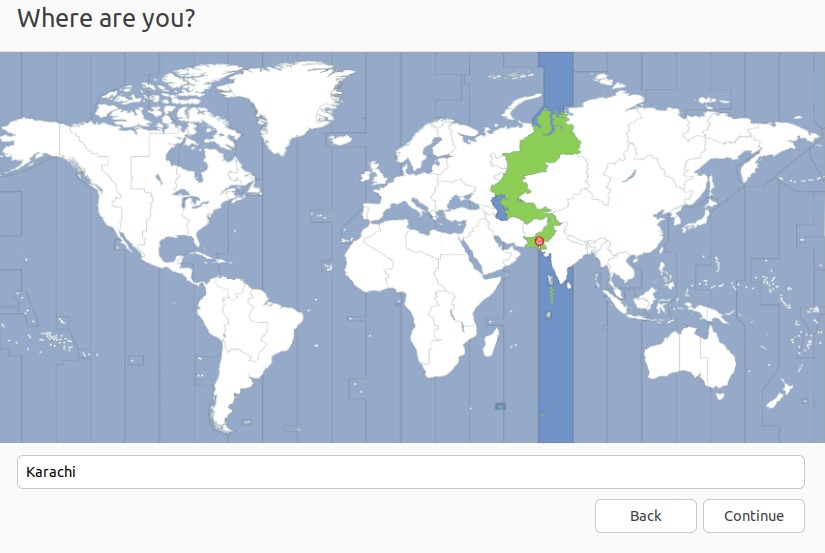
Step 5: Select a Location
Click on “Continue” after entering your location.
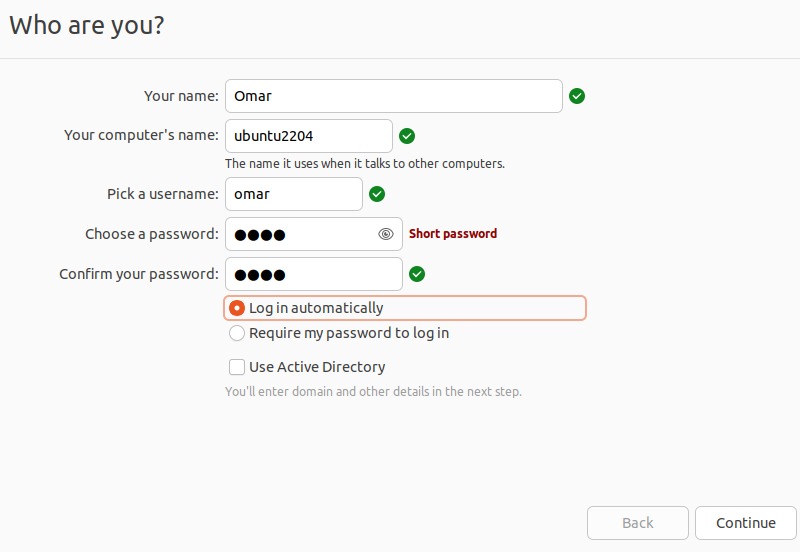
Step 6: Enter Your Username and Hostname
Enter the system name, username, and a secure password.
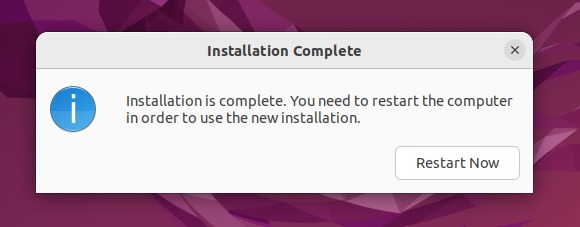
The process of installing Ubuntu 22.04 LTS will immediately begin. Once it is finished, restart your computer.
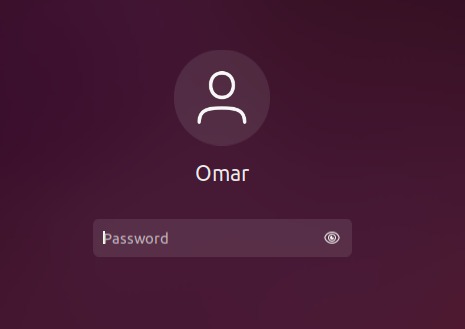
Step 7: Login
Simply log in to your new Ubuntu desktop and use it.
Conclusion
The ISO file must be downloaded and added to the bootable USB to download and install Ubuntu in your system. Reboot the system after attaching the installation file or medium. After that, install Ubuntu with the default settings or make a manual partitioning. Specify the necessary data such as the username, password, location, etc. Restart your system after the Ubuntu installation is completed. This is how you can download and install Ubuntu on your computer.

