In this blog, we have discussed two different approaches to set up configuration manually, which are as follows.
- Using the GUI
- Using nmtui command
Let’s get started.
Method 1: Setting up static IP address on Ubuntu 22.04 using GUI
If you prefer using the GUI over the command line to configure a static IP address, then here we have summed up all the required steps for you.
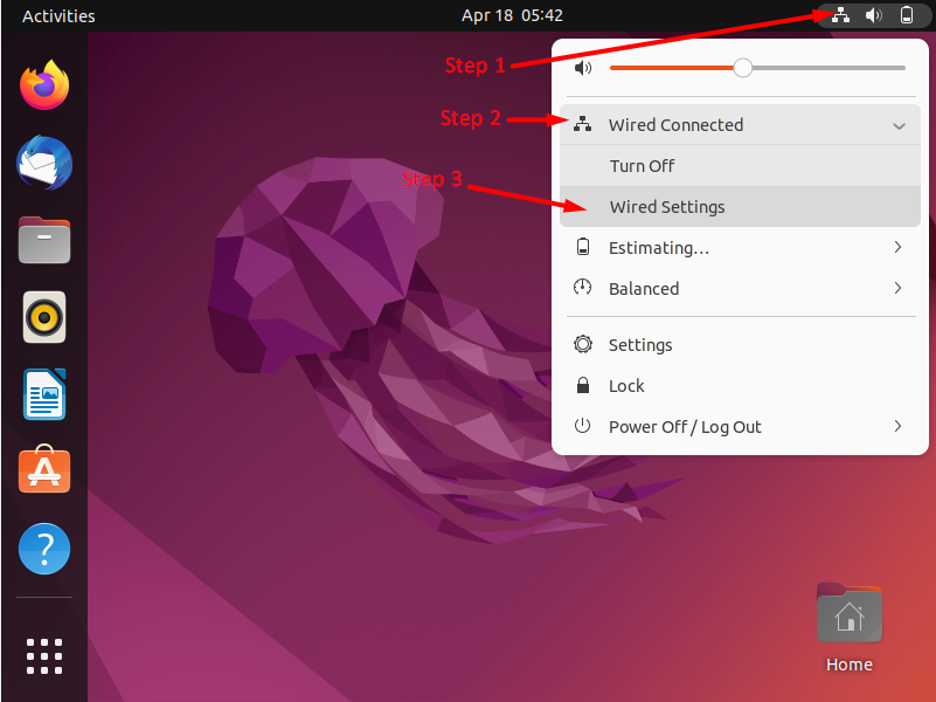
Step 1: Open Wired Settings
First of all, click on the network icon that is present at the top right side of your screen. When you click there, a pop-up will appear. Now select the ‘Wired Connected’ option, and a menu will open; from there, choose the ‘Wired Settings’ option:
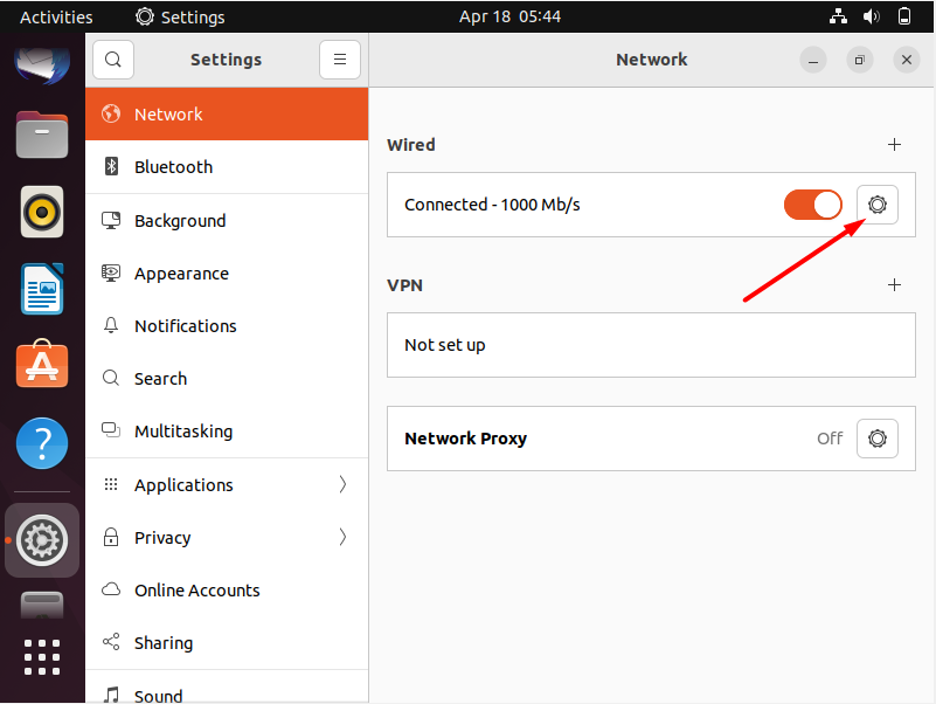
Step 2: Open Settings of Network to be Configured
Wired setting will open. Now click on the gearbox icon, which is placed right next to the network connection that you are about to configure.
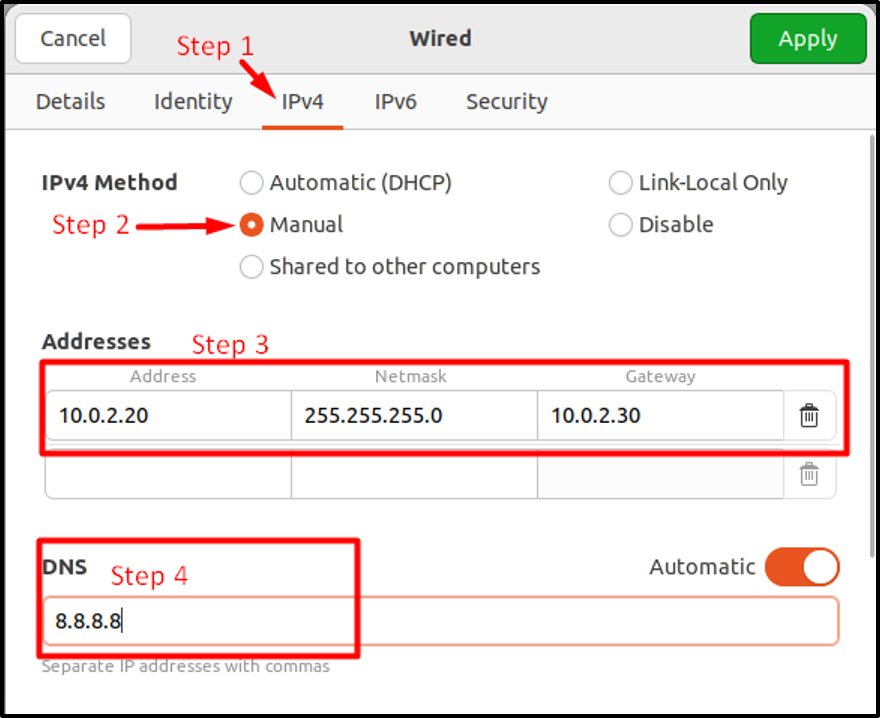
Step 3: Enter Addresses
A new window will now appear on your screen where you have to select between IPv4 and IPv6 depending on your requirements. Then select the ‘Manual’ option and set your desired address, netmask, and gateway. Lastly, you can also set the DNS server (optional) and hit the apply button.
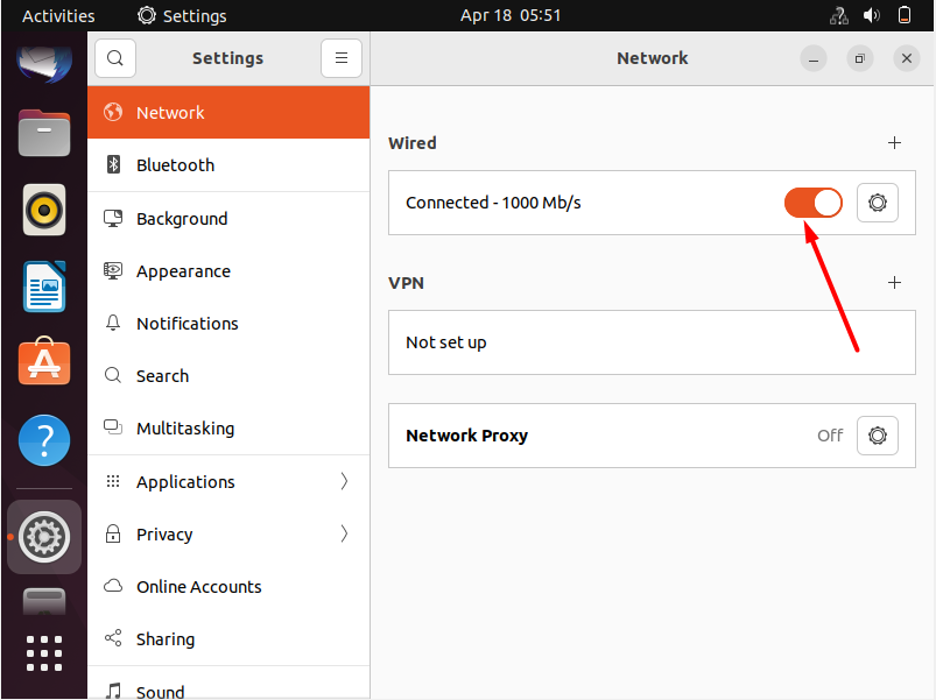
Step 4: Restart Network
Now you are required to restart your network using the toggle button provided.
Step 5: Verify Change
Now verify the changes by clicking on the gear box icon.
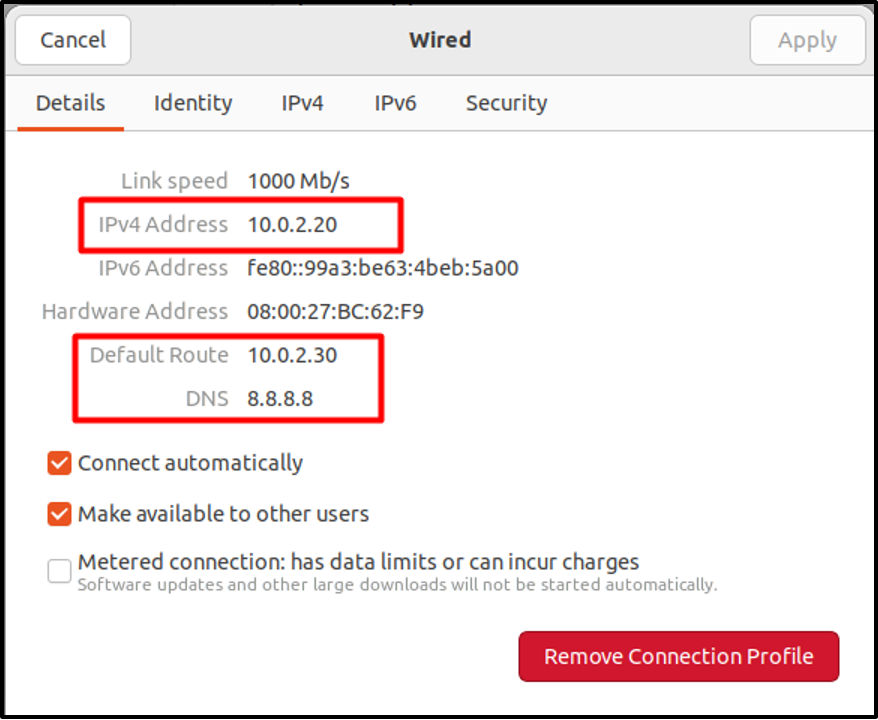
The network has been configured.
Method 2: Setting up static IP address on Ubuntu 22.04 using nmtui
Here we are going to provide you with a step-by-step guide on how to configure a network using nmtui.
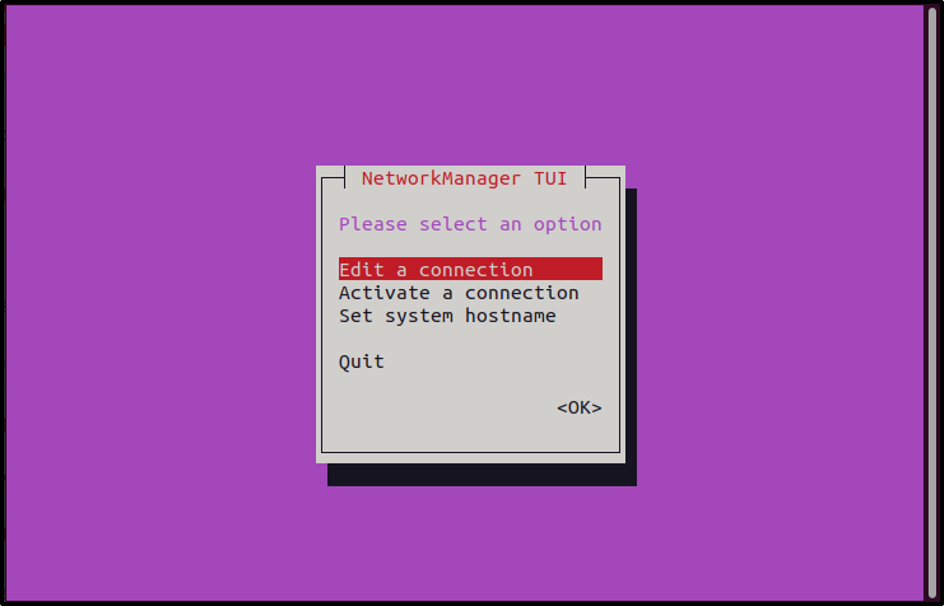
Step 1: Open nmtui
Run this command to open the nmtui menu and select the first option and press enter.
Output
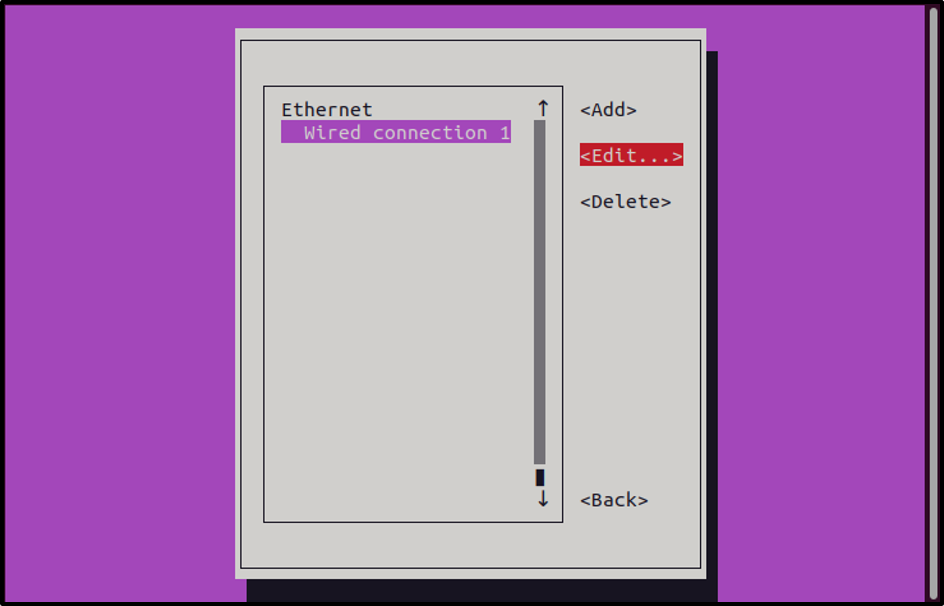
Step 2: Edit a Connection
Utilize the keyboard arrow keys for making a selection. Once selected, press enter key again:
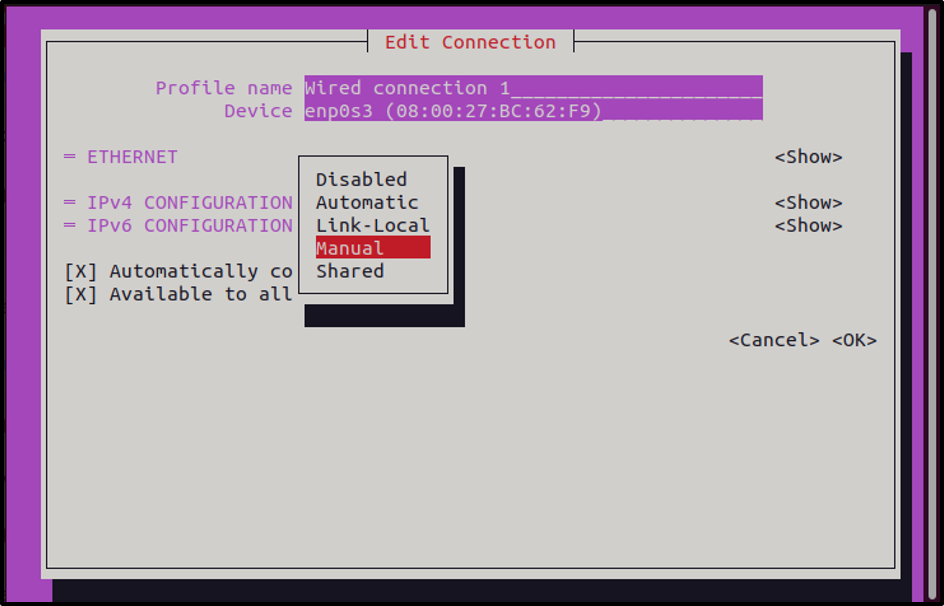
Step 3: Open Manual Settings
Using the arrow keys go to the IPv4 Configuration and bring the cursor on the ‘<Automatic>’ option. Now press enter and a menu will appear. From that menu choose the manual option:
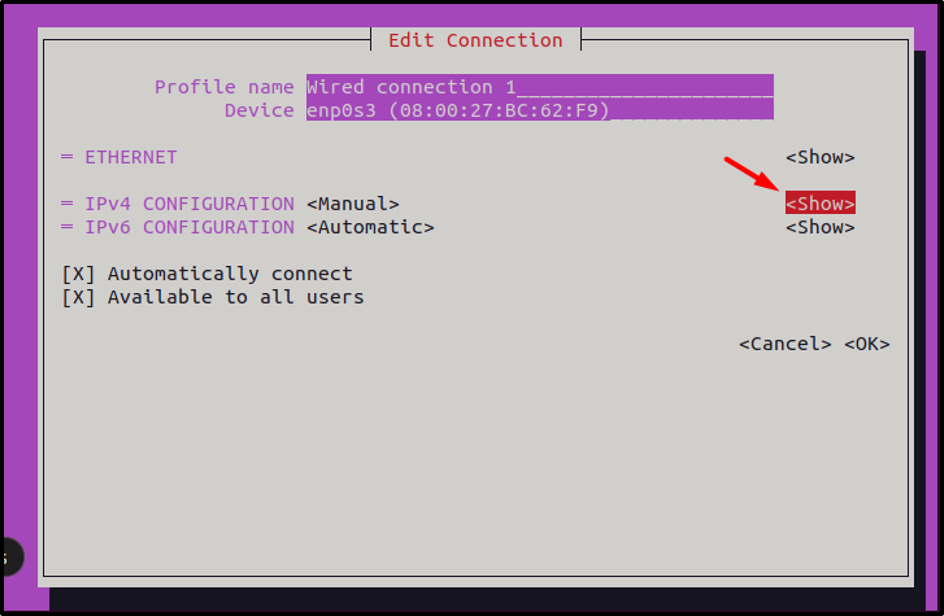
Step 4: Show Menu
Now click on the show button:
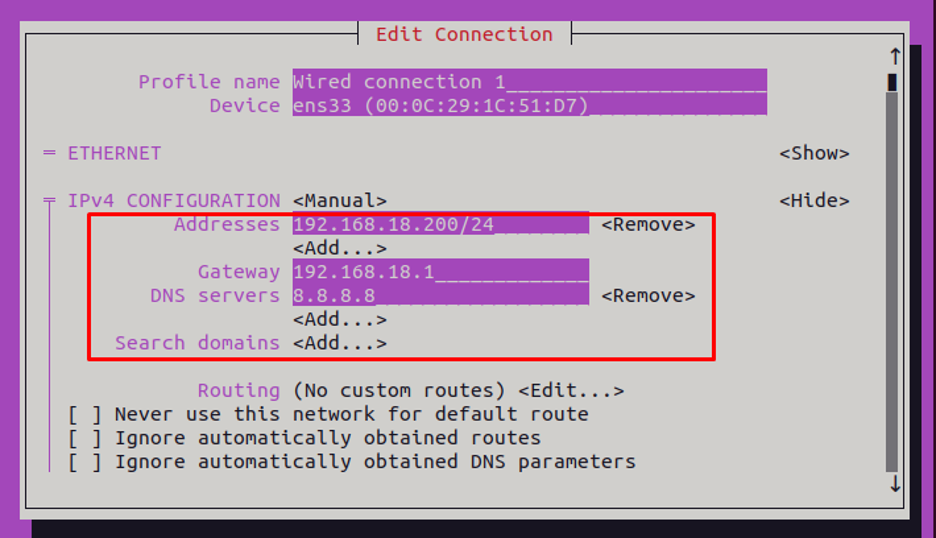
Step 5: Add Addresses
Now using the arrow keys, go to the relevant fields and set your desired address, netmask, and gateway:
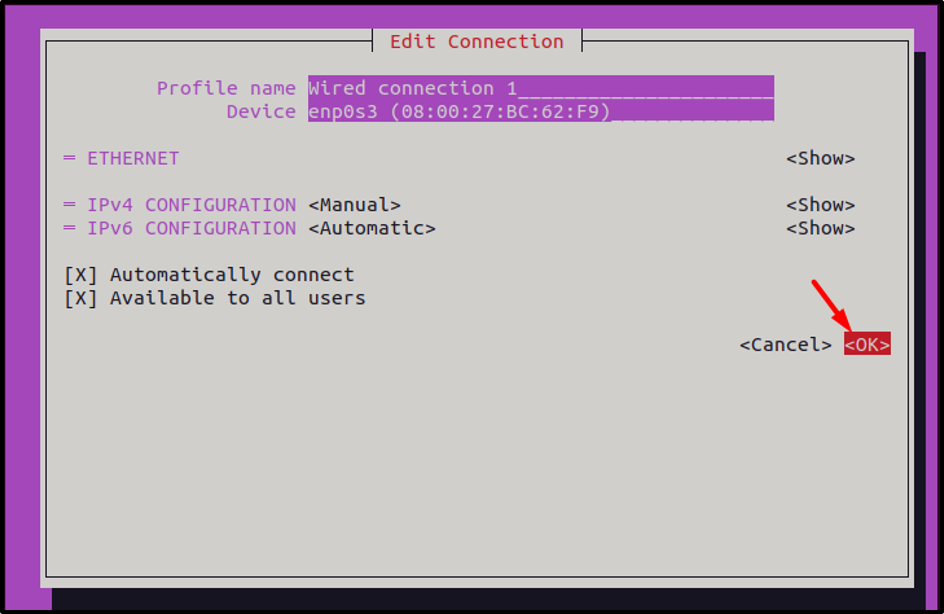
Step 6: Apply Changes
Now click OK to apply changes.
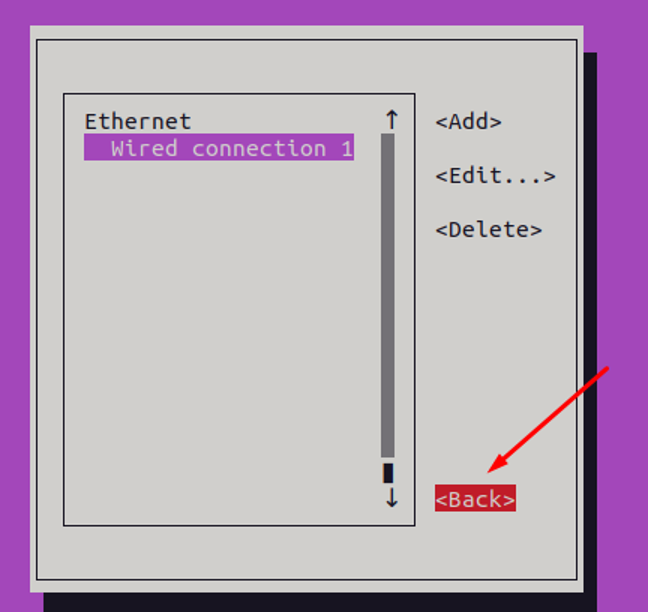
From the menu that appeared, go back once more by pressing the “Back” button:
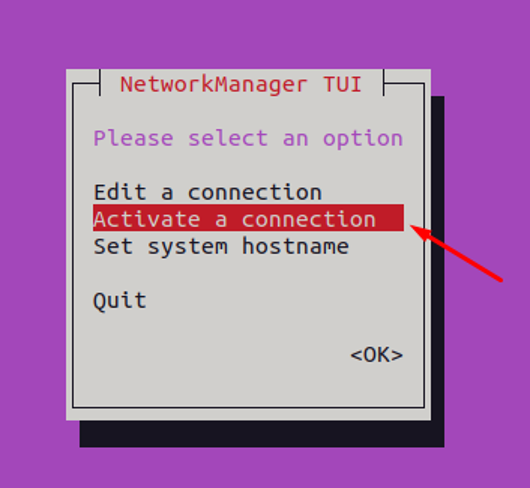
Step 7: Turn ON/OFF
Restart the network to have updated changes by going to the “activate connection” option:
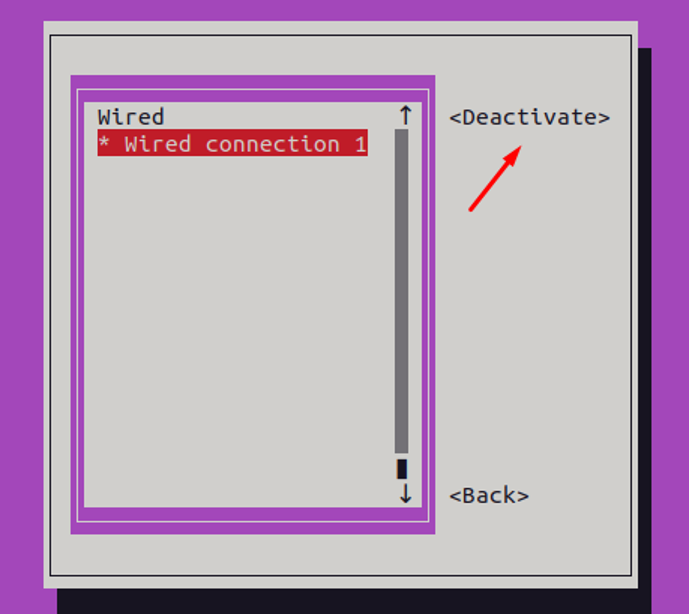
Move to the “Deactivate” option, and deactivate the connection:
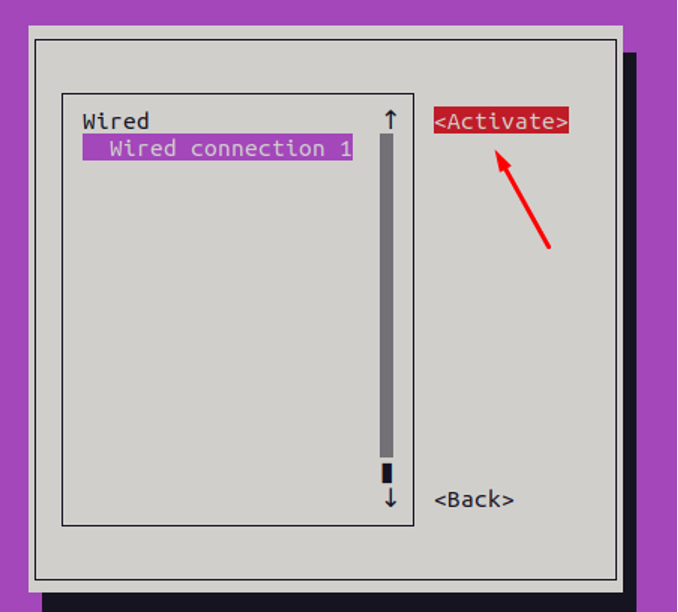
Activate again:
After restarting the network, go back and Quit from the NMTUI.
Step 8: Verify updated network configuration
To verify check the IP address of the system using the “ip a” command:
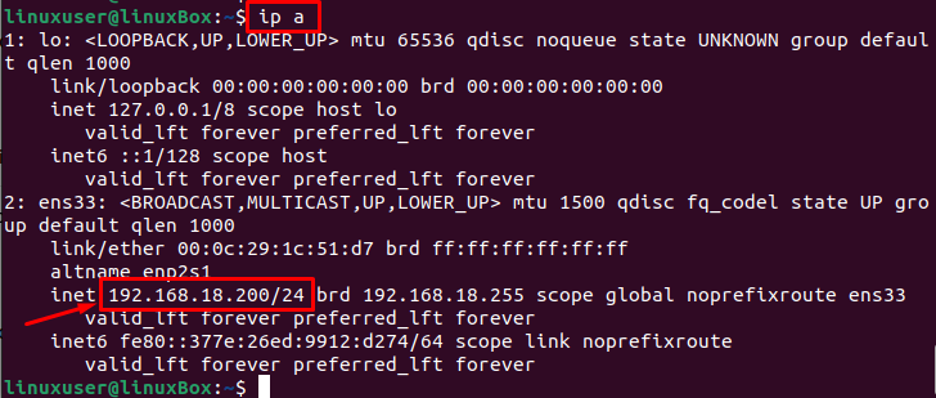
The Static IP address is set successfully using the NMTUI.
Conclusion
To configure the network manually in Ubuntu 22.04 you can either use GUI or nmtui configuration. When using GUI, you have to go to network settings choose either the IPv4 or IPv6 option and enter your desired address, netmask, and gateway. In the case of nmtui, run the nmtui command and open the menu. Once the menu opens go to the manual settings, add new addresses and configure the new network.