
When using Ubuntu 22.04, it is possible to set up a DHCP server. By the end of this guide, you will have an active DHCP server on your Ubuntu 22.04 that devices can use when connecting to your network to get their IP address.
Setting DHCP Server on Ubuntu 22.04
There are two main steps to follow to get DHCP on Ubuntu 22.04. First, you must install the DHCP server and configure it as your last step.
Before we install the DHCP server, update your Ubuntu packages.

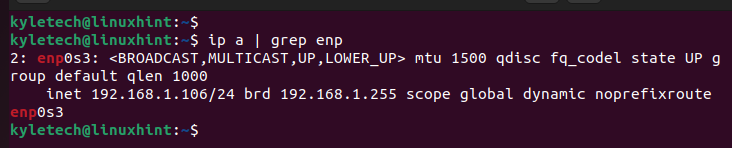
You also need to note your network interface card. It is required by the DHCP server to create the connection to the client machines. You can get your network interface using the ip or ifconfig command.
Here, our interface is enp0s3.
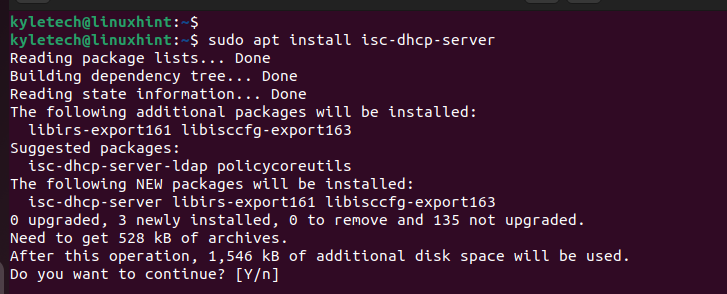
Your network interface may be different from our case. To install the DHCP server, run the command below.
Press the y option to continue with the installation.
With the DHCP installed, you must configure it to use your network interface card to handle client requests.
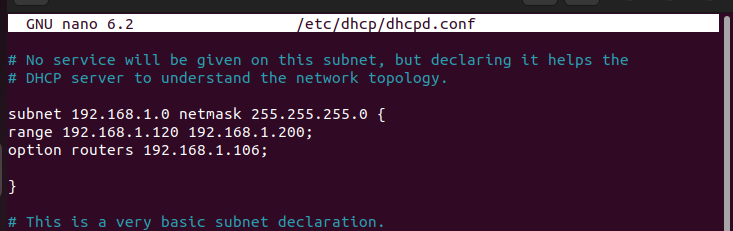
Open the configuration file for the DHCP using an editor of choice.
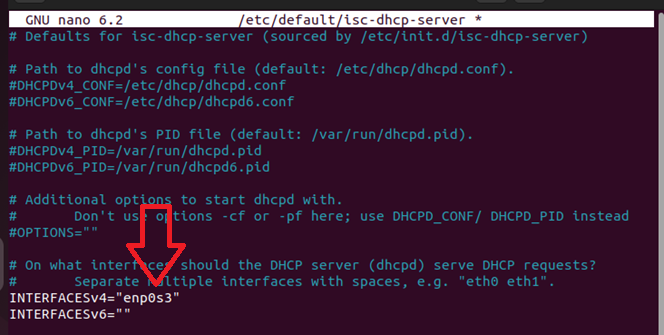
Locate the INTERFACEv4 and add your network interface. If you have multiple interfaces, you can separate them with a space and include them in the definition of the v4 network interface.
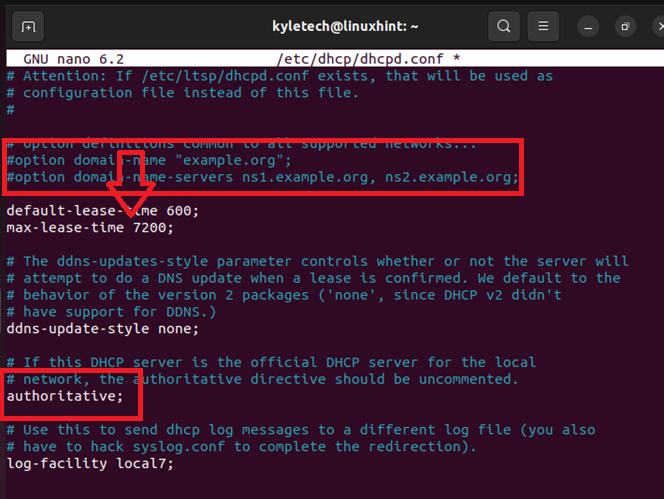
Also, comment out the domain name servers by adding a # at the start. Locate the authoritative line and uncomment it by removing the # at the beginning. Doing so makes the DHCP the official server for your local network.
For the lease time, feel free to specify any duration. If the client machine does not request a specific lease, they will be assigned the default-lease-time. Moreover, the longest lease time that can be assigned to any client is the max-lease-time.
DHCP also requires you to define the subnet address and the IP range. Ensure you set the correct IP ranges depending on your network interface. You must define the subnet, netmask, option routers, and the IP address range so that devices that connect to the DHCP will be assigned the IP address.
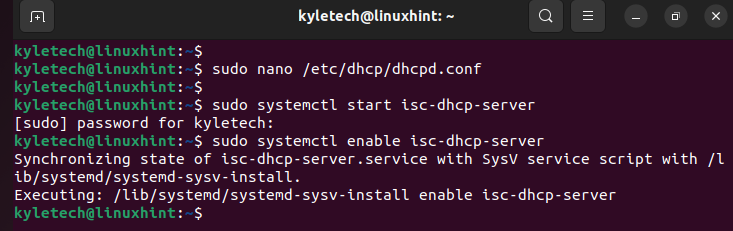
Save the file and exit the editor mode. At this point, your DHCP server is installed and configured. All that is remaining is to start it and set it to start at boot time.
Start the DHCP server and enable it using the commands below.
$ sudo systemctl enable isc-dhcp-server
Your DHCP server on Ubuntu 22.04 is created, started, and enabled. It is now ready for use and clients can connect to it to get assigned IP addresses automatically on your local network. You can verify that your DHCP server is working fine by checking its status using the command below.
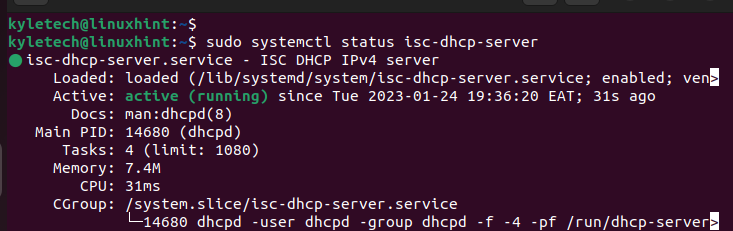
If you get its active status, your DHCP server is up and running. Any client machine connecting to it will get assigned an IP address for the IP range we defined in the configuration file. That’s how to set up a DHCP server on your Ubuntu 22.04.
Conclusion
Configuring the DHCP server on Ubuntu requires first installing the DHCP on your system. Once installed, you must edit its configuration file to define different parameters, such as the IP range, subnet, and netmask. Besides, you must comment and uncomment different parameters in the configuration file. This post has covered all the steps to create an active DHCP server on your Ubuntu 22.04.