One such sector in the computer world is that of memory storage, which has quickly moved on from traditional hard disks to a newer, faster type of storage called a solid-state drive, or SSD for short. SSDs are extremely fast, require less power, and are more shock-resistant than HDDs. You can see this for yourself by benchmarking your SSDs. Benchmarking is the process of measuring the performance of any tool, which can be done using a benchmarking utility.
This article looks at two of the best utilities available for SSD benchmarking in the Linux operating system, Disks and hdparm.
Tools to Use for Benchmarking SSDs
Linux offers a wide collection of tools to its users, each of which is catered to meet the interests of different user types. From among the large collection available, users can easily choose the tool with which they are most comfortable. The same is the case with SSD benchmark utilities. There are several excellent benchmark utilities available for Linux, including KDiskMark, sysbench, sysstat, Phoronix Test Suite, and more.
In this tutorial, we will look at two tools, both of which come preinstalled in most Linux systems. One of the utilities will be a GUI-based tool, and the other utility will be a command-line-based tool.
For users who prefer using the GUI, Disks is the best option. Disks is a powerful GUI disk management tool that comes preinstalled in almost every Linux system. This utility has an extremely easy-to-use interface, and you can easily check your benchmark results using this tool. The other tool that we will look at is hdparm, a simple command-line application that includes the option to check out the performance of storage devices.
Benchmarking SSDs Using Disks
As mentioned before, Disks comes preinstalled in almost every Linux system. However, if this tool is not present in your system, run the following command in the terminal to install Disks:
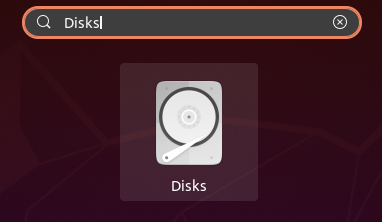
To open Disks, search for the application in the search bar, and an application with the name Disks and a CD icon will appear in the results list.
Click the icon to open the Disks application. The window that opens will contain all storage devices present in your system. Scroll down to find the SSD device that you would like to benchmark.
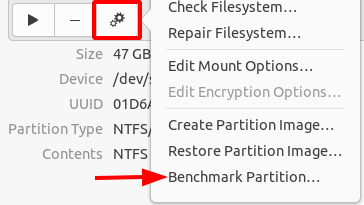
Next, click the gear icon below the Volumes section, then select Benchmark Partition from the choices available in the drop-down menu.
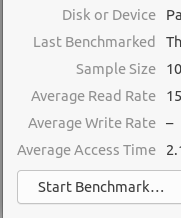
Selecting the Benchmark Partition option will open a window in which various details regarding your SSD will be present, such as the last time that it was benchmarked, the sample size selected for the benchmark process, and the average read, write, and access rates. If this is your first time benchmarking the SSD, then everything else, apart from the name of your Disk, will appear blank.
To start the Benchmark process, click the Start Benchmark button found in the bottom-left corner of the window.
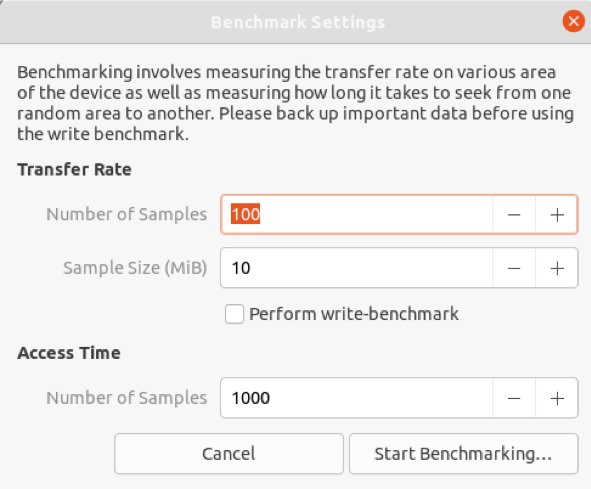
After clicking this button, a new window will open. In this window, there will be various options, such as the Transfer Rate and the Access Time. For the Transfer Rate, you must specify the number of samples you want for the benchmark process and define the total size of these samples. There is also a Perform write-benchmark option present, which you should disable if you do not want your data in the SSD to get overwritten. Note that if you do go for a write benchmark, be sure to backup all your data, as it will be erased in the overwrite.
Finally, once you are finished setting up everything, click the Start Benchmarking button, and the benchmarking process will start. During the benchmarking process, the average reading, writing, and access times will continue updating. Once the process is complete, your results will appear.
An HDD will have results similar to the following:
As you can see in the results above, SSDs are nearly ten times faster in both reading and accessing the data.
Benchmarking SSDs Using hdparm
Hdparm is a command-line performance-testing tool that comes preinstalled in almost every Linux system. If hdparm is not present in your system, run the following command in the terminal to install hdparm:
To benchmark your SSD using hdparm, open your terminal and issue the following command:
DeviceName refers to the name of your SSD. You can easily verify this output by running the following command:
Here, the output one refers to a hard disk, while the output zero refers to an SSD. The result we get from this is as follows:
Meanwhile, the result we get from an HDD is:
As you can see from the results, SSDs are once again much faster than hard drives.
So, Why Should You Benchmark Your SSD?
Benchmarks are an excellent way to test the performance of your storage devices and also other computer parts. These utilities also allow users to compare their results with others, and check whether improvements are needed.


