Table of Contents:
- What is Microsoft Windows Defender
- Why Managing Windows Defender Using PowerShell Gives Extra Edge Over Windows Security App
- Why Should You Never Turn Off the Windows Defender
- How to Turn on Windows Defender Using PowerShell
- Conclusion
What is Microsoft Windows Defender?
Windows Defender (Microsoft Defender) is the Windows default antivirus or anti-malware application. It protects users from threats like ransomware, malware, rootkits, or spyware.
After the release of the 2016 Windows update, Microsoft implemented the fail-safe method. Whenever a user turns off the Windows Defender, it gets turned back on due to the fail-safe method.
Why Managing Windows Defender Using PowerShell Gives Extra Edge Over Windows Security App?
PowerShell has dedicated commands to manage the Windows Defender. It can manage settings that are not visible in the GUI settings. Similarly, Windows Defender has some settings that are not visible in GUI settings. But PowerShell users can view and manage it by creating customized scripts.
Why Should You Never Turn Off the Windows Defender?
Keeping your Windows Defender on is always recommended. Otherwise, Windows system files will be exposed to malicious threats. It is never recommended to disable the Microsoft Defender. But, there comes a need to disable it when you want to install a program. That particular program requires the condition to disable the Windows Defender. Only turn it off, when you have some third-party antivirus already installed and it is running.
How to Turn on Windows Defender Using PowerShell?
There are many built-in utilities for Windows Defender management. These tools include Settings, Group Policy Editor, Regedit, Control Panel, CMD, or PowerShell. Yet, in this very guide, we will only enable Windows Defender using PowerShell. But before diving into the process of enabling Windows Defender. First, check its state to confirm whether it is running or not.
Check the State of Windows Defender
It is a must to check the state of Windows Defender before making any move toward its management. For that purpose, check the mentioned steps:
Step 1: Launch PowerShell as an administrator from the Start menu:
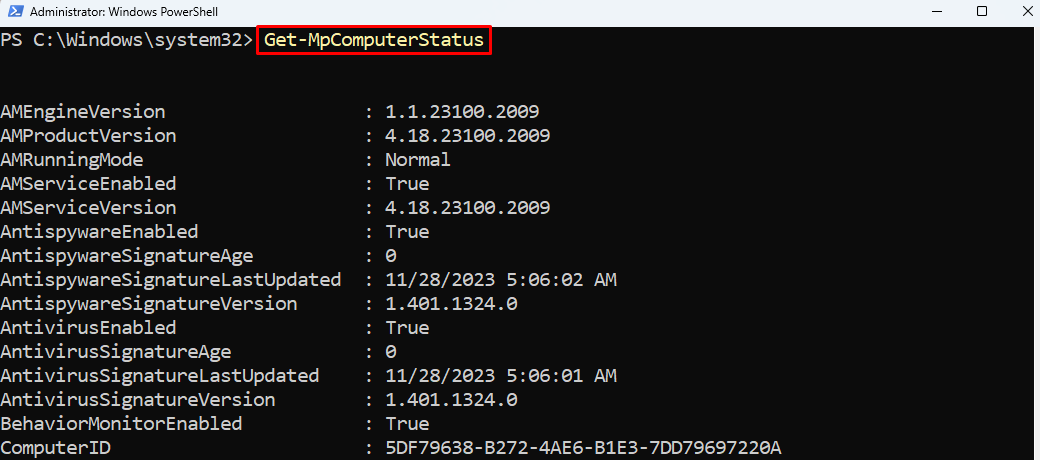
Step 2: Execute the provided code to check the state of Microsoft Defender:
In the output, locate the AntivirusEnabled option. If it is set to True then the Windows Defender is running. If it is False, then it is disabled.
Enable the Tamper Protection
One of the prerequisites to enable the Windows Defender is to turn on the Tamper Protection. Microsoft has included the fail-safe method Tamper Protection feature. If it is enabled, then turning off the Windows Defender will turn it back on, due to the fail-safe method. So, it is advisable to enable the Tamper Protection before enabling Windows Defender.
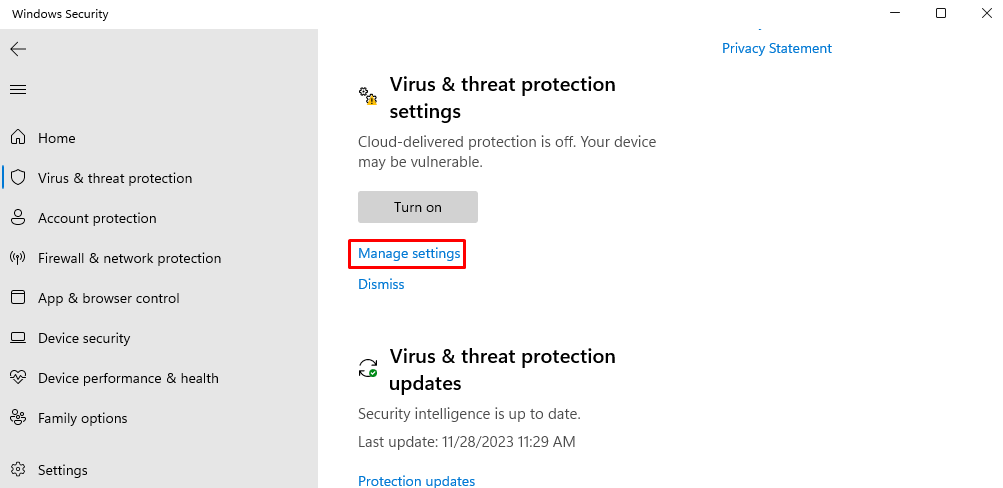
Step 1: Open Windows Security application:
Step 2: move to Virus & Threat Protection> Manage Settings:
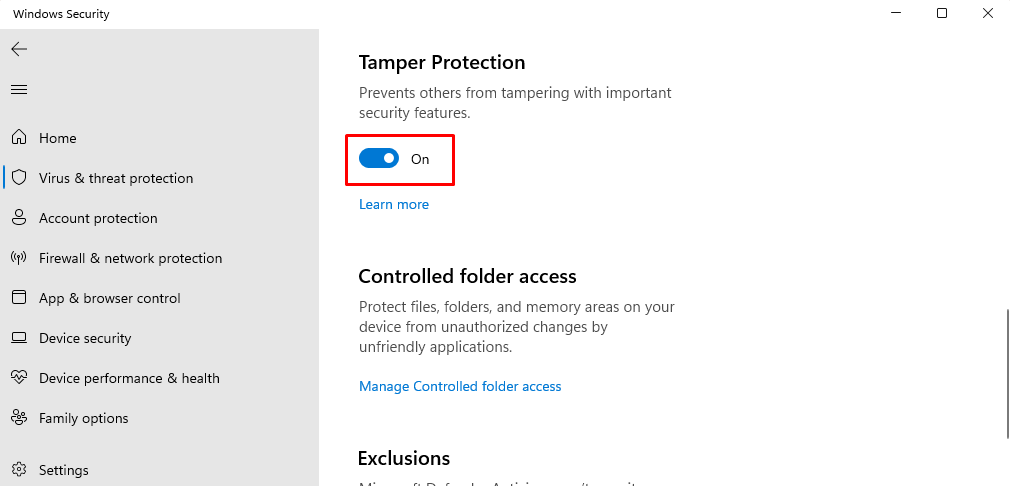
Step 3: Locate Tamper Protection and enable it:
Turn on Windows Defender Using PowerShell
When Tamper Protection is turned on. Then, move on to disabling the Microsoft Defender. To disable Windows Defender, here are the steps mentioned:
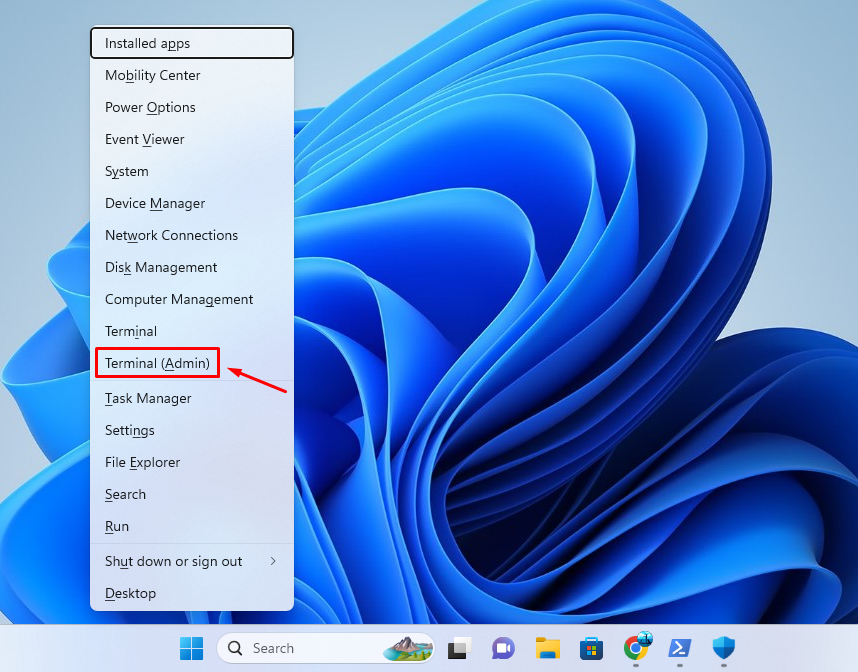
Step 1: Press the Windows + X and select Windows PowerShell(Admin):
Step 2: Type the provided command in the console and hit Enter:

Note: To disable Windows Defender using PowerShell, set the -DisableRealtimeMonitoring parameter to $True.
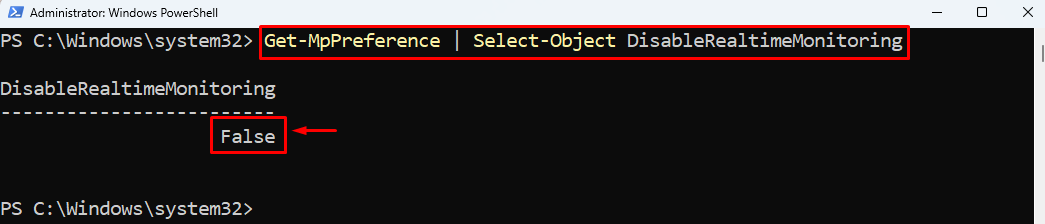
To check that Windows Defender is enabled, type the given command in the console and press Enter:
This will tell whether the Windows Defender is running or it is disabled. This will return a Boolean value, If it returns the value False then Windows Defender is running. If it returns True then it means that Windows Defender is still disabled:
Conclusion
To turn on Windows Defender using PowerShell. Open PowerShell as an administrator. Type the Set-MpPreference -DisableRealtimeMonitoring $false command and press the Enter key. To verify whether the Windows Defender was enabled or not. Execute the Get-MpPreference | Select-Object DisableRealtimeMonitoring command. If it returns False then it means the Windows Defender is enabled. If it displays True, then, it is still disabled. Read the guide above to learn the method to enable Windows Defender using PowerShell.