How to install Tree command in Ubuntu
Firstly, you have to install the tree as it is not available by default; so, if you have not installed the tree command yet, then use the following command to install it:
How to use Tree command in Ubuntu
Once it is installed; execute the following command to get the detailed usage of the tree command. The syntax of tree command is:
tree [options] [directory]
The syntax consists of two items: options and directory: options are used to display the result of tree command according to some specific property. For instance, options can be used to get the output in various ways, such as: in alphabetical order, to display only directories, to check the size and location of files or directories. However, If you want to get the result of a specific directory, then you will put the directory name in replace of the “directory” keyword that is used in syntax.
General command output : You can get the print (on the terminal) of the directory’s content in the tree structure by executing the following command. The command will print the content of the present working directory:
Tree command has displayed a total of 18 directories and 13 files:
How to use options with tree command in Ubuntu
We have seen the general use of tree command; moreover, there are various options that are used to perform specific tasks within the present directory or the path of any other directory.
How to use -a option with tree command
Generally, the tree command does not print the content of hidden directories; this option helps to print the content of hidden directories as well; the syntax to use this flag is shown below:
tree -a [directory]
The command given below will help to get the hidden content of the present working directory:
You can observe that the tree command only printed 18 directories and 13 files, whereas; the same command, when used with the “-a” flag, displayed 215 directories and 256 files.
How to use -d option with tree command
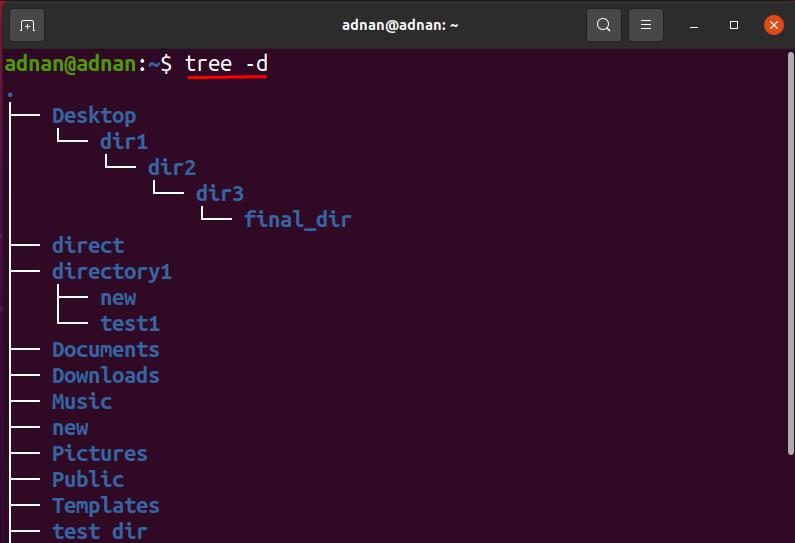
This option is used with tree command to only list down the directories of the targeted directory; the syntax of tree command with the option “-d” is given below:
tree -d [directory]
The command given below will only print the directories inside the current directory:
Other than the present working directory; For, instance you want to get the directories list of the “Desktop” directory, then execute the following command to do so:
How to use -f option with tree command
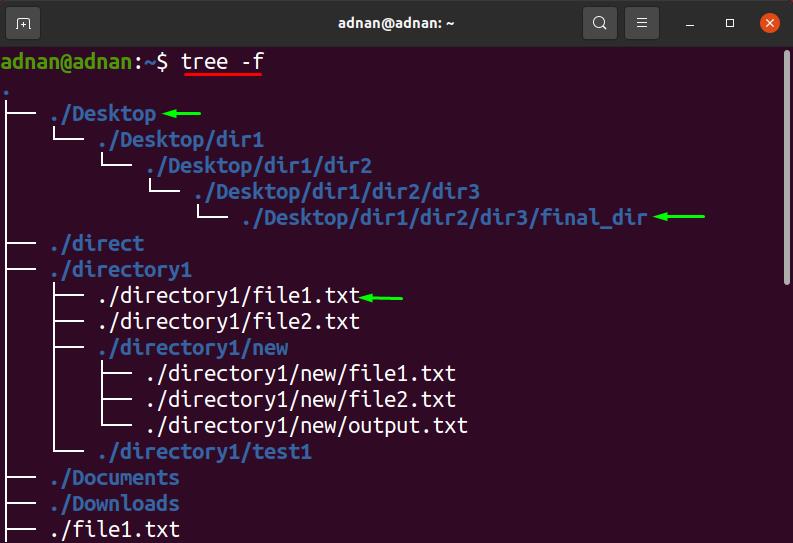
Tree command, when used with the “-f” option, shows the path prefix of every file in a tree structure: syntax to use this option is shown below:
tree -f [directory]
The command given below will show the path of every directory or file present in the current directory:
Moreover, you can get the result of this command for any directory other than pwd; For instance, to apply the “-f” flag on the “Desktop” directory; use the path of the directory, or you can pass the name of the directory if it is sub-directory of your pwd.
How to use -o option with tree command
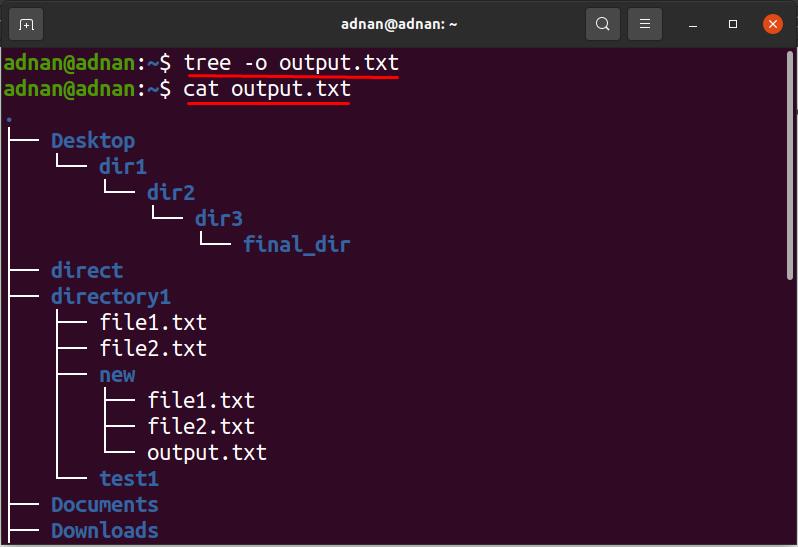
With the help of using this option, you can get the output of the tree command in any other file; the syntax to use this flag is mentioned below:
tree [directory] -o [filename]
The below-stated command will save the output of the tree command to a file named “output.txt“:
You can get the output of any specific directory for this option: the command below will save the output of the tree command (Desktop directory) in the “output1.txt” file:
How to use -Q option with tree command
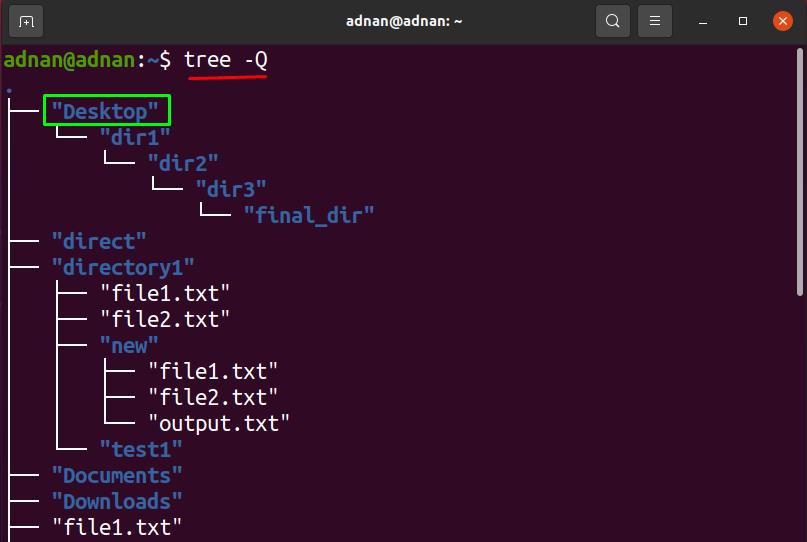
This file listing option of a tree will display the names of files in double quotations; syntax to use this flag is given below.
tree -Q [directory]
To print the file names in double-quotes; execute the following command to get the output of the present working directory:
Moreover, the command given below will show the file and directories name (of Desktop directory) in double-quotes:
How to use -p option with tree command
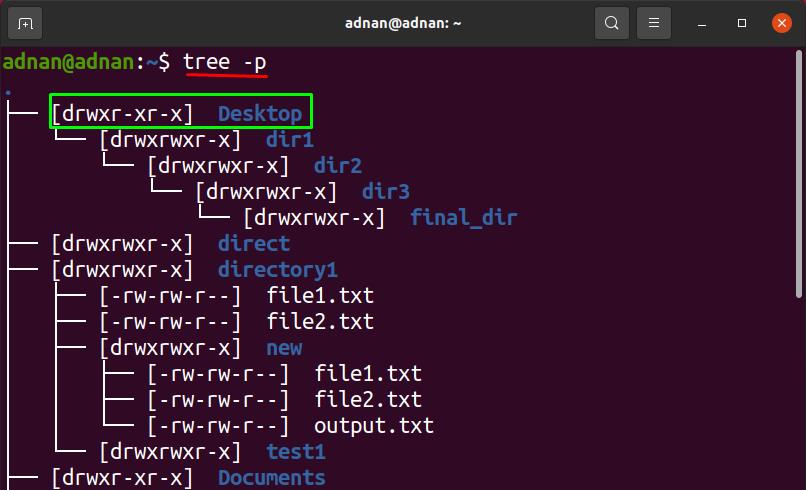
By using the “-p” flag, all the file types and permissions to each file are printed in a hierarchical structure: the syntax of the tree along with this option is given below:
Syntax
tree -p [directory]
the command given below will show the use of this option on the present working directory:
Using the “-p” flag on the directory named as “directory1“; that is present in our home directory: the following command will give the result of the “-p” flag on “directory1“:
How to use -s option with tree command
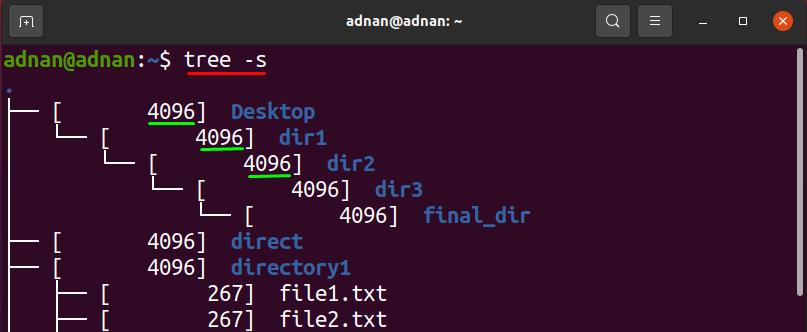
You can get the display of size (in bytes) of all files by using the “-s” flag; the syntax is given below:
tree -s [directory]
The command given below will show the size of the files inside the current working directory:
To check the size of a specific directory; pass the path, or you can pass the name only if the directory lies in the present working directory: the following command will print the size of files present inside “directory1“:
How to use -h option with tree command
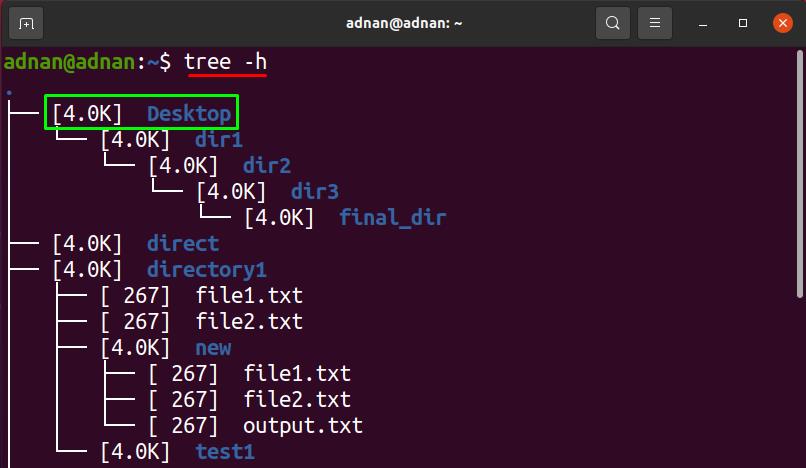
This option will also display the size of each file and directory, but in KB’s, MB’s, GB’s, etc. The “-s” flag displays the result in bytes, but the result contains only numeric values; a novice user may not get the measuring unit.
tree -h [directory]
The command given below will help to get directories, files, and their sizes in tree shape:
The command mentioned below will get to the result of “-h” for “directory1“:
How to use -t option with tree command
This option will sort the files and display the output as the modification time of the files; the syntax of the “-t” flag with tree command is given below:
tree -t [directory]
The command given below will print the files according to their modification time in alphabetical order:
In our case, the following command will display the result of the “-t” flag (on the “Desktop” directory):
How to use -r option with tree command
This option will sort the output of the tree command in reverse alphabetical order; the syntax is shown below:
tree -r [directory]
The command given below will print the files in reverse alphabetical order of the current directory:
To get the alphabetic order list of files present in “directory1“, execute the following command:
How to use -L option with tree command
This option will limit the number of branches of tree command; the syntax to use this option is given below:
tree -L [numeric number] [directory]
This option will limit the number of branches of a tree to 1:
To get the shortlist of the “directory1” directory; the following commands will do the job:
Conclusion
Ubuntu supports several useful commands to handle directories and files; tree command is one of them. In this guide, the tree command is explained in detail; its basic use is to print the directories and files in a tree-like hierarchical structure; moreover, tens of flags are supported by a tree command that shows the output with specific properties. One can join multiple options at a time to attain more purified results in a single command.


