S3 (a simple storage service) is a highly available and scalable storage service provided by AWS. It provides almost infinite storage, but you will only be charged for what you use from this storage. S3 stores your data in multiple places so you do not lose your data in case of disaster. That is why S3 can be used to backup your important data.
While working on EC2, sometimes you need to store some important data from EC2 instance to S3 regularly, like database backups or some other important data as a backup because EC2 servers may crash on AWS, and you may lose all your data. In this blog, we will discuss how we can move important data from EC2 to S3.
Installing awscli package
First, you need to install the awscli package on your EC2 instance. The awscli package is used to interact with AWS using the command line interface. Check the version of the awscli package to verify if it is already installed or not.
To install the awscli package, first, download the packaged zip file using the curl command.
Unzip the package using the unzip command.
Install the awscli package using the following command.
Enable S3 access on EC2 instance
After installing the awscli package, now enable S3 access on the EC2 instance so the EC2 instance can store data to S3. There are two ways to grant access to the EC2 instance. You can use any of them to grant access.
- Grant access using IAM role (recommended way)
- Grant access using Access key ID
Grant access using IAM role (recommended way)
EC2 instances can be granted access to upload files on S3 using the IAM role. An IAM role with access to upload data on S3 is created and attached to the EC2 instance.
NOTE: Never grant extra permissions using the IAM role. If someone else gets access to your EC2 instance, he can use it to provide extra resources to your account.
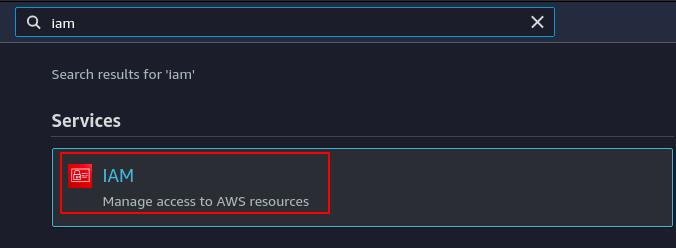
To create an IAM role, first, create an IAM policy with specific permissions. Login to the AWS management console and search for IAM in the search bar.
Click on the ‘Policies’ from the left side panel under ‘Access management’.
Now click on the ‘Create Policy’ button appearing on the right side.
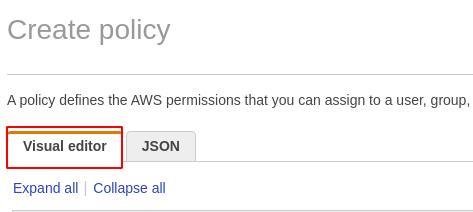
It will display a page to create a policy. Select the ‘Visual editor’ tab from the top.
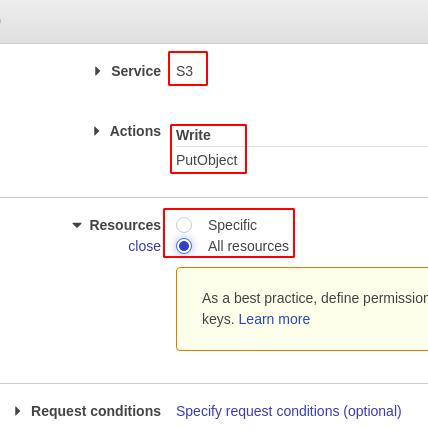
From the visual editor, select S3 as service, PutObject under the writing category as action, and All Resources as a resource.
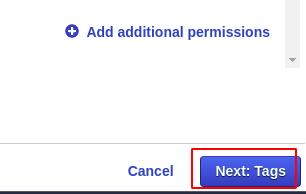
After specifying the service, action, and resource, now click on the ‘Next’ button at the bottom right corner.
The tags are optional and can be skipped by clicking on the ‘Next’ button at the bottom right corner.
Add the name of the policy on the review page and click on the ‘Create Policy’ button to create the policy.
After creating the IAM policy, click on the ‘roles’ from the left side panel in the IAM console.
Click on the ‘create role’ button to create a new role.
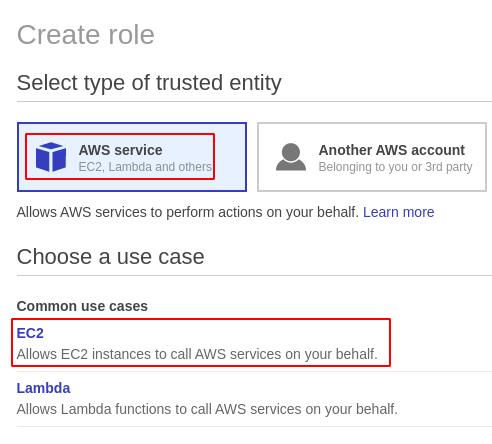
Select ‘AWS service’ as a trusted entity and ‘EC2’ as a use case and click on the ‘Next’ button to add permissions.
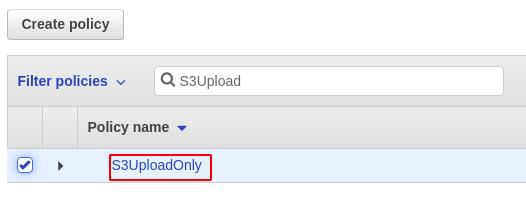
For permissions, select the IAM policy created in the previous step and click on ‘Next’.
Add the role name and click on the ‘create role’ button to create the role.
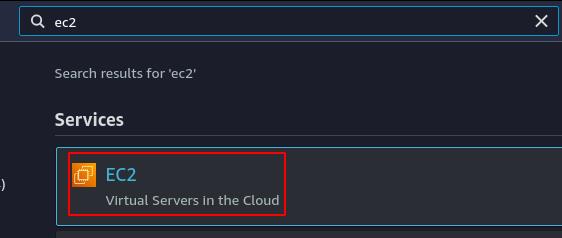
Now the IAM role has been created; it is time to attach it to the EC2 instance. Search for the EC2 in the AWS management console.
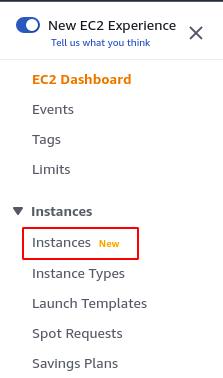
Click on the ‘instances’ from the left side panel, and it will display all the instances.
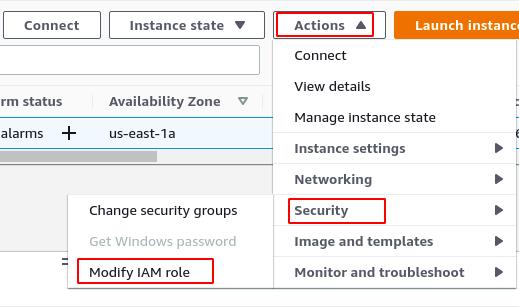
Select the instance you want to grant access to upload files on S3 and click on the ‘Actions’ button on the top right corner of the console. Select the security > Modify IAM role from the drop-down menu.
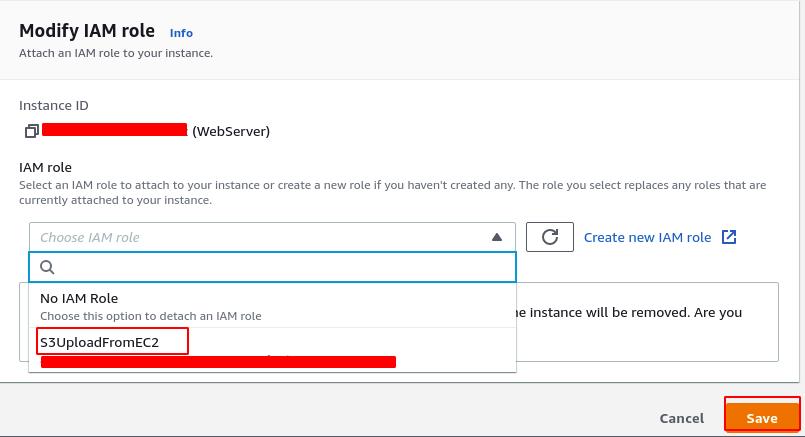
Select the previously created IAM role and click on the save button. Now the EC2 instance has been granted access to upload files on S3.
Grant access using Access key ID
To grant access to EC2 an instance using the access key, first generate a new access key from the IAM console. From the IAM console, click on the ‘Users’ under the ‘Management access’ from the left side panel.
Click on your user account and go to the ‘security credentials’ tab from the user’s list.
Under the ‘security credentials’ tab, click on the ‘create access key’ to generate a new access key.
Download the csv file containing the access key id and secret access key.
After generating the Access key ID and secret access key, log into the EC2 instance using SSH and configure the access key.
It will ask for an access key ID and the secret access key. Provide the credentials we just generated.
Now the EC2 instance has access to upload the files on S3 using the command line interface.
Upload files to S3 from EC2
Before uploading the files to S3, first, create an S3 bucket. From the management console, search for S3.
From the S3 console, click on the ‘create bucket’ button.
Enter the name and the region of the bucket, leave the rest of the settings by default and create the bucket. The name of the S3 bucket must be universally unique.
Now log into your EC2 instance using SSH and upload the file to S3 using the command line interface. The syntax to upload the file to S3 is as follows.
To copy a file named file.txt to S3, use the following command.
To verify if the file is present in the S3 bucket or not, use the following command.
The file has been copied to the S3 bucket. Instead of copying a file to S3, we can also move the file to S3.
Conclusion
Files from EC2 instances can be saved as a backup by uploading them on S3 (simple storage service). This blog describes the procedure to upload files from EC2 to S3 using two different ways, i.e., using the IAM role and Access key ID. After reading this blog, I hope you can easily transfer files from EC2 to S3 using either way.


