This post will provide a procedural guide for creating an S3 Bucket policy using Terraform.
Prerequisite: Installation of AWS CLI and Terraform
Download and Install the AWS CLI and Terraform in your system. After the completion of installation, check whether they are successfully installed or not, so for AWS type this command:

It is visible that the AWS is successfully installed in your system.
For Terraform type:

In the output above, it is visible that Terraform is successfully installed in your system.
The next step is to configure your AWS account using the following command and by providing the required details:

Note: To learn how to configure AWS CLI, Read Here!
You are ready to code for creating and managing your AWS Cloud resources and services using Terraform.
Create S3 Bucket Policy Using Terraform
To create a Terraform file, first let’s create a directory in which you will work by typing:
Open the directory with any code editor:
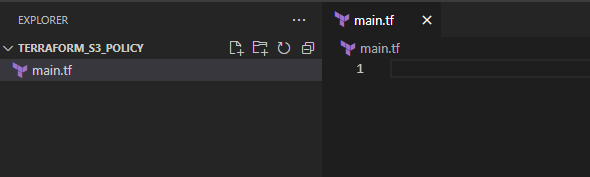
Create a Terraform file named “main.tf” to store the code:
Provide this code to declare that AWS Provider is being used:
required_providers {
aws = {
source = "hashicorp/aws"
version = "~> 4.0"
}
}
}
Write the code for to mention Provider region, in which resources will be created:
region = "us-east-1"
}
Code for the creation of S3 Bucket for which you will create a policy later in this post:
bucket = "linuxhintbucket"
tags = {
Name = "My Bucket"
Environment = "Dev"
}
}
Let’s declare whether the bucket objects will be publicly accessible or not, by setting it to “true” means, it will not be public:
bucket = aws_s3_bucket.linuxhintbucket.bucket
block_public_acls = true
block_public_policy = true
}
The next step is to do the configuration for server-side encryption using AWS Key Management Services, by coding:
bucket = aws_s3_bucket.linuxhintbucket.bucket
rule {
apply_server_side_encryption_by_default {
sse_algorithm = "aws:kms"
}
}
}
Do the configuration of S3 Lifecycle, to set of rules with predefined actions for S3 Bucket to perform on objects during a lifetime, type:
bucket = aws_s3_bucket.linuxhintbucket.id
Set rules according to your preference, for this post “rule-1” is for “logs” of S3 Bucket:
id = "rule-1"
filter {
and {
prefix = "logs/"
tags = {
Key1 = "Value1"
Key2 = "Value2"
}
}
}
status = "Enabled"
expiration {
days = 7
}
}
Let’s define another rule for “tmp”, using this piece of code:
id = "rule-2"
filter {
prefix = "tmp/"
}
status = "Enabled"
expiration {
days = 7
}
}
Let’s configure bucket metrics:
bucket = "linuxhintbucket"
name = "EntireBucket"
}
After typing this code, for creating S3 Bucket policy and save the file.
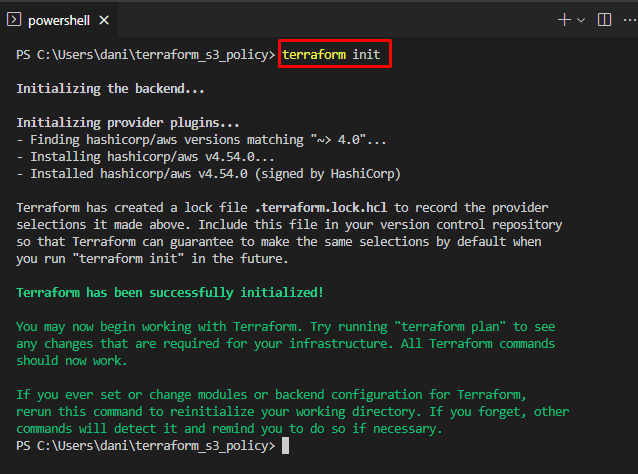
To initialize the workspace, type this command in the terminal. The terminal can be of the Code Editor or the Command Prompt in this directory:
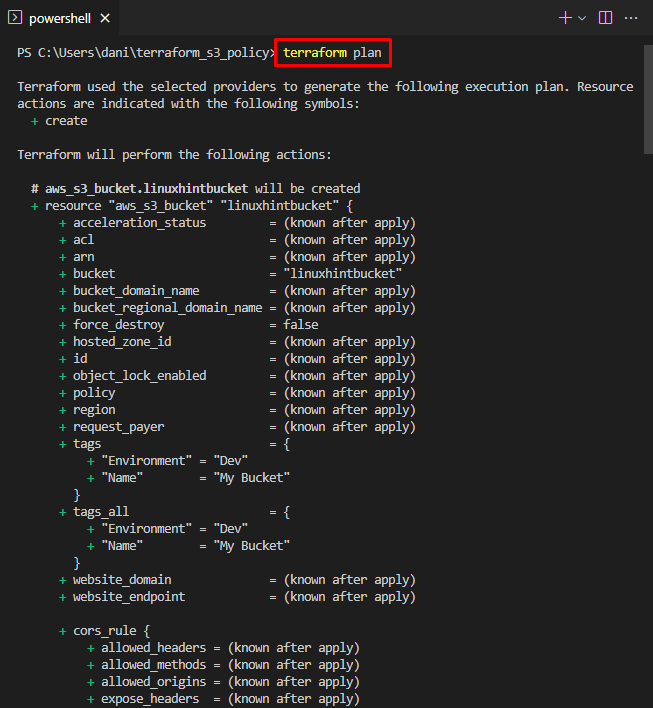
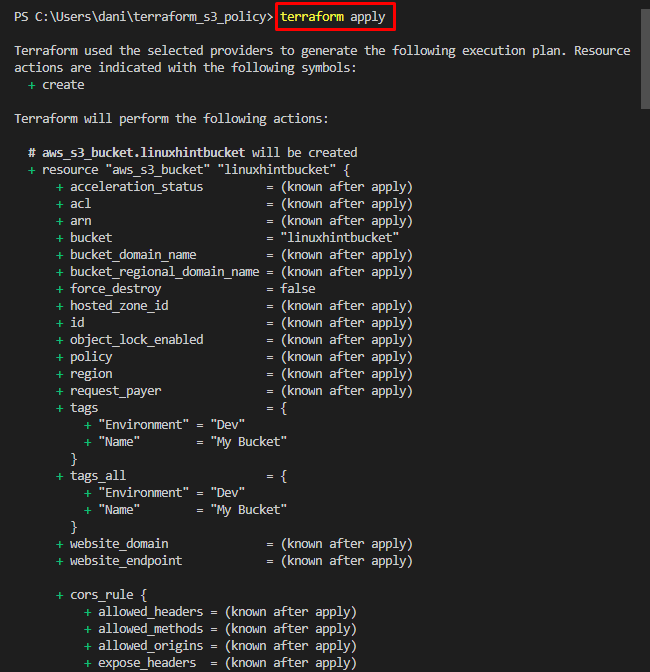
On the successful initialization of workspace, type this command to see what is going to create or change:
Type this command to execute the file:
Type “Yes” when a message for continuity appears:
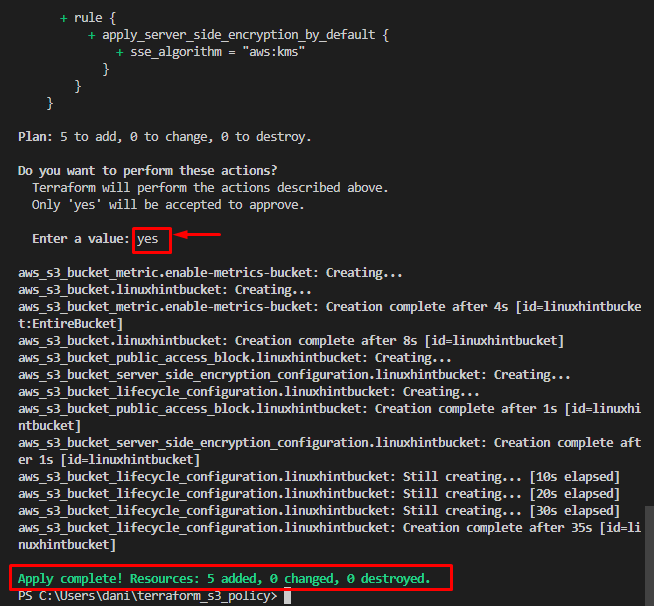
A success message is displayed, informing that 5 Resources are added successfully.
Confirm the Creation of the S3 Bucket Policy
To confirm that the Resources are added Successfully to the AWS account, In the Amazon management console, search, and open the Bucket dashboard. In the dashboard, you will be able to see the S3 Bucket you created using the Terraform file:
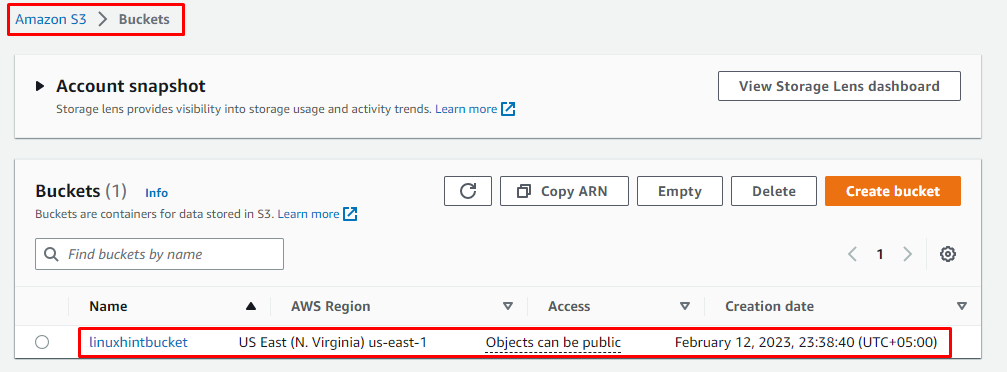
It is visible that S3 Bucket is created successfully.
The next step is to open the S3 bucket and select the “Management” tab, here you will be able to see the Lifecycle rules that were created using the Terraform file:
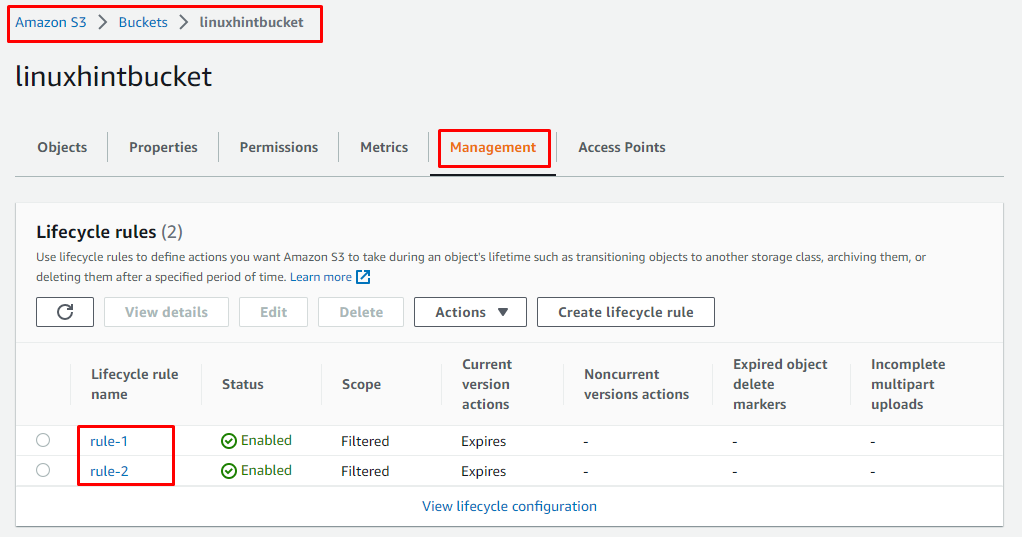
Which means that you have successfully created the S3 bucket along with the S3 Bucket policy using the Terraform.
Conclusion
To create S3 Bucket in AWS using Terraform, make sure that Terraform and AWS Cl are installed in your system. Configure the AWS CLI and create a directory, to save the Terraform file. In the Terraform file, the code for Providing the Provider AWS region details, creation of S3 Bucket, and creating policy by configuring its public access, encryption, lifecycle rules, and metrics. Lastly, initialize the workspace and execute the file to make changes.