The plays, roles, and tasks are the ansible structure and this ansible structure contains the important attribute which is called tags in Ansible. Whenever we launch a playbook in Ansible, you can employ the -tags and –skip tags commands so that we can execute only a particular series of tasks, plays, and roles. If we have a playbook that contains so many tasks, but we don’t want to execute all tasks of the playbook, instead of executing the whole playbook, we will just run a few tasks by using the tag command in the Ansible playbook.
We are going to discuss tags in this topic, which serve as one of the most important facets of Ansible. We will try to explain what tags are and how tags operate in Ansible because this is a perplexing feature of the Ansible platform.
For instance, a playbook may contain three responsibilities: installing the module, configuring it, and checking on the status of the deployed module, such as whether the service is running and accessible. Since we simply need to see the state of the modules on a few remote machines, we utilize Ansible tags in this situation rather than executing all of the tasks in the playbook. It enables us to run a certain operation exclusively, allowing us to reduce running time by keeping all related activities in a single playbook.
Prerequisites of Utilizing the Tags in Ansible Playbook
For putting the practical examples in the ansible software, we must fulfill the following requirements.
An Ansible controlling server must be required so that it will make changes. To utilize the tag parameter in Ansible software, we need the local hosts to communicate with them. In this case, we are using the local host throughout the execution as a target remote server. We will create playbooks, execute Ansible tag commands, and monitor the results on remote hosts from the ansible-controller device.
We will aim to employ different scenarios to examine a few of the Ansible tags so that the learner can easily understand the concept of tags in an Ansible playbook.
Example 01: Accessing a Single Task in Ansible Playbook
We are going to implement in Ansible by providing multiple tasks in the playbook and then we will access only a single task by utilizing the tags in it. To do so, we will create first the playbook by writing the following command:
After creating and launching the ansible_tags.yml playbook. Now we will start writing the commands in the playbook. First, we will pass the provided hosts in the “hosts’ parameter which we will use “localhost”. Then, we will write the “false” value in the “gather_facts” parameter so that we cannot get the extra information about the localhost when we execute the playbook.
After that, we will start listing the activities under the “tasks” parameter one by one that we want to execute. We will determine whether the document is there on the localhost machine in the first process. If it is available, we will store it in the “register” parameter and then we will give the unique name to the tag so that when we execute the playbook, it will be easy for us to access the tag. In the second task, we will do the same as we have done in the first task, but the tag must be unique and then we will use the debug option to showcase the task along with the related message.
- localhost
gather_facts: false
tasks:
- name: Check file existence x`
stat: path=./host.yml
register: fileExists
tags: check_file
- debug:
msg: "{{ 'File exists' if fileExists.stat.exists else 'File not found' }}"
tags: check_file
- name: Check if host.yml is accessible by current user
shell: stat -c "%a" ./host.yml
register: accessPath
tags: check_access
- debug:
msg: "{{ 'File accessible' if (accessPath.stdout|int) < 660 else 'File is not accessible' }}"
tags: check_access
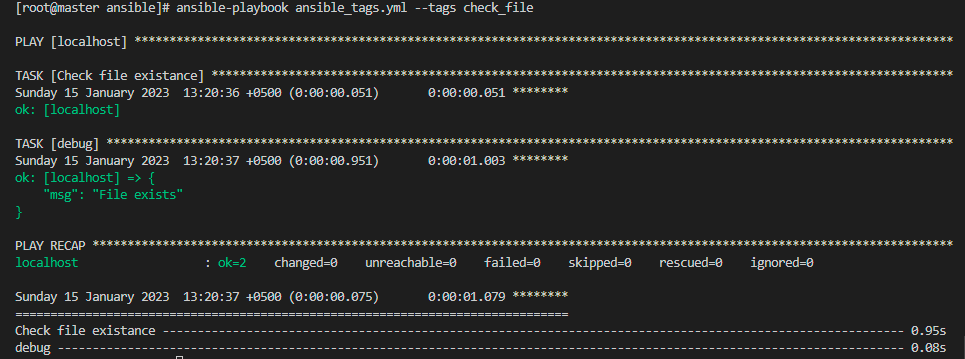
Now, we will save the playbook and then close it. We want to run the ansible_tags.yml playbook so we will write the following command in the Ansible terminal to showcase the output to the users.
After running the command above, we will get the desired output in return. As shown below, only one task is executed and that is displayed in the output which is “check file existence”.
Example 02: Ignore Particular Tag in Ansible Playbook
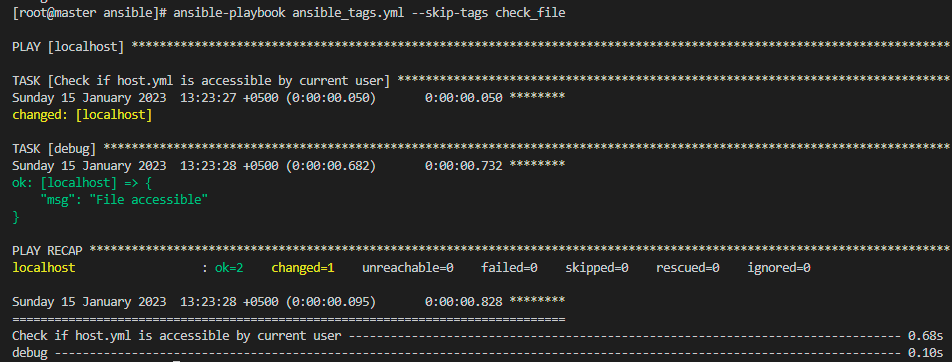
Here is the second example of the Ansible tag where we are going to the “skip” tag. It is up to you whether you want to ignore all the tasks or you want to ignore a particular task of the playbook in Ansible. We are utilizing the example 1 implementation and then we will just skip the task by simply writing the below statement in the Ansible terminal.
From the command above, we have simply ignored the “check file existence” task. Now, only a single task is displayed in the output which is “file accessible” in green font.
Example 03: Always keep Running the Task in Ansible Playbook
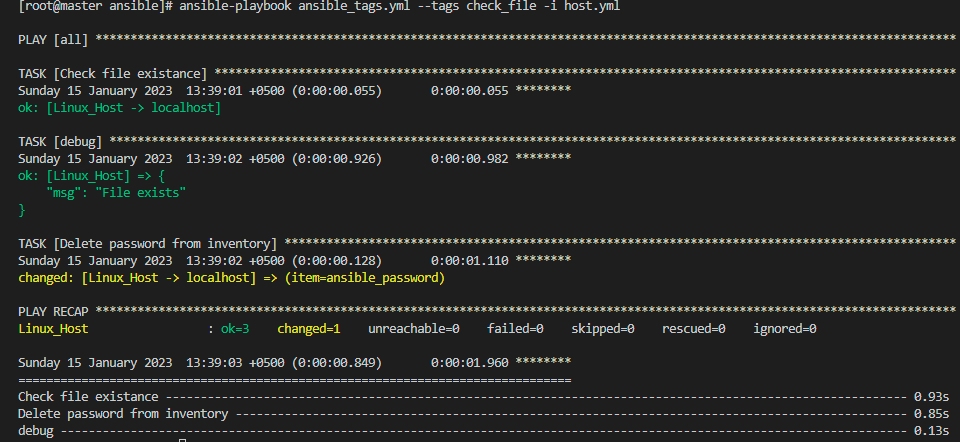
We are going to implement the third example based on the Ansible tag. In this example, we will use the “always” tag which means that a particular tag will always execute in the Ansible Playbook. To launch the playbook, use the following command:
In the playbook, we have created multiple tasks to run but we passed the “always” tag in the last task which is “delete the password from inventory”. The following are the command implemented in the playbook:
gather_facts: false
tasks:
- name: Check file existence
stat: path=./host.yml
register: fileExists
delegate_to: localhost
tags: check_file
- debug:
msg: "{{ 'File exists' if fileExists.stat.exists else 'File not found' }}"
tags: check_file
- name: Check if host.yml is accessible by current user
shell: stat -c "%a" ./host.yml
register: accessPath
delegate_to: localhost
tags: check_access
- debug:
msg: "{{ 'File accessible' if (accessPath.stdout|int) < 660 else 'File is not accessible' }}"
tags: check_access
- name: Delete password from inventory
lineinfile:
path: "{{inventory_file}}"
regexp: '\b{{item}}.*\b'
state: absent
delegate_to: localhost
become: false
tags: always
with_items:
- ansible_password
After that, we will create the inventory file to build the connection between the controller and the target remote host. Below is the command:
Here is the inventory file that contains the information related to the “Linux_host” in Ansible.
hosts:
Linux_Host:
ansible_host: 192.168.3.229
ansible_user: ansible
ansible_password: ******
ansible_connection: ssh
ansible_port: 22
To get the desired output, we will run the following command in the Ansible terminal:
Conclusion
Tags in Ansible have been explained in this article. We now understand the function of tags and the places in Ansible where we will apply them. To help the learner to understand the grasp the concept of Ansible tags, we have developed a variety of examples.