In this guide, we will discuss:
Now, let’s move ahead to explain the above-listed statements one by one!
How to Switch an Existing Git Branch Using git switch Command?
Git allows the developers to switch an existing branch using the “$ git switch” command. Let’s check out the provided instructions for this purpose.
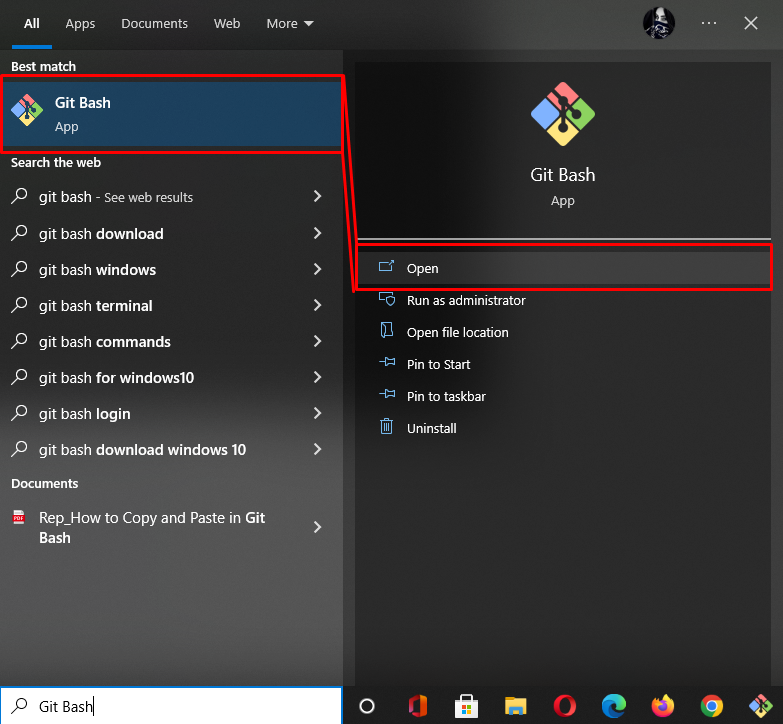
Step 1: Git Terminal
Search for the “Git Bash” using the Startup menu and open it:
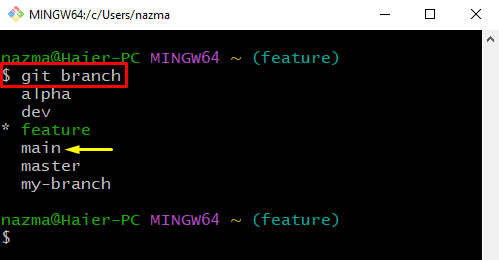
Step 2: View Git Branches
To view the list of Git branches, the below-given command is utilized:
As you can see, our Git local repository contains multiple branches. Now, we will select one branch to switch. For instance, it is required to switch to the “main” branch:
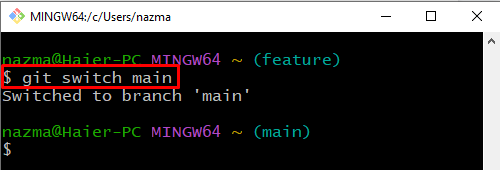
Step 3: Switch Branch
Now, execute the “git switch” command with the branch name to switch to it:
It can be seen that we have successfully switched to the “main” branch:
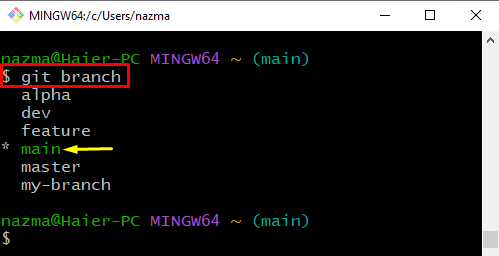
Step 4: Verify Switched Operation
Next, run the provided command to verify the performed operation:
As you can see, we have switched from the “feature” branch to the “main” branch. Moreover, the asterisk “*” symbol at the start of the highlighted branch indicates that it is the current working branch:
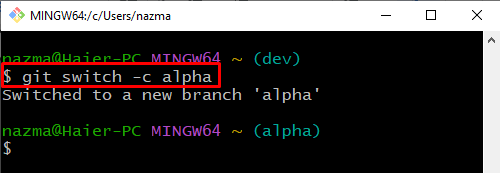
Sometimes, developers want to switch to another branch immediately while performing the branch creation process. To do so, utilize the following command:
Here, the “-c” option is used to create a new branch named “alpha”, and we have switched to it immediately:
How to Switch an Existing Git Branch Using git checkout Command?
There is another way to switch branches by utilizing a “git checkout” command with the branch name. For this purpose, list the branches, then switch to one of them.
Let’s follow the below instructions for this purpose.
First, view the list of Git branches using the “git branch” command:
As you can see, the “main” branch is our current working branch:

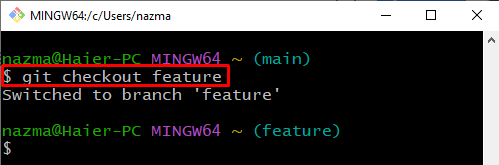
Next, run the provided command to switch to another branch:
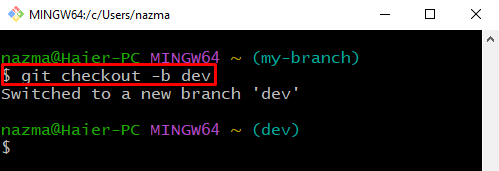
Users can also create and switch branches simultaneously with the help of the “git checkout” command with the “-b” option. To do so, try out the provided command:
It can be seen that “dev” is the newly created branch name:
We have offered multiple commands to switch from one branch to another branch.
Conclusion
You can switch to an existing branch with the help of the “$ git switch <branch-name>” and “$ git checkout <branch-name>” commands. If you want to create and switch branches immediately, utilize the “$ git switch -c <branch-name>” and “$ git checkout -b <branch-name>” commands. This guide demonstrated the procedure of switching Git branches.