Network Configuration:
In order to configure a static IP on your computer, you need at least the IP address, the network mask, the gateway/default route address, the DNS nameserver address.
In this article, I will use the following information,
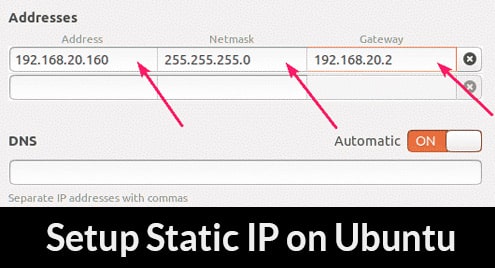
IP Address: 192.168.20.160
Netmask: 255.255.255.0 or /24
Gateway/Default route address: 192.168.20.2
DNS nameserver addresses: 192.168.20.2 and 8.8.8.8
The information above would be different for you. So, make sure to replace them with yours as required.
Setting Up Static IP in Ubuntu Desktop 18.04 LTS:
Ubuntu Desktop 18.04 LTS uses Network Manager for network configuration. You can configure a static IP on Ubuntu 18.04 LTS desktop graphically and from the command line. In this article, I will show you the graphical method of setting a static IP address on your Ubuntu 18.04 LTS desktop.
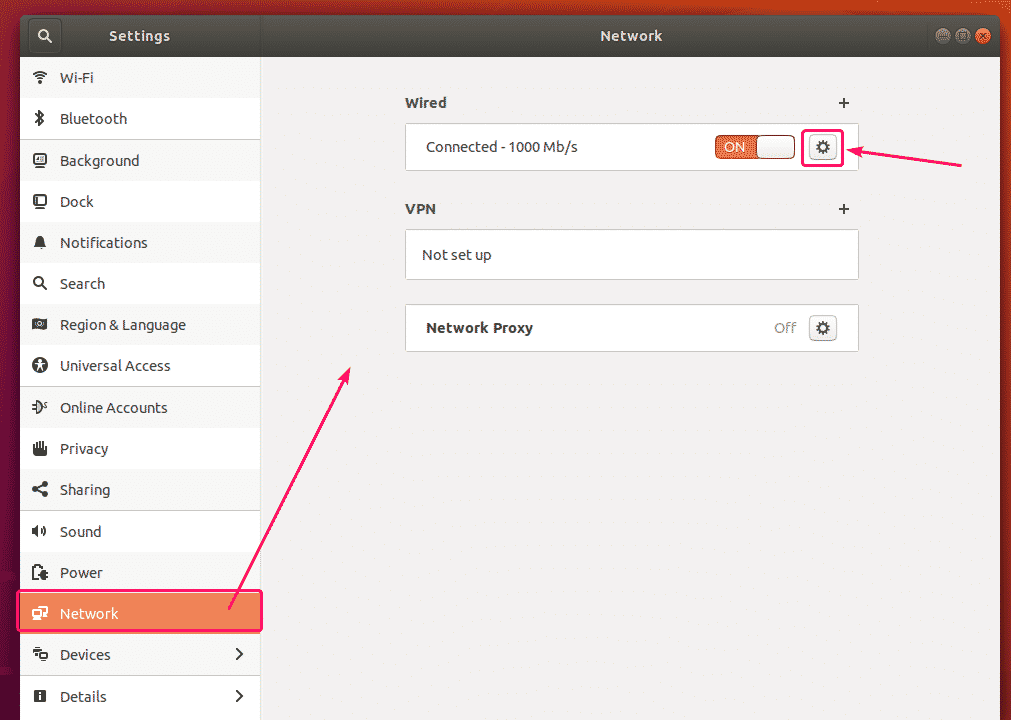
To configure a static IP on your Ubuntu Desktop 18.04 LTS graphically, open the Settings app and go to Network. Here, you should see all the available network interfaces on your computer. Click on the gear icon of the network interface which you want to configure a static IP address.
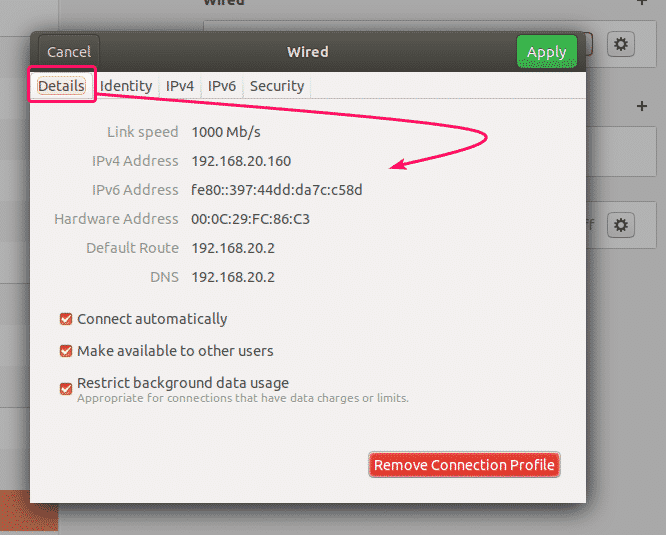
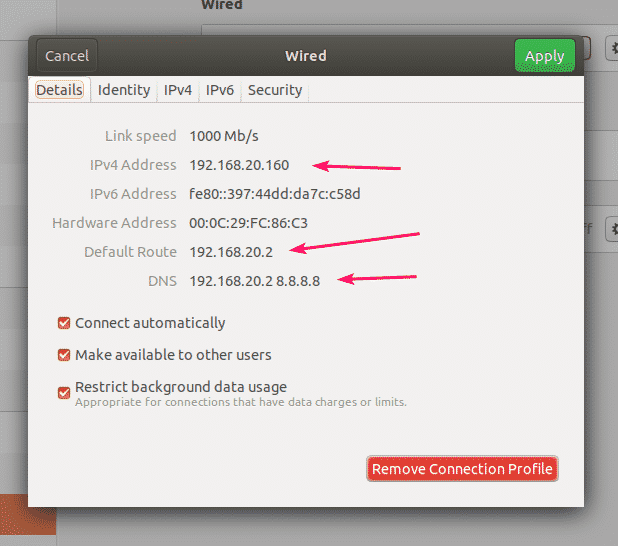
A new window should open. In the Details tab, your current network configuration should be displayed.
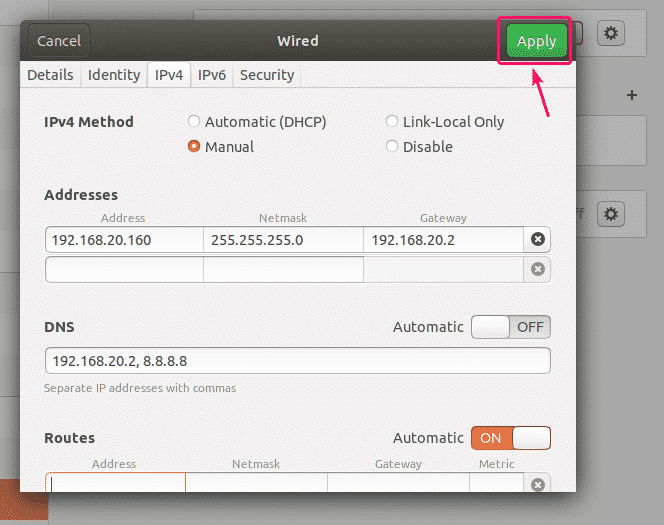
Now, go to the IPv4 tab. By default, IPv4 Method is set to Automatic (DHCP). Set it to Manual.

A new Addresses field should be displayed.

Type in your desired IPv4 address, netmask and gateway address.

You can add multiple IP addresses to the same network interface. If you add multiple IP addresses to the same network interface, the IP addresses should have the same network gateway address.
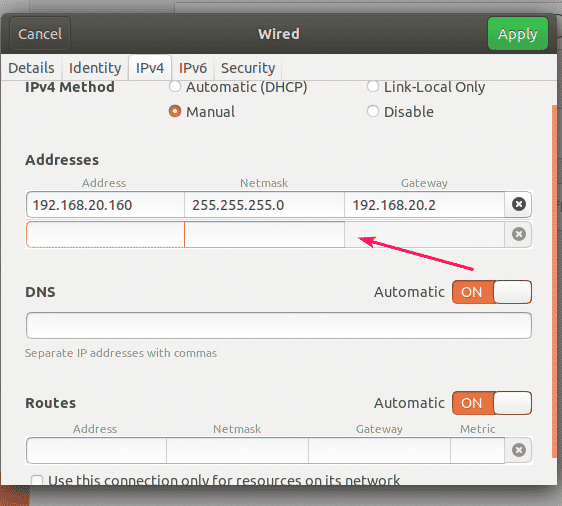
By default, DNS is set to Automatic. Click on the toggle button to disable Automatic DNS.

Now, you can add DNS nameserver address here. If you have multiple DNS nameserver addresses, you can separate them with commas (,).

Now, click on Apply to save the static IP information.
The changes won’t take effect right away. You must restart your computer or the network interface for the changes to take effect.
To restart the network interface, click on the marked toggle button to turn the network interface OFF.

Now, click on the marked toggle button to turn the network interface ON again.

Now, click on the gear icon to confirm whether the new IP information is applied to the network interface.

As you can see, the new IP information is applied to the network interface.
So, this is how you set a static IP address on Ubuntu 18.04 LTS desktop graphically using Network Manager.
Setting Up Static IP in Ubuntu Server 18.04 LTS:
Ubuntu Server 18.04 LTS uses Netplan and Cloud Init for network configuration by default.
The default Netplan network configuration file on Ubuntu 18.04 LTS server is /etc/netplan/50-cloud-init.yaml. But this is generated by Cloud Init. So, I don’t advise you to change anything in there. Instead, you should change the default Cloud Init network configuration file /etc/cloud/cloud.cfg.d/50-curtin-networking.cfg. The changes you make to the Cloud Init network configuration file /etc/cloud/cloud.cfg.d/50-curtin-networking.cfg should be automatically added to the Netplan configuration file /etc/netplan/50-cloud-init.yaml. The Cloud Init network configuration file /etc/cloud/cloud.cfg.d/50-curtin-networking is the same as Netplan. So, you configure your network interface the same way as you do in Netplan.
You can edit the Cloud Init network configuration file /etc/cloud/cloud.cfg.d/50-curtin-networking.cfg using nano text editor.
To open the Cloud Init network configuration file with nano text editor, run the following command:
![]()
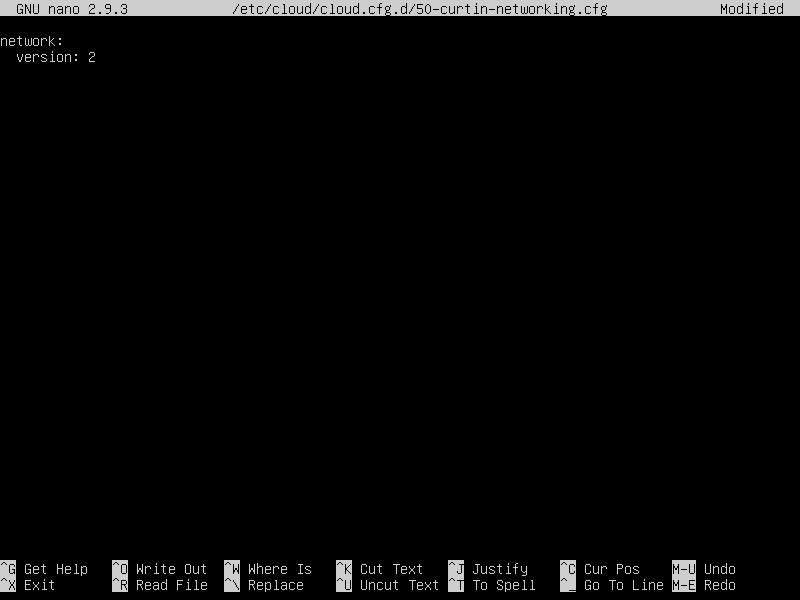
The default network configuration file may look something like this.
NOTE: You must know the name of the network interface which you want to configure to set a static IP address in your Ubuntu 18.04 LTS server.
To find the network interface name, run the following command:
As you can see, the network interface name in my case is ens33. It might be different for you. So, make sure to change it with yours from now on.

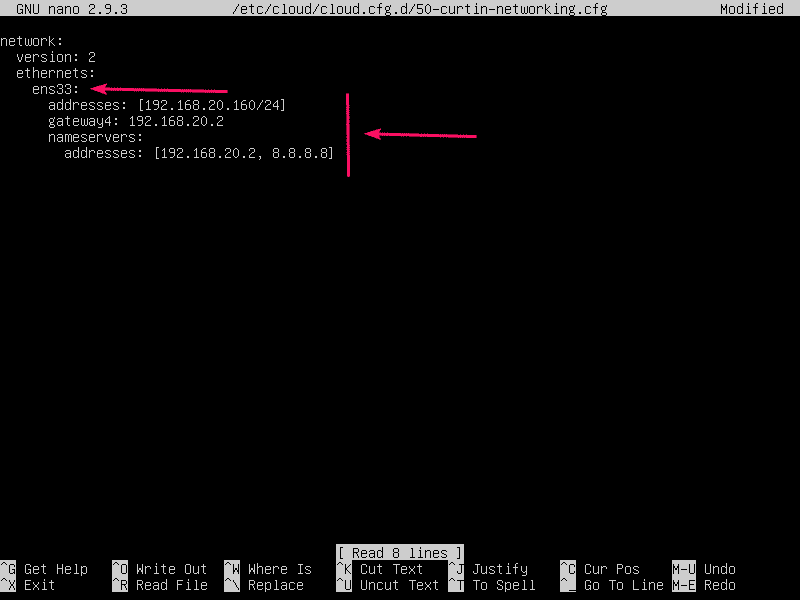
Now, on the /etc/cloud/cloud.cfg.d/50-curtin-networking.cfg file, configure the ens33 network interface with the following lines:
version: 2
ethernets:
ens33:
addresses: [192.168.20.160/24]
gateway4: 192.168.20.2
nameservers:
addresses: [192.168.20.2, 8.8.8.8]
Remember to keep the tab size same across the entire configuration file. Otherwise, you will get errors.
The final configuration file should look as follows. Once you’re done, save the file.
Now, for the Cloud Init configuration changes to take effect, run the following command:
![]()
Your Ubuntu Server 18.04 LTS machine should restart and the new network configuration should be applied as you can see in the screenshot below.

So, that’s how you configure a static IP address on Ubuntu Server 18.04 LTS.
Thanks for reading this article.