In this guide, check out how to start Debian GUI in Windows 10 with WSL.
Debian on WSL
The WSL tool was originally developed by Microsoft in collaboration with Canonical, the creator of Ubuntu. It’s basically a kernel compatibility layer based on Ubuntu.
In 2020, Microsoft released WSL 2. It brings several crucial improvements over WSL 1. It offers better system compatibility, better VM management, full Linux kernel support, and more. Check out the difference between WSL 1 and WSL 2. Note that WSL 2 is only available for Windows 10 version 2004 build 19041 or higher. Run the following command to verify the version of Windows 10 you’re running.
Because WSL was originally based on Ubuntu, it supports Debian by default. Debian for WSL is available from Microsoft Store. However, we’ll demonstrate how to install Debian even without a Microsoft account.
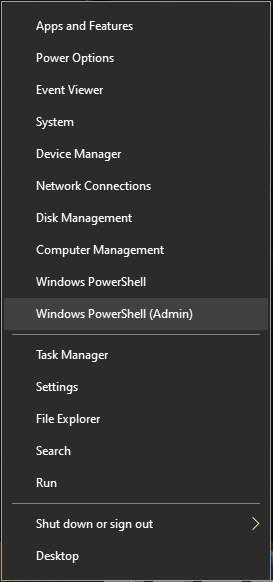
In the case of Windows, all the commands will be run on Windows PowerShell with administrative privilege. It’s the Linux equivalent of running a sudo shell. To start PowerShell with administrative privilege, press “Win + X” and select “Windows PowerShell (Admin)”.
Enabling WSL
Optional features like WSL are not enabled by default. Thankfully, enabling WSL is very simple. Run the following command in PowerShell.
WSL 2 also requires the Virtual Machine Platform feature.
These changes require a system restart to be fully functional.
After rebooting, start PowerShell with admin privilege. Enforce WSL 2 as the default version.
Note that if you’re running Windows 10 64-bit version, then you may need to download and install the Linux kernel update package for WSL 2.
Downloading and installing Debian
First, check out all the available distros supported by WSL.
Tell WSL to install Debian. Debian is available as an installable package from Microsoft Store.
It may take a couple of minutes for the process to finish.
Configuring Debian
Debian is now installed. If you installed using WSL, a new shell will automatically pop up. During the first start, Debian shell will ask to create a new user.
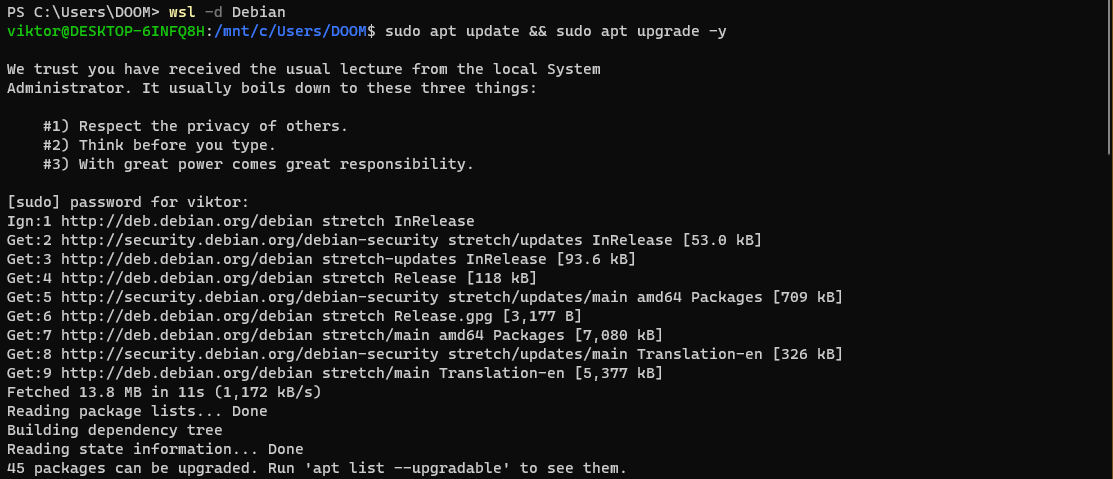
If you want to access Debian later, use the following WSL command. From this point onwards, I’ll be using Windows Terminal for ease of use.
Update the APT cache and upgrade all the packages.
Next, we need to verify if we’re running the latest Debian version. At the time of writing this guide, the latest stable release is Debian 11, codenamed bullseye.
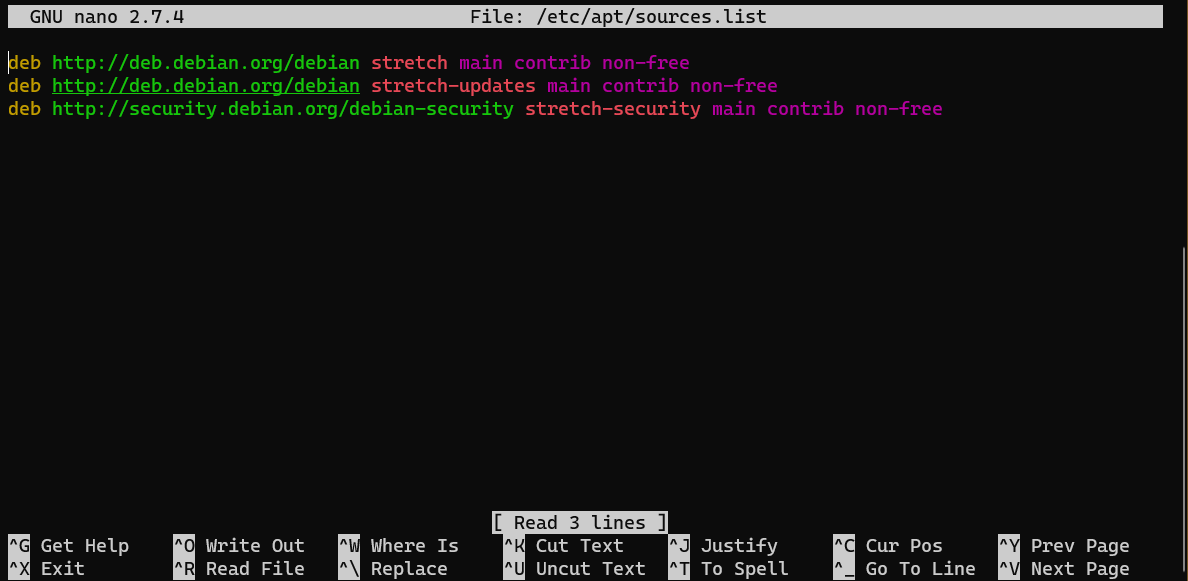
In my case, it’s Debian 9 (stretch) where it should be Debian 11 (bullseye). It requires a distro upgrade to get to the latest Debian release.
First, make a backup copy of the sources.list file.
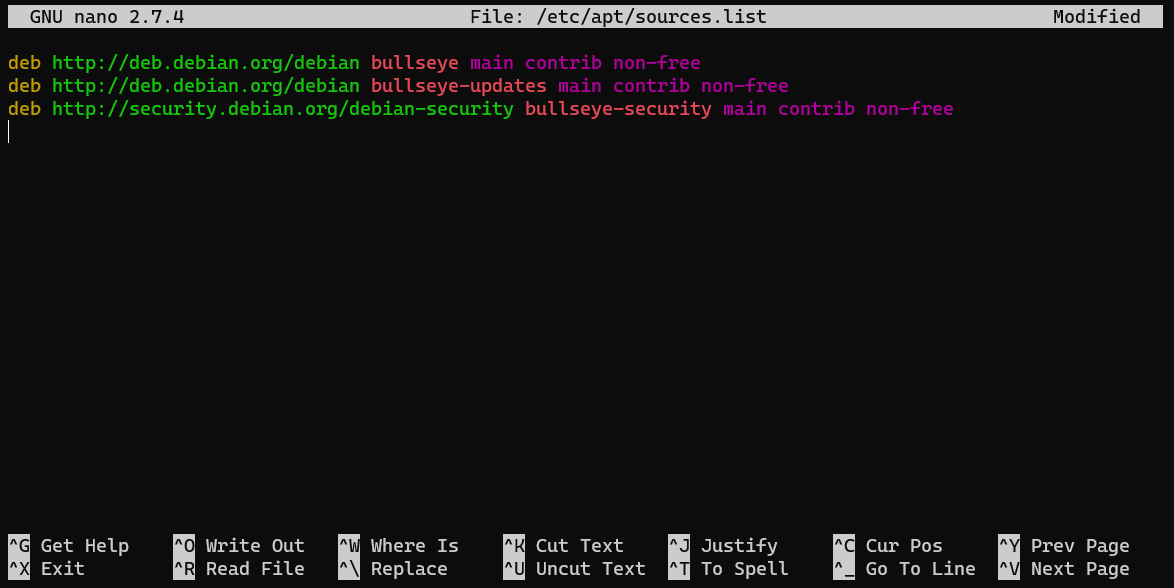
From the sources.list file, replace all the instances of stretch (Debian 9) to bullseye (Debian 11). This will effectively tell APT to work with packages for Debian 11. Open up sources.list in a text editor and replace all the instances of stretch to bullseye.
Here’s a sample list of repos for Debian 11 bullseye.
$ deb http://deb.debian.org/debian bullseye-updates main contrib non-free
$ deb http://security.debian.org/debian-security bullseye-security main contrib non-free
Interested in sed? Check out this mega guide on 50 sed examples.
Now, run the APT update commands again.
It will for permission to restart various services during the process. Select “Yes”.
We can now safely get rid of the obsolete packages on the system.
Restart the Debian session to take the changes into effect. Verify the change.
Configuring GUI
The Debian system is fully functional at this point. However, the only way to interact with the system is through command-line interface. There’s no GUI by default to use.
We can circumvent this by implementing VNC. The configuration process is somewhat complicated but very much doable.
Prerequisites
There are a couple of prerequisites to this method. First, ensure that the WSL distro is configured to run with WSL 2.
Installing components
Now, access Debian shell. We need some additional components like curl and wget.
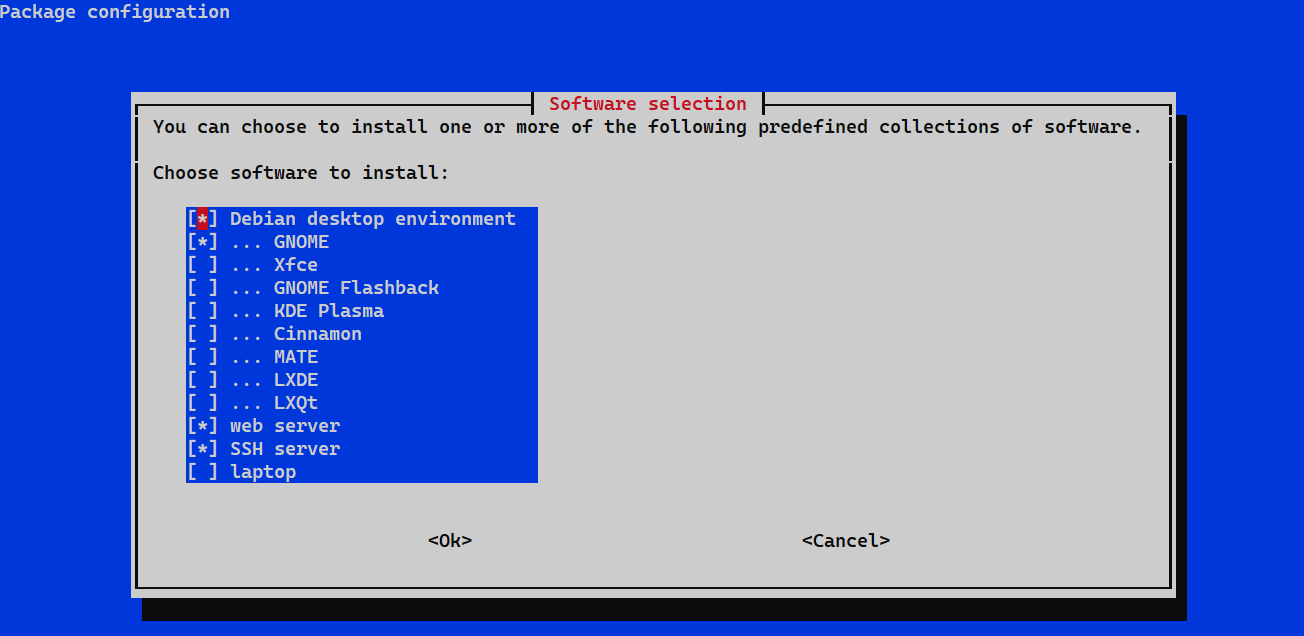
We’ll be installing tasksel, a super handy tool for managing various desktop and service components. Run the following APT command.
Run tasksel with sudo privilege.
It will show a list of package groups and bundles. Press the spacebar to select/deselect a group. Once you’ve selected the desired ones, select “Ok”.
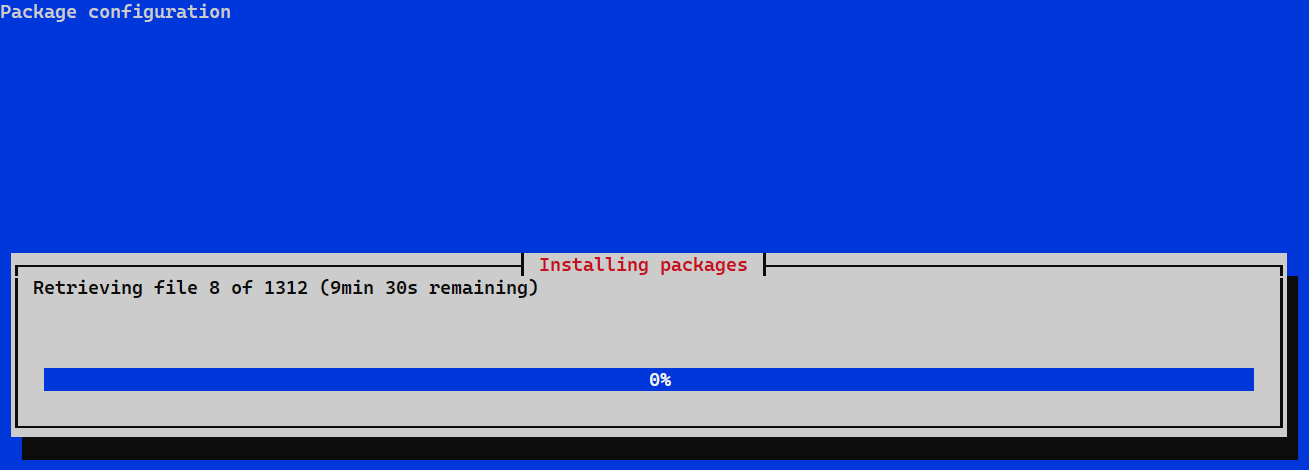
The tool will download and install all the necessary components. It will take some time.
Installing the VNC server
The next step is installing the VNC server. For this purpose, we’ll be installing TigerVNC.
Installing .NET Runtime
The .NET is a general-purpose framework for building apps for Windows, Linux, and macOS by Microsoft. We need it for the next part of the configuration.
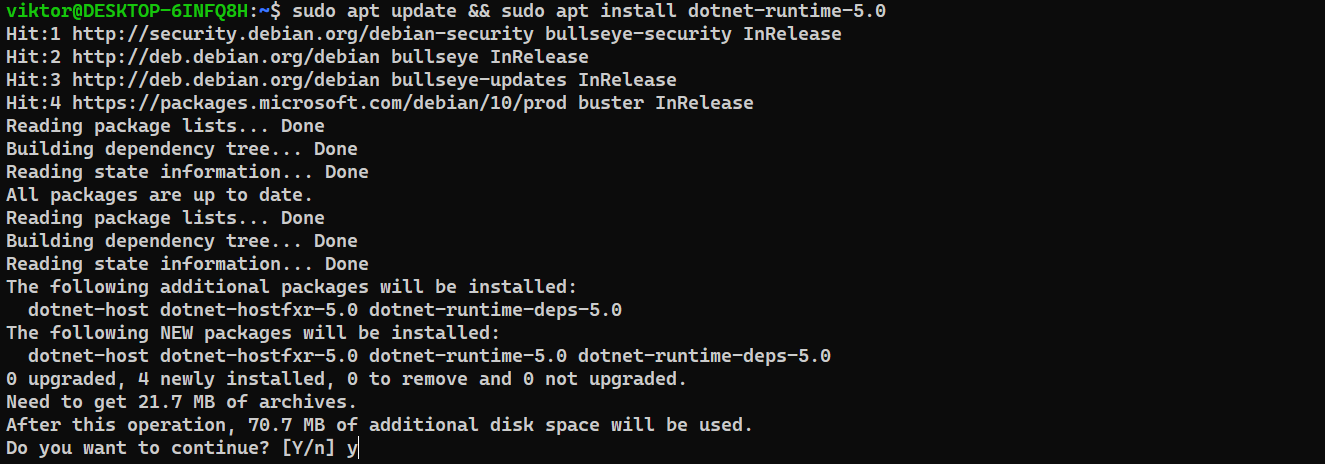
Run the following commands to install .NET Runtime. For further in-depth installation instructions, check out the official .NET installation guide by Microsoft.
Installing systemd-genie
WSL, by itself, is only a barebones Linux framework implementation. Using systemd-genie is the way to give Debian a full-fledged and functional Linux framework. Check out more on systemd-genie.
We’ve already installed its dependency (.NET Runtime). All it’s left is configuring the systemd-genie repo and installing the package. Check out in-depth documentation on systemd-genie installation on Debian.
First, configure the APT repo for systemd-genie.
$ deb https://arkane-systems.github.io/wsl-transdebian/apt/ $(lsb_release -cs) main
$ deb-src https://arkane-systems.github.io/wsl-transdebian/apt/ $(lsb_release -cs) main
$ EOF
Finally, install systemd-genie.
All the necessary tools are installed. Time to configure them to get the expected behavior.
Configuring VNC server password
In the VNC setup, each user will have unique passwords. For full functionality, we need at least three passwords, one for each of the following users.
- root
- gdm
- <current_user>
First, configure the VNC password for the current user.
Next, configure the VNC password for root.
Finally, configure the VNC password for GDM. Note that you may skip this step if you didn’t choose to install GNOME desktop environment.
Replacing default X by Xvnc
The default function of the display manager is to call X instances for each user session (including the login screen). However, because we’re going to use the VNC server, it’s not going to cut. To work with VNC, Xvnc is the proper candidate.
Next, our goal is to swap X to Xvnc. It requires tweaking the Xorg script that calls Xvnc instead of X/Xorg display service.
Before proceeding, it’s always recommended to make a backup of the existing Xorg script.
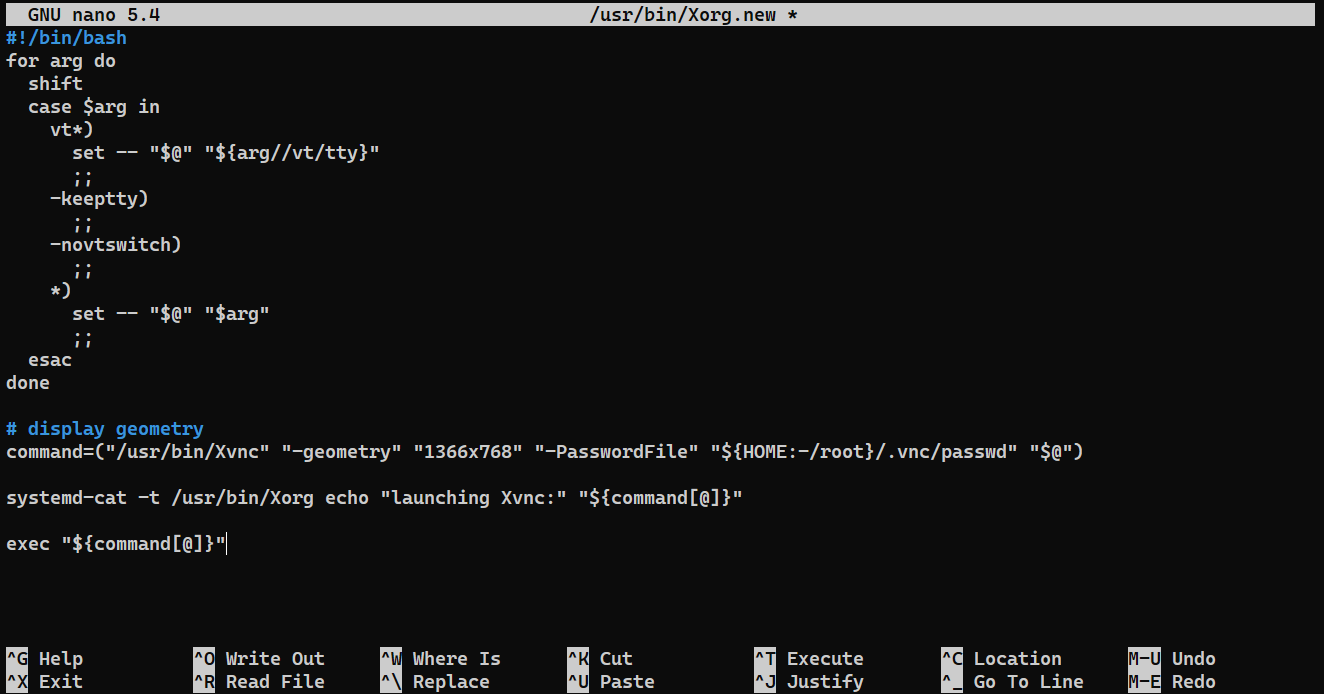
Now, create a new Xorg script.
Enter the following code.
for arg do
shift
case $arg in
vt*)
set -- "$@" "${arg//vt/tty}"
;;
-keeptty)
;;
-novtswitch)
;;
*)
set -- "$@" "$arg"
;;
esac
done
# display geometry
command=("/usr/bin/Xvnc" "-geometry" "1366x768" "-PasswordFile" "${HOME:-/root}/.vnc/passwd" "$@")
systemd-cat -t /usr/bin/Xorg echo "launching Xvnc:" "${command[@]}"
exec "${command[@]}"
Save the file and close the editor. The file must have correct file permissions to work properly.
Create a link to the file to emulate the original Xorg script.
Configuring environment variables
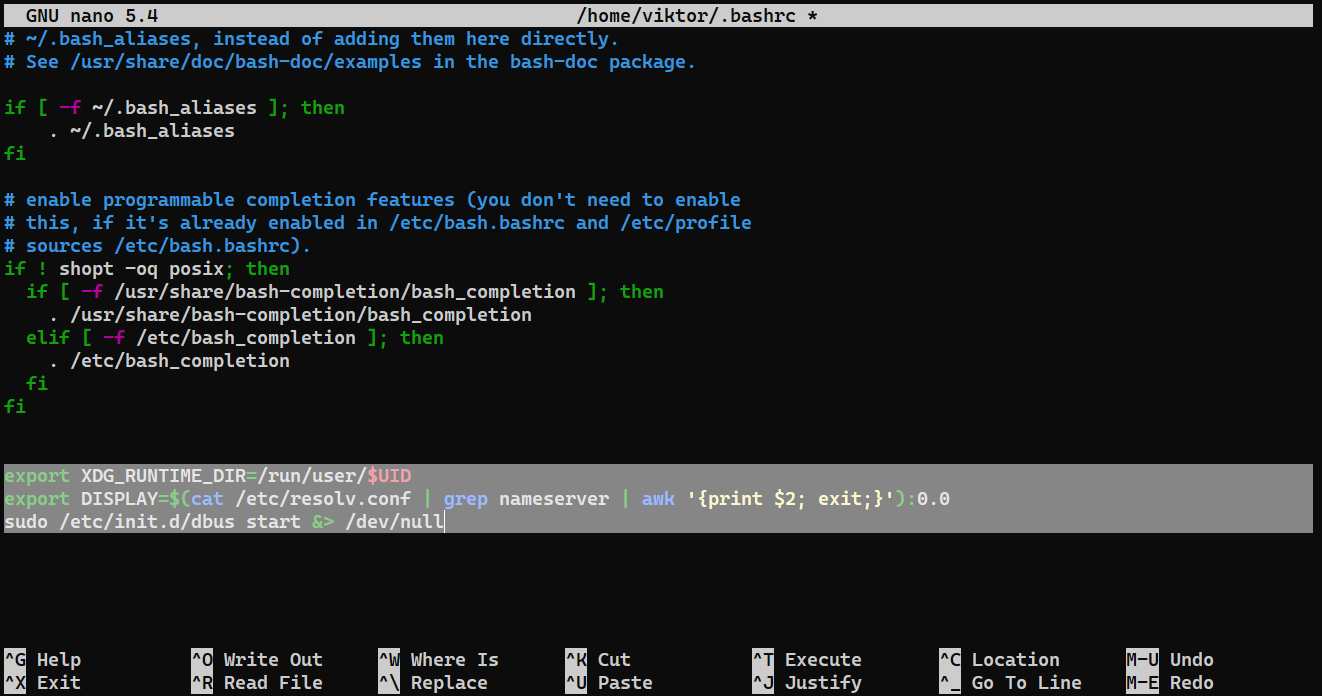
We need to tweak some environment variables so that Xorg reads from the user executing the genie command. To do so, we need to tweak the bashrc file of both the root and the current user. Note that bashrc is different than bash_profile.
Open the bashrc of the current user.
Add the following codes at the end of the file.
export DISPLAY=$(cat /etc/resolv.conf | grep nameserver | awk '{print $2; exit;}'):0.0
sudo /etc/init.d/dbus start &> /dev/null
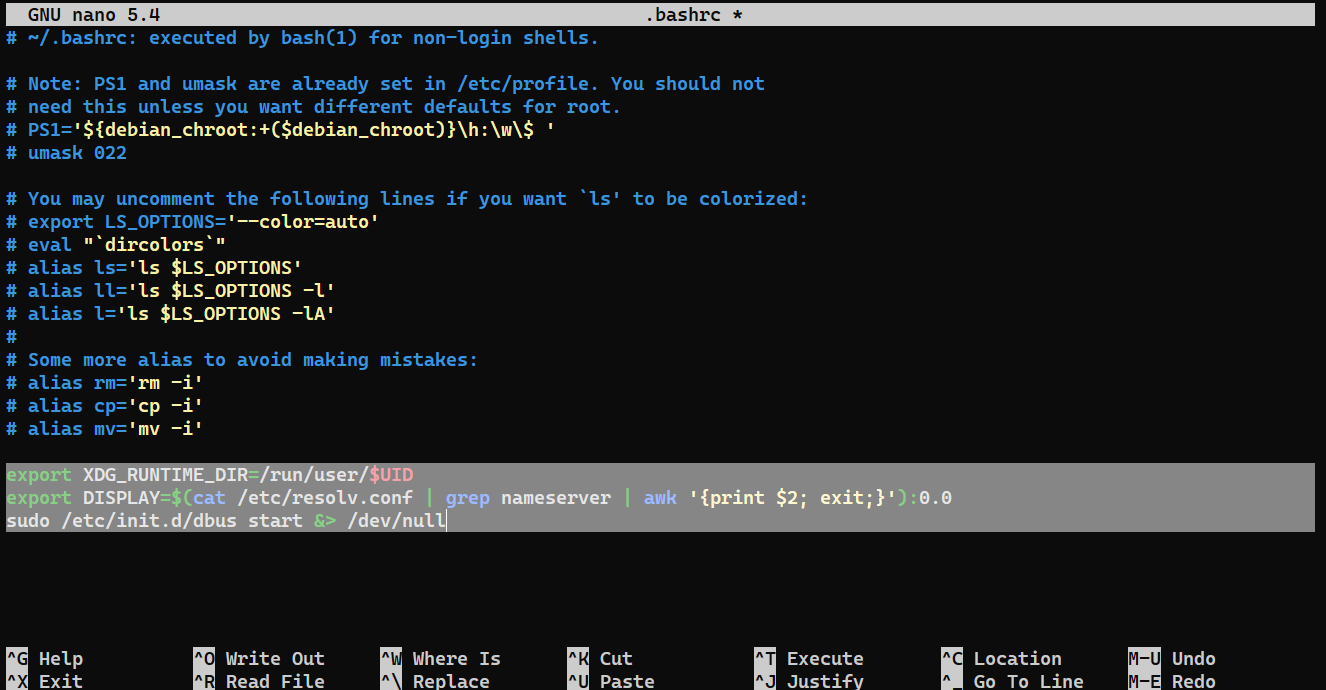
Do the same with the bashrc file of the root user.
$ nano ~/.bashrc
export DISPLAY=$(cat /etc/resolv.conf | grep nameserver | awk '{print $2; exit;}'):0.0
sudo /etc/init.d/dbus start &> /dev/null
Finally, reload bashrc for the current user.
Launching systemd-genie
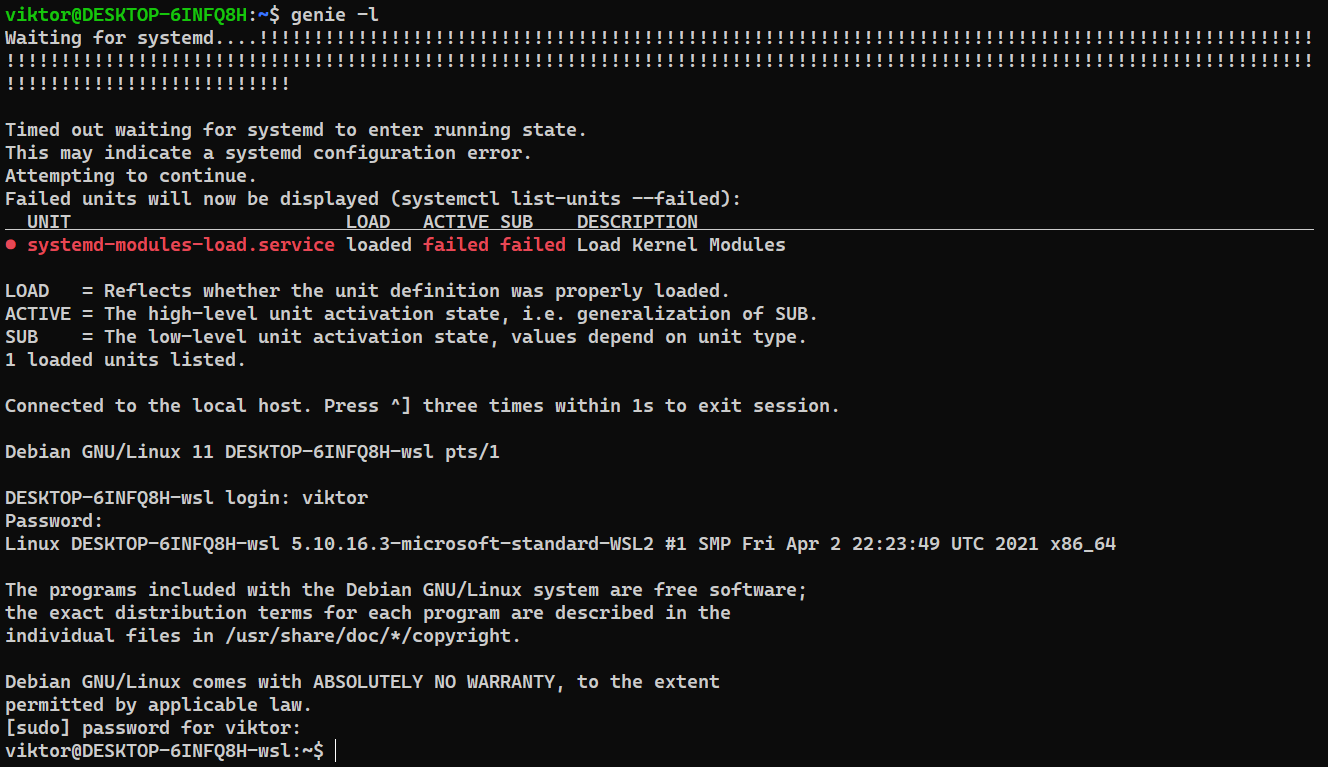
Now, systemd is configured to let gdm start automatically and create an instance of X display to the login instance. Because of the configuration, it’ll create Xvnc instances instead. It will start listening from 5900.
The next command will show the message “connecting to systemd” followed by a few errors. The errors are expected. You should land on the login screen.
Voila! You’ve now successfully logged in to GUI-enabled Debian running under WSL 2! All that’s left is connecting to the WSL server through VNC. The following command will report the server IP address.
To connect to the system, use a VNC client (on port 5900). To log in, use the gdm VNC password. This should land you on the login screen.
Final thoughts
For Windows users, WSL is an excellent way to get used to the world of Linux without having to learn everything from scratch. This guide demonstrates recommended method of installing and configuring Debian 11 with GUI on WSL with the help of a VNC server (TigerVNC).
With a suitable VNC configuration, you can achieve a lot more. Check out this in-depth guide on installing and configuring a VNC server on Debian.
Happy computing!


