Syntax:
The syntax of the ssh-keyscan has given below. It supports multiple options to scan the keys.
The different option of ssh-keysan:
The purposes of using different ssh-keyscan options are described below.
| Option | Purpose |
| -4 | It is used to force ssh-keyscan for using IPv4 addresses only. |
| -6 | It is used to force ssh-keyscan for using IPv6 addresses only. |
| -c | It is used to request certificates from target hosts. |
| -f file | It is used to retrieve the hosts or “addrlist namelist” pairs from the file. |
| -H | It is used to hash all hostnames and addresses in the output. |
| -p port | It is used to connect the remote host with a particular port. |
| -T timeout | It is used to set the timeout for the connection attempts. The default timeout value 5. |
| -t type | It is used to define the type of key that will be retrieved from the scanned hosts. The type values can be rsa, dsa, ecdsa, etc. |
| -v | It is used to print debugging messages about the progress of the scan. |
The most commonly used options of the ssh-keyscan command have shown in the next part of this tutorial.
Prerequisites:
Before starting the next part of this tutorial, you have to create one or more SSH key pairs to test the commands used in this tutorial. Complete the following steps before running any ssh-keyscan command.
- Enable the SSH service on Ubuntu if it is not enabled before. Two local user accounts of Ubuntu have been used here as a client machine and a server machine.
- Generate the multiple SSH Key pairs on the server machine using the ssh-keygen command that creates the public key and the private key. The private keys are stored in the remote server, and the public keys are stored in the client securely.
- Next, add the public keys to the client machine.
Run ssh-keyscan in different ways to scan the keys:
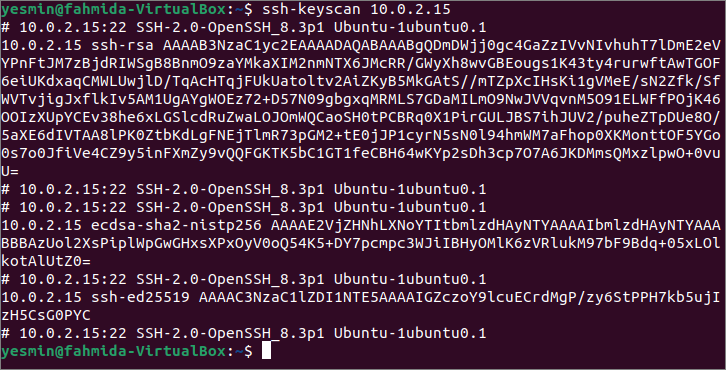
You have to log in to the client machine to check the ssh-keyscan commands used in this tutorial. At first, run the following ssh-keyscan command without any option to read all public keys from the IP address 10.0.2.15. The output of the command can vary based on the IP address or hostname used in the command. Since no key type has been defined in the command, it will retrieve all keys found during the scan.
The output shows that different keys are scanned by the above command, such as rsa, ecdsa and ed25519.
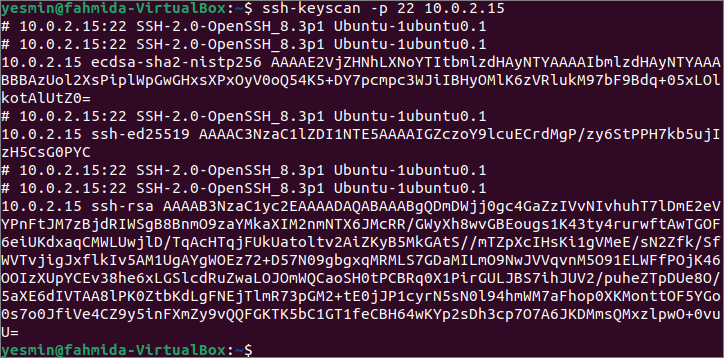
Run the following ssh-keyscan command with the -p option to read all public keys from the IP address 10.0.2.15 at port number 22. Like the previous command, the command’s output can vary based on the IP address or hostname used in the command.
The output shows the different keys that have been scanned at port number 22 by the above command. All ssh-keyscan commands in this tutorial have been executed in the local server that supports port number 22 only. So, the output of the ssh-keyscan command without any option and with the -p option is the same.
Run the following ssh-keyscan command with the -t option to read all public keys of the rsa type from the IP address 10.0.2.15. Like the previous command, the command’s output can vary based on the IP address or hostname used in the command. All types of public keys have been retrieved from the particular IP address in the previous two commands. But the output of the command used here will retrieve all rsa-key-related information only.
The following output shows that there is one rsa public key that exists in the IP address, 10.0.2.15.
If you want to update the known_hosts file with the fingerprint of the particular hostname or the IP address, you have to the -H option with the ssh-keyscan command. Run the following command to update the known_hosts file located in the path, ~/.ssh/known_hosts, with the scanned fingerprint found in the IP address, 10.0.2.15.
The following output shows that five entries have been appended in the known_hosts file.
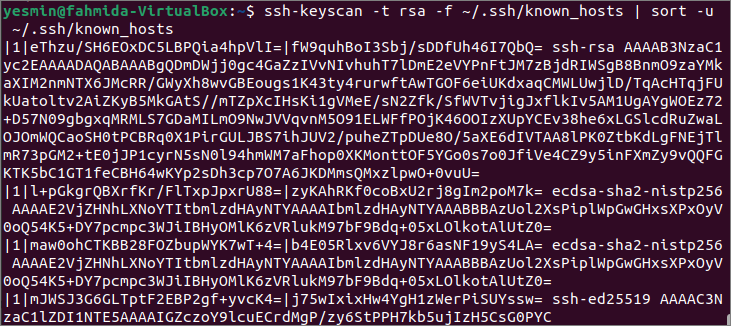
The multiple options can be used with the ssh-keyscan command. Run the following command to retrieve the rsa keys from the known_hosts file and send the output to the sort command to print the unique sorted values of the rsa keys. Two options have been used in this ssh-keyscan command. The -t option has been used to retrieve the rsa keys, and the -f option has been used to retrieve the keys from the known_hosts file. The pipe(|) has used the command to send the retrieved rsa keys from the file to the sort command.
The following output shows that four rsa keys have been retrieved from the known_hosts file, and the keys have been printed in sorted order.
Conclusion:
The different ways of scanning the public keys from the client machine by using the ssh-keyscan command have been described in this tutorial with the two local accounts of the localhost. You can follow the same process for scanning the public keys of the remote host.


