
Topic of Contents:
- Installing the SSH Client on Windows 11
- Installing the SSH Client on Windows 10
- Opening a Terminal Program on Windows 11
- Opening a Terminal Program on Windows 10
- Accessing the Linux Servers via SSH from Windows 10/11
- Removing the Conflicting SSH Keys/Fingerprints from Windows 10/11
- Conclusion
Installing the SSH Client on Windows 11
To access the Linux servers from Windows 11 via SSH, you need to install the SSH client program on your Windows 11 operating system. The SSH client program may not be installed on your Windows 11 operating system.
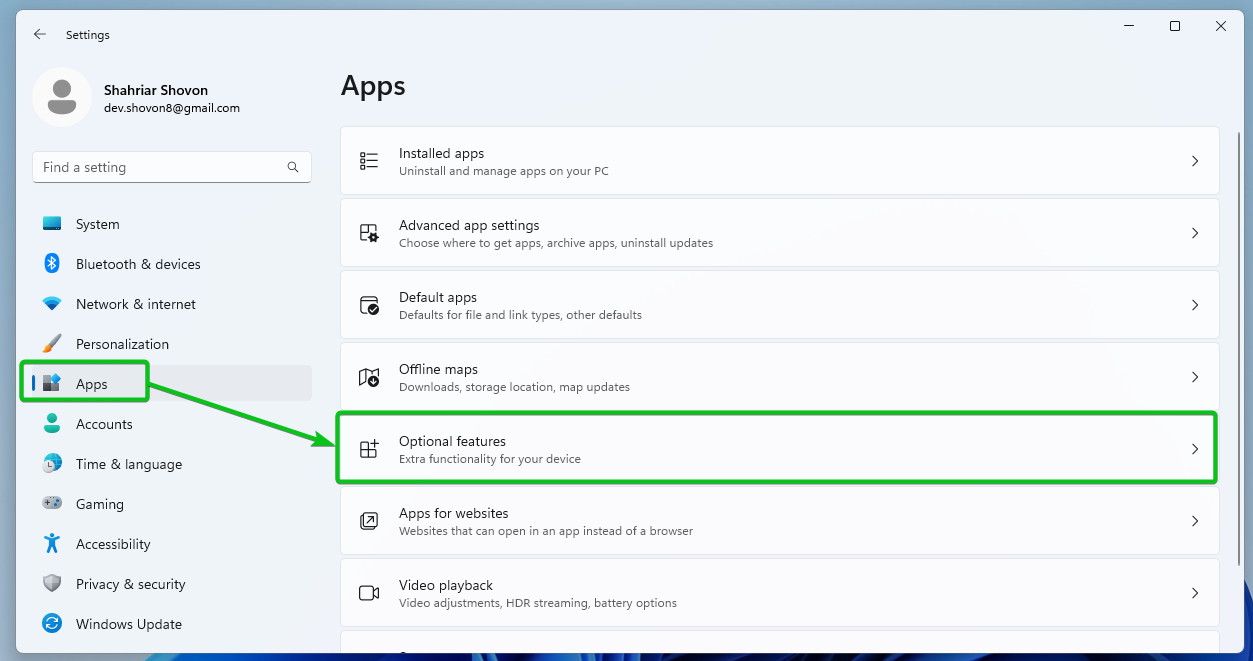
To check whether the SSH client program is installed or to install the SSH client program on Windows 11, right-click (RMB) on the “Start” menu and click on “Settings”.

The “Settings” app should be opened.
Click on Apps > Optional features.
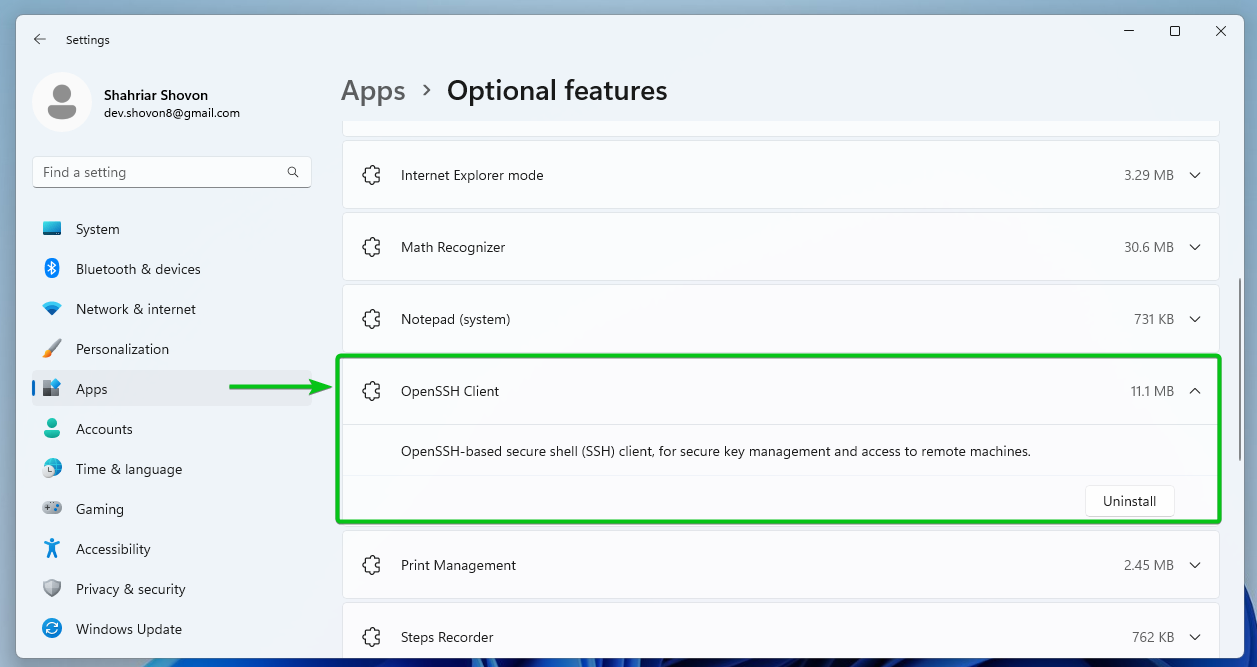
Scroll down a little. You will see the “OpenSSH Client” feature. Click on it and see if it is installed.
In our case, it is installed (since we can see the “Uninstall” button). If it’s not installed in your case, you will see an “Install” button. You can click on it to install the OpenSSH Client programs on Windows 11.
Installing the SSH Client on Windows 10
To access the Linux servers from Windows 10 via SSH, you need to install the SSH client program on your Windows 10 operating system. The SSH client program may not be installed on your Windows 10 operating system.
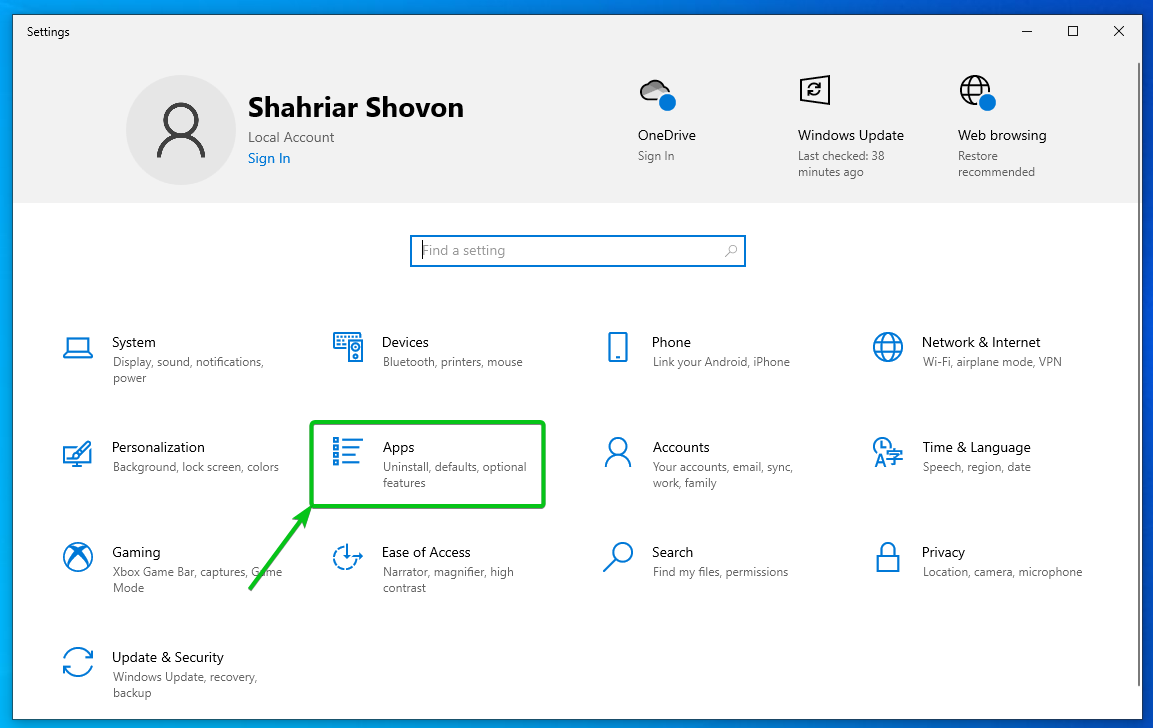
To check whether the SSH client program is installed or to install the SSH client program on Windows 10, right-click (RMB) on the “Start” menu and click on “Settings”.

The “Settings” app should be opened.
Click on “Apps”.
Click on “Optional features” from the “Apps & features” section.
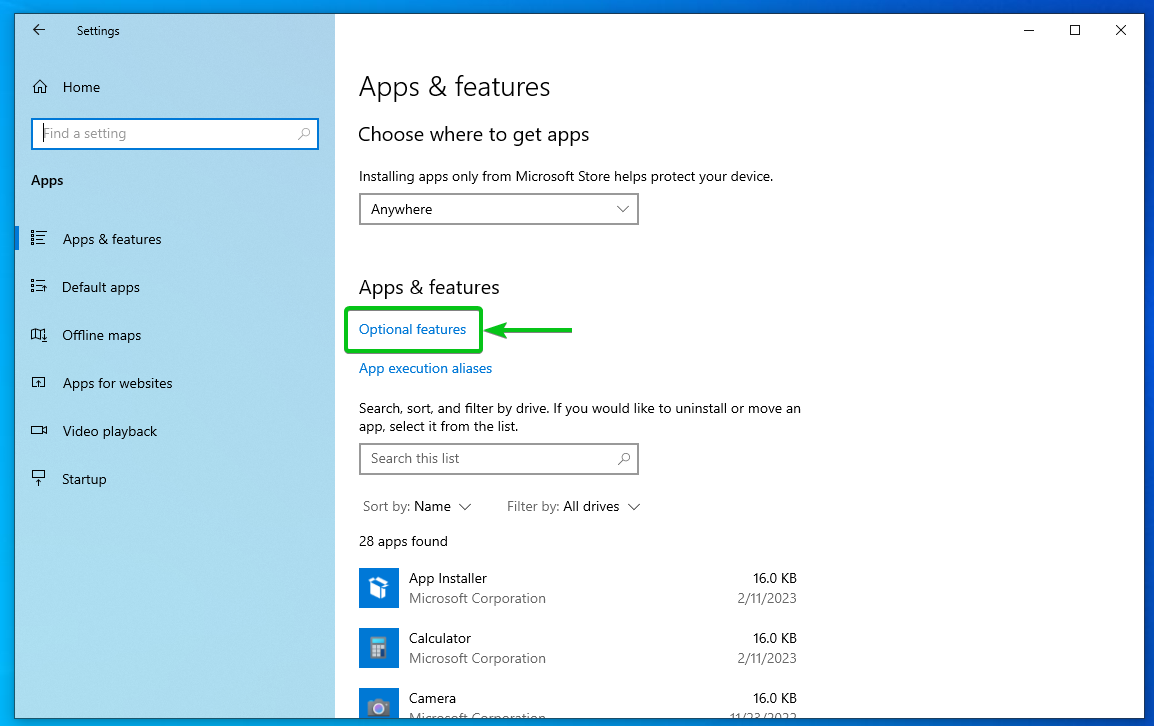
Scroll down a little. You will see the “OpenSSH Client” feature. Click on it and see if it is installed.
In our case, it is installed (since we can see the “Uninstall” button). If it’s not installed in your case, you will see an “Install” button. You can click on it to install the OpenSSH Client programs on Windows 10.

Opening a Terminal Program on Windows 11
To access the “OpenSSH client” program, you need to open a “Terminal” app on Windows 11.
To open the “Terminal” app on Windows 11, right-click (RMB) on the “Start” menu and click on “Terminal”.
The Windows 11 “Terminal” app should be opened.
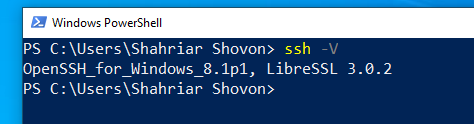
To confirm whether you can access the OpenSSH Client program, run the following command. The OpenSSH client version should be printed on the terminal:

Opening a Terminal Program on Windows 10
To access the OpenSSH client program, you need to open a “Terminal” app on Windows 10.
To open the “Terminal” app on Windows 10, right-click (RMB) on the “Start” menu and click on “Windows PowerShell”.
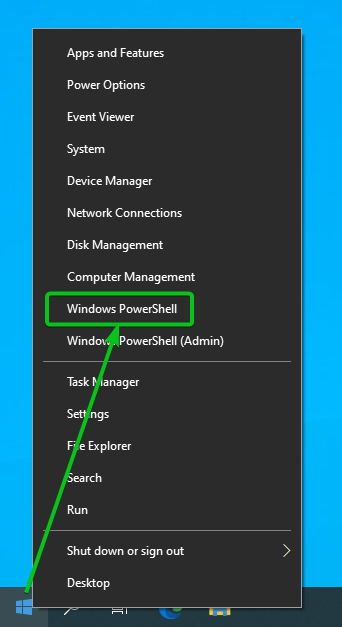
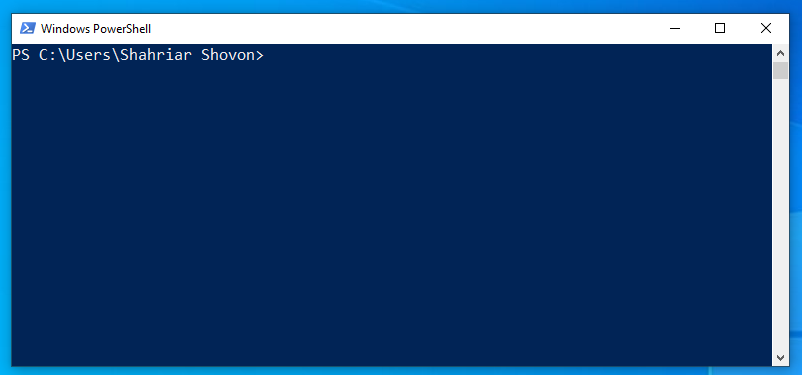
The Windows 10 Terminal app should be opened.
To confirm whether you can access the OpenSSH Client program, run the following command. The OpenSSH client version should be printed on the terminal:
Accessing the Linux Servers via SSH from Windows 10/11
To access a Linux server from your Windows 10/11 computer, you can run the following command:
Or
Here, the <username> is the login username of your Linux server.
The <hostname/ip-address> is the hostname/domain name or IP address of your Linux server.
The <port-number> is the port number of the OpenSSH server that runs on the Linux server that you’re trying to access. This is only needed if the OpenSSH server is running on a non-default port – a port other than 22.
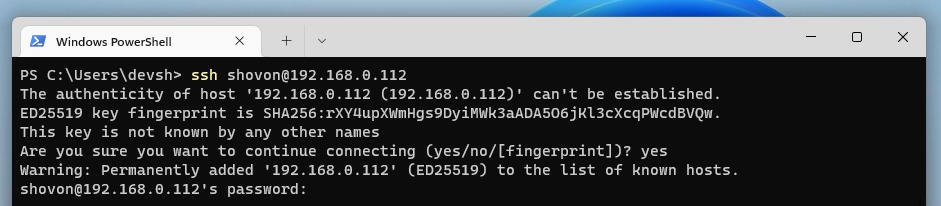
For example, to access the Linux server with the 192.168.0.112 IP address as the shovon login user, run the following command:

To confirm the SSH key/fingerprint of the Linux server, type in “yes” and press <Enter>.

Type in the login password of your Linux server and press <Enter>.
You should be logged in to the Linux server.
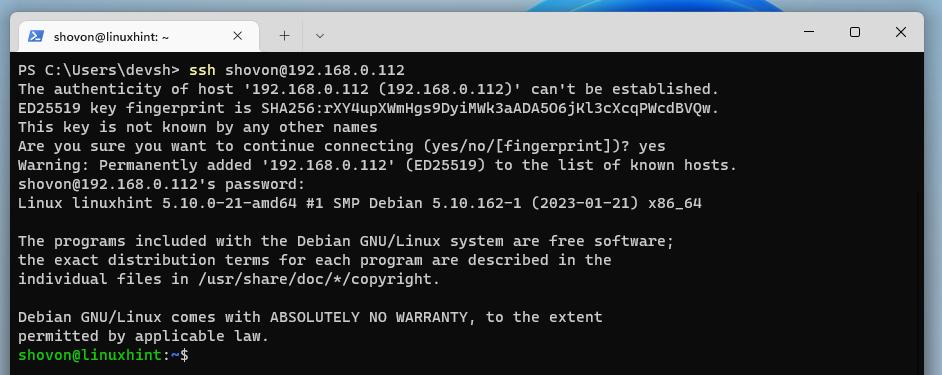
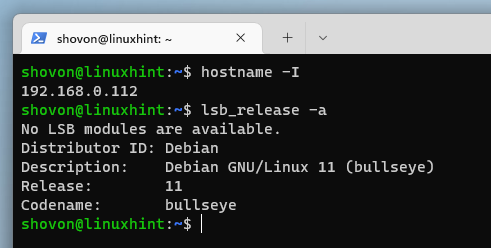
Now, you can run any command that you want on your remote Linux server.
$ lsb_release -a
To close the SSH session, run the following command:

Removing the Conflicting SSH Keys/Fingerprints from Windows 10/11
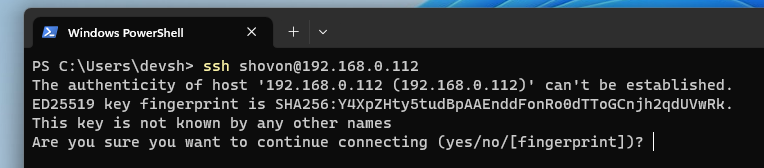
If you’re using DHCP to assign the IP addresses on your Linux servers, the same IP address may be assigned to different Linux servers at times. In that case, if you try to SSH into a Linux server with an IP address that was previously assigned to some other Linux servers while accessing it via SSH, you will see the following error message.
This happens because the SSH keys/fingerprints of these Linux servers are different while the IP address is the same. Accessing these servers could be a security issue (i.e. man-in-the-middle attack). So, the SSH client program does not allow these types of connections.

To solve this problem, you have to remove the SSH key/fingerprint that the OpenSSH client program keeps as a cache for the IP address on your Windows 10/11 computer.
For example, you can remove the cached SSH key/fingerprint for the 192.168.0.112 IP address with the following command:

The cached SSH key/fingerprint for the IP address should be removed from your Windows 10/11 computer.

Now, you should be able to access the Linux server with the same IP address from your Windows 10/11 computer via SSH as usual, as you can see in the following screenshot:
Conclusion
We showed you how to install the OpenSSH client program on Windows 10/11 operating systems. We also showed you how to open a Terminal app on Windows 10/11 and access the Linux servers from Windows 10/11 via SSH, and how to remove the conflicting SSH keys/fingerprints for Linux servers with the same IP address from Windows 10/11 operating systems.