SSH (Secure Shell) is a protocol used to remotely and safely (encrypted) access systems. The SSH server runs on the remote machine, and the SSH client on your working machine. Communication between client and server is typical via the command line. Now, there are several ways of authenticating the connection – password authentication, public/private key-based authentication (using the authorized_key file), and host-based authentication (using the known_host file).
- In the password-based authentication method, a password is required to login. Passwords can be long and tedious to remember; however, worse even, they can be brute-forced (hacked)! Simple python scripts can bruteforce even the worst of passwords, and as such, they pose a security risk.
- In the public/private key-based authentication, no password is required to login (a password-less login). In fact, key-based authentication is safer than password authentication because there is no need to type a password. In such circumstances, the server simply verifies that you have a private key! This private key is a file and thus can be copied (security risk); however, it is much stronger and longer than an 8-character password. Further, the authorized_keys file is used to authenticate users by the server.
- In the known host-based authentication method, the known host file contains the hosts that are allowed to connect. The known_hosts file is used to authenticate servers by the users.
In this tutorial, we will be looking at how to set up the public/private key-based authentication and take a look at the authorized_keys file and its uses.
SETTING UP KEY-BASED AUTHENTICATION
When setting up complicated systems such as these, we need to ensure that the configuration files are appropriately configured! If they are not, the entire process will not work! Now, there are two systems here – the client and the server. The /etc/ssh/sshd_config on the server on the server Do uncomment and configure them as follows:
PasswordAuthentication yes
ChallengeResponseAuthentication no
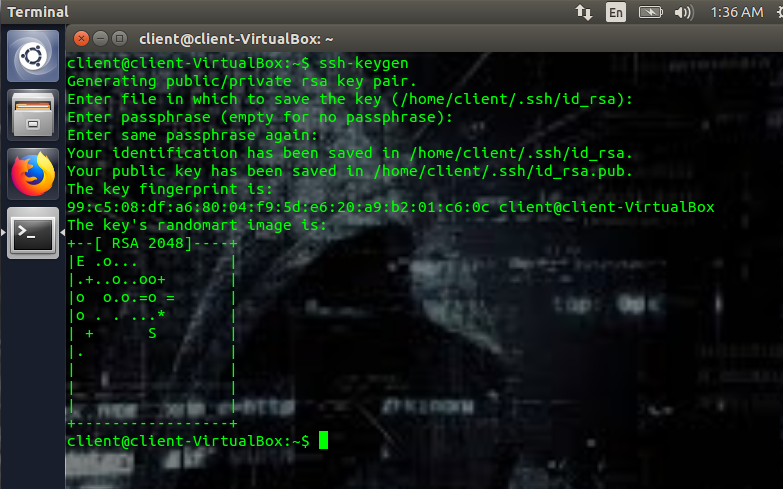
Next, we need to genre public and private keys. To generate the keys, run (on the client machine):
When you run ssh-keygen, you’ll be prompted with a few questions. The first question will be the location where you want to save the keys. If you leave this blank, it will save it in the default folder. In my case,that’s the /home/client/.ssh/id_rsa, where id_rsa is the actual private key, and the .ssh is the folder. Next, you’ll be prompted to enter a passphrase. You don’t have to enter a passphrase, but this adds another layer of security. The passphrase is used to encrypt the private key.
This will create a public key and a private key.
~/.ssh/id_rsa.pub (public key)
The dot ssh means that it’s a hidden folder by default. Further, the public key is used for encryption, while the private key is used for decryption. And though the public key can be bandied about everywhere and anywhere, the private key must be kept safe! Your private key must remain within your network at all times! If you lose your private key, you might as well assume that your system has been compromised. It’s worse than losing your password because it’s a password-less login).
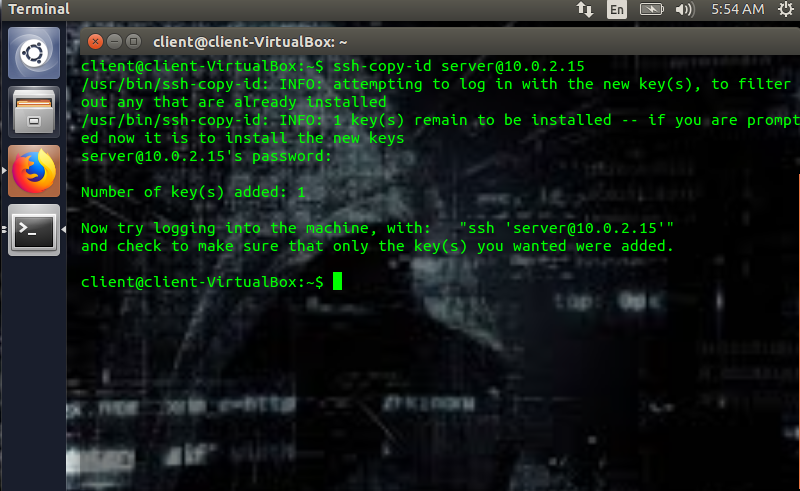
Next, we need to copy the public key to the server, and for that, we use the following code (which is run on the client machine):
For example, in my case, I’d write:
Ssh-copy-id <servername@ip> is such that servername is the name of the server, and ip is its ip address. In this case, “server” is the name of my server, and 10.0.2.15 is its ip address. When the previous code is inputted into the client machine, the client will prompt for the server’s password, do input it. It will copy the public key to the server at ~/.ssh/authorized_keys and subsequently display”Number of keys added: “ on your client machine.
The client machine will also ask you to attempt a login using:
(ex: ssh server@10.0.2.15)
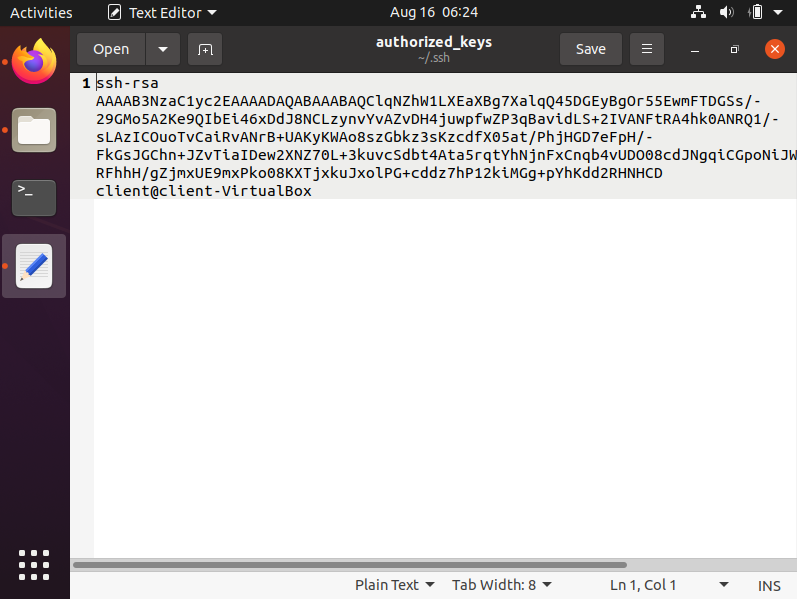
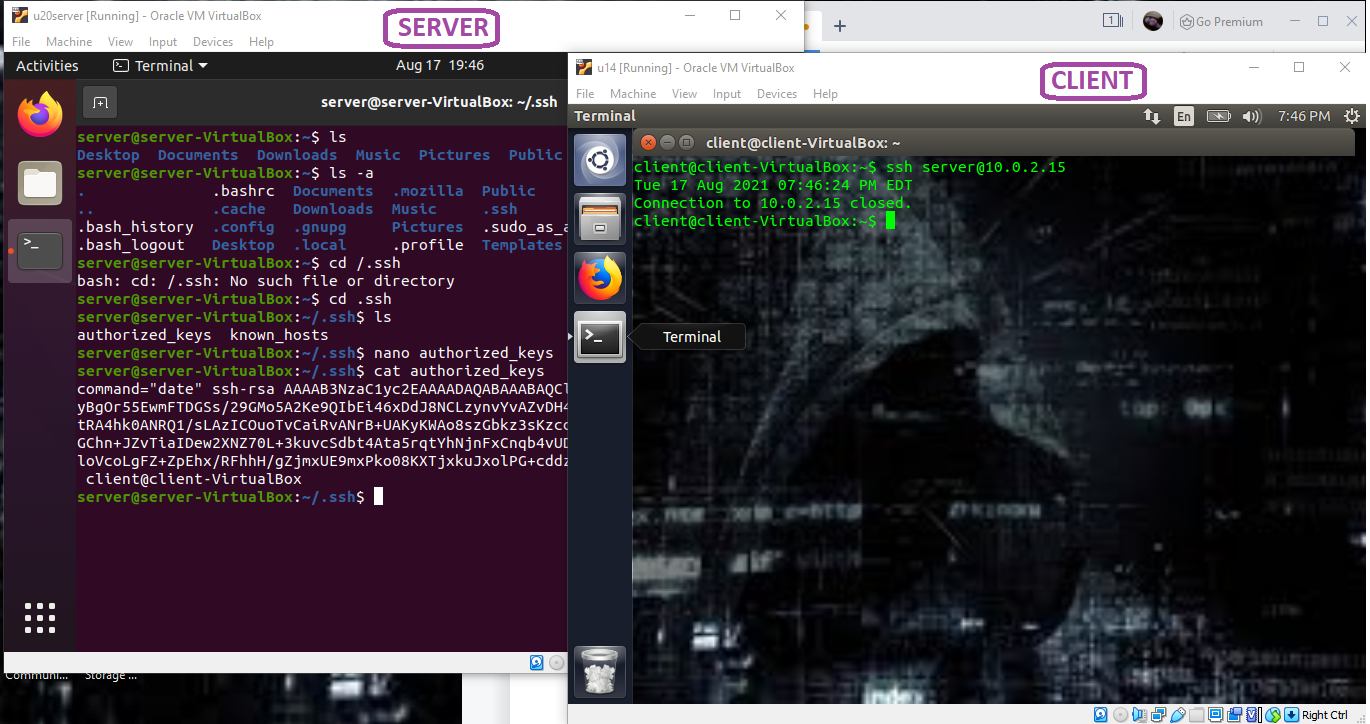
The second the public key is copied onto the server, a file called authorized_keys will be created with the public key within it. As you can see in the following pictures, here’s a hidden folder called /.ssh won my server; when the authorized_keys file is opened, you can see the public key that we generated within it.
Though this process seems to be quite simple, you can and probably will come across a number of errors while setting up the key-based authentication process. One, in particular, is the following:
You might get this error after copying the public key to the authorized_keys file. Use the following code on the client machine to fix it:
Once everything has been set up, you now need to disable the Password Authentication on your server machine. This is done by going into the /etc/ssh/sshd_config file on your server and setting the PasswordAuthentication to no:
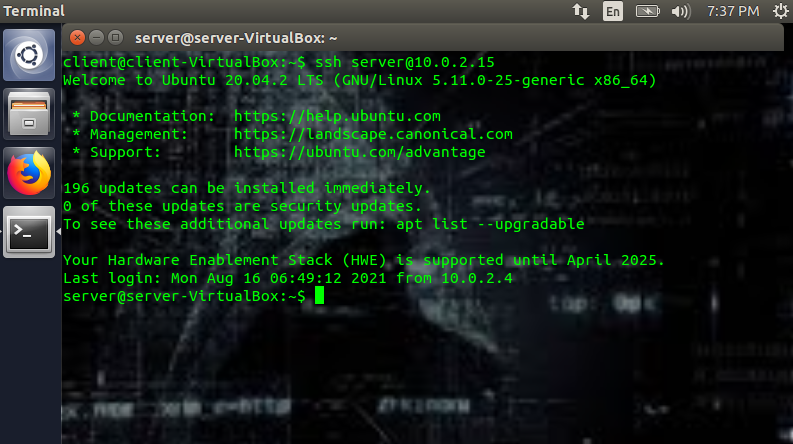
Once you set the password authentication to no, if you try to login via ssh, you should be automatically logged in. (Please note that I didn’t set a passphrase.)
Authorized_keys file
Regardless of the type of key you use (ex: rsa, ecdsa, etc.), to use key-based authentication, the public key generated must be copied onto the server’s authorized_keys file. Typically, if this file doesn’t exist, the server will attempt password authentication. Please also remember that each public key is stored in a single line in the authorized_keys file. Do also remember to give the /.ssh folder, the private/public keys, and the authorized_keys file the appropriate permissions – you and you alone should be able to mess with it. Note that you can copy the public key manually into the /.ssh folder as well, and if done manually, the appropriate permissions are an important part of the process.
In the event that you add a second public key manually into the authorized_keys file, end the line with a “newlin” or a return. If you do not, it will think that the two distinct keys are a single key, and neither will work.
The /.ssh directory should have the following permission:
The authorized_keys file should have the following permission:
The public key should have the following permission:
The private key should have the following permission:
You can also grant other users access to your server. For this, you simply get their public key and place it into the authorized_keys file (in a new line). The latter will grant them access to your server.
Typically, when key-based authentication is set up, the user can access the remote machine with fully functional commands. However, you can restrict access to a single command that you want by using the authorized_keys file. This is called “forced command“.
This is the format of the authorized_keys file if you want to force a command:
Ex:
Command=”date” ssh-rsa AASASA[...]
In my example, I placed the command “date” in front of the public key in the authorized_keys file (see in the picture below). The result of this added command to the authorized_keys file is that I only get the date on my client machine. The command you specified, and only that command will then be executed or allowed.
The downside to the forced command in the authorized_keys file is that you can typically only put one command per authorized public key. To bypass this, you’ll need a bash script. If you’re dealing with a bash script, you will use the following notation:
Suppose that I write a script called ssh_script.sh (this is just an example script):
PS3='Choose your option: '
choices=("get the date" "make a directory" "make a file" "exit")
select opt in "${choices[@]}"; do
case $opt in
"get the date")
CURRENTDATE=`date +"%Y-%m-%d %T"`
echo ${CURRENTDATE}
;;
"make a directory")
echo "what is the name of the directory?"
read nameDir
mkdir $nameDir
;;
"make a file")
echo "Enter the text you want to place in file"
read text
echo "Name of the file please"
read fileName
echo $text >> $fileName
break
;;
"exit")
echo "Good bye! See you again soon!"
exit
;;
*) echo "invalid option $REPLY";;
esac
done
The next step is to make this file executable by typing the following:
Please note that if you do not make this file executable, the process will throw an error! Here, you’d place the file you just created in ~/.ssh as ~/.ssh/ssh_script.sh, and write the following in the authorized_key file:
Command=”/home/server/.ssh/ssh_script.sh” ssh-rsa AASASA[...]
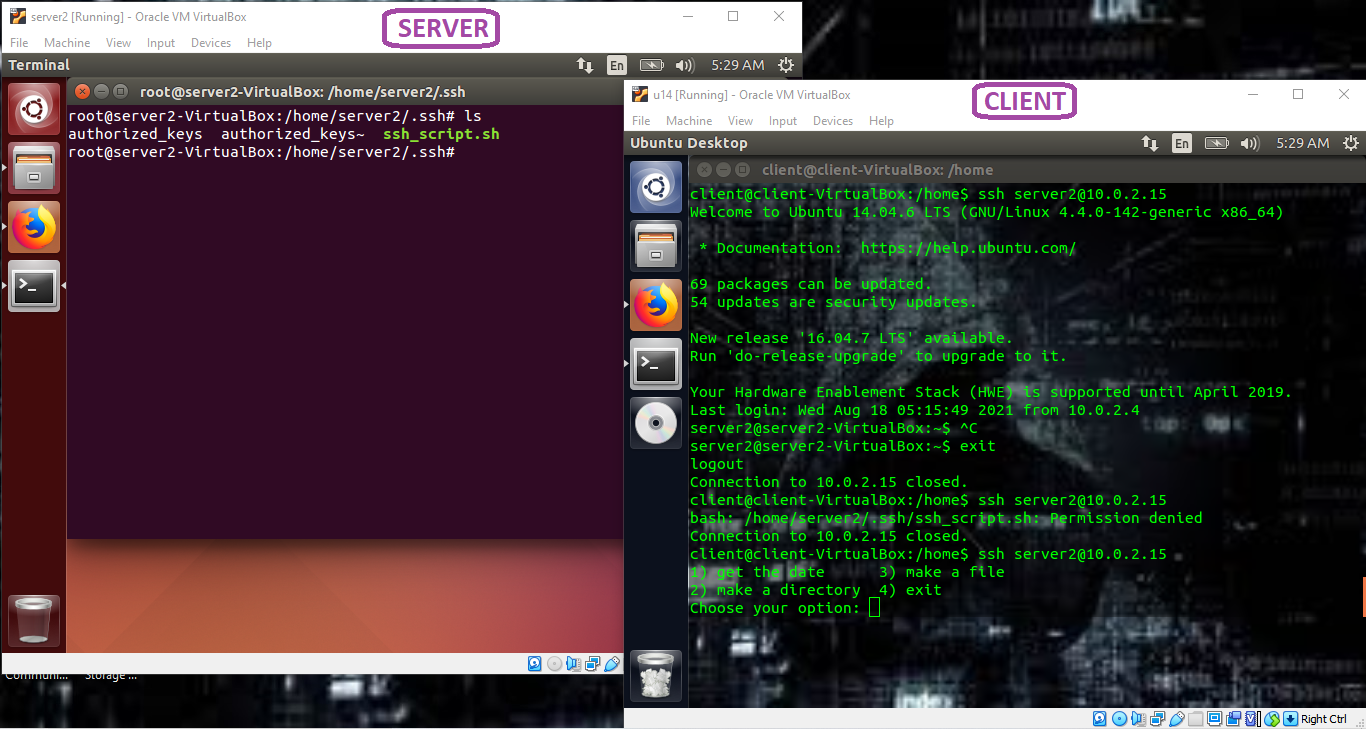
The result is as follows:
When the ssh_script.sh (executable) file is placed in the ~/.ssh folder (~/.ssh/ssh_script.sh), and that the authorized_keys file is modified, you should see the results of the bash script on the client machine (as in the image above). And that’s it! Easy, breezy, beautiful code!
Key-based authentication is an easy, quick, and safe way to login to your remote machine using ssh. In particular, the authorized_keys file is of great use in authenticating the user and specifying which commands are permitted by the user.
Happy Coding!

