Prerequisites:
Before starting the steps of this tutorial, the following steps will be required to complete.
Enable the SSH service on Ubuntu if it is not enabled before.
Generate the SSH Key pairs to execute the commands in the remote server. Run the following command to create the public key and the private key. The private key will be stored in the remote server, and the public keys will be stored in the client securely.
Run the following command to open the sshd_config file using nano editor to add some necessary configurations.
Add the following lines in the file to enable the root login and password-based authentication.
PermitRootLogin yes
Run the following command to restart the SSH service.
Syntax:
Two different syntaxes of the ssh-agent have given below. The meaning of the options used with this command is described in the next part of this tutorial.
ssh-agent [-c | -s] -k
Different options of ssh-agent:
the ssh-agent command has many options. The uses of the options are given below.
| Option | Purpose |
| -a bind_address | It is used to bind the UNIX domain socket to the given file path forcefully instead of using the default socket. |
| -c | It is used to generate the C-shell commands on stdout. The shell is automatically detected by default. |
| -d | It is used to enable the debug mode. |
| -E fingerprint_hash | It is used to define the algorithm used to generate the SSH key fingerprints. md5 and sha256 are the valid values. |
| -k | It is used to kill the currently running agent. |
| -s | It is used to generate the Bourne shell (/bin/sh) commands on stdout forcefully. The shell is automatically detected by default. |
| -t life | It is used to define the maximum number of seconds used to keep the agent’s identity. The value of this option defines in seconds, but it can be defined by different suffixes, such as m for minutes, h for hours, d for days, and w for weeks. If this option is not used, the agent will keep the keys in the memory as long as it runs. This value will be overridden when the ssh-add command will be executed. |
The use of the -t option has been shown here. Run the following command to keep the identity of the agents for 60 seconds.
The following output will be appeared after executing the above command.

Using ssh-agent command for non-interactive authentication:
Run the following command from the server machine to start the ssh-agent for non-interactive authentication.
The following output will be appeared after executing the above command. ssh-agent is running now. Here, the username of the server machine is ‘fahmida.’

Use ssh-add to add the private key passphrase to ssh-agent:
the ssh-add command will require providing the passphrase for the ssh private keys. Now, log in to the client machine and run the ssh-add command from the terminal.

After adding the private key to the ssh-agent, different types of SSH commands, such as scp, sftp, ssh, etc., can be executed from the client machine.
Copy file from client to server:
The scp command to copy the file from the client to the server and ssh command to connect with the server for checking the file is copied or not shown in this part of the tutorial. Create a text file named testfile.txt with the following content.
It is a testing file created in the client machine.
Run the following command to check the content of the testfile.txt file before executing the `scp` command.
The following output will be appeared after executing the above command.

Run the following command to copy the testfile.txt file from the client machine to the Documents folder of the server machine.
The following output will be appeared after executing the above command if the file is copied successfully to the server location. Here, the username of the server machine is ‘fahmida,’ and the username of the client machine is ‘Yasmin.

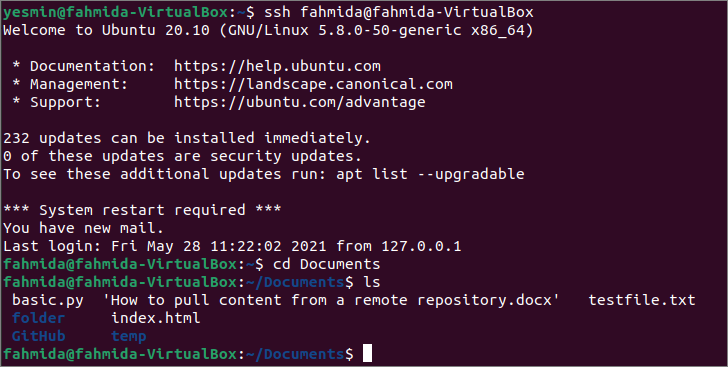
Run the following command to establish a connection with the server using ssh command.
Run the following command to go to the Documents folder of the server machine to check the text file has been copied here or not.
Run the following command to check the list of the files and folders of the Documents folder.
[
The following output shows that the text file exists in the Documents folder of the server machine.
Now, run the following command to check the content of the testfile.txt file of the server machine.
The following output shows that the content of testfile.txt of the server machine is the same as the content of the textfile.txt of the client machine.

Remove all cached ssh-agent private keys:
Run the following ssh-add command with the -D option to remove all private keys of the cached ssh-agent.
The following output will be appeared after executing the above command.

Conclusion:
Using ssh-agent is one way to connect with the remote machine from the client machine to do different tasks. Any file can be copied from the client machine to the server machine by running an SSH agent shown in this tutorial to help the reader know the use of this command.