How to split files by size in Linux:
For the first example of this tutorial, I will use a 5GB Windows ISO image named WIN10X64.ISO. To learn the file size you want to split, you can use the du -h command, as shown in the screenshot below.

As you can see, the file size is 5GB. To split it into 5 files of 1GB each, you can use the split command followed by the -b flag and the splitted files size you want. The G defining the size unit for GB can be replaced by M for megabytes or B for bytes.
As you can see, the ISO was splitted into 5 files named xaa, xab, xac, xad, and xae.
By default, the split command names generated files in the previous example, where xaa is the first part, xab the second part, xac the third, etc. As shown in the example below, you can change this and define a name, leaving the default name as an extension.
As you can see, all files are named Windows.* , the extension of the name given by the split command, which allows us to know the order of the files.
When using the split command, you can implement verbosity for the command to print the progress, as shown in the following screenshot.
As you can see, the progress output shows the phase of file division. The next example shows how to split the files into MB units. The file is an 85MB file.
The split command includes additional interesting features which aren’t explained in this tutorial. You can get additional information on the split command at https://man7.org/linux/man-pages/man1/split.1.html.
How to split files by content in Linux using csplit:
In some cases, users may want to split files based on their content. For such situations, the previously explained split command isn’t useful. The alternative to achieve this is the csplit command.
In this tutorial section, you’ll learn how to split a file every time a specific regular expression is found. We will use a book, and we will divide it into chapters.
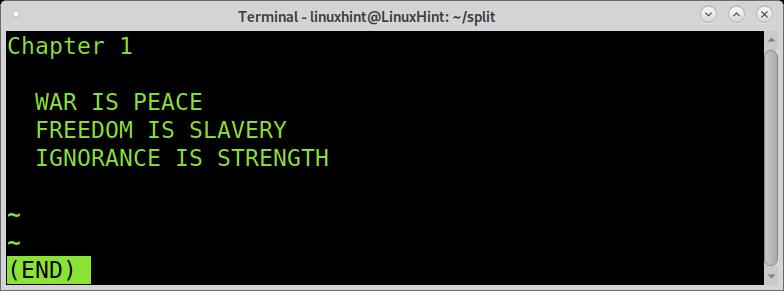
As you can see in the image below, we have 4 chapters (they were edited to allow you to see the chapter divisions). Let’s say you want each chapter into a different file. For this, the regular expression we’ll use is “Chapter“.
I know there are 4 Chapters in this book, so we need to specify the number of splits we want to prevent errors. In the examples below, I explain how to split without knowing the number of regular expressions or splits. But in this case, we know there are 4 chapters; thus, we need to split the file 3 times.
Run csplit followed by the file you want the split, the regular expression between slashes, and the number of splits between braces, as shown in the example below.
The output we see is the bytes count for each file piece.
As you can see, 5 files were created, the empty space before Chapter 1 was also divided.
The files are named as when using the previously explained split command. Let’s see how they were divided.
The first file, xx00 is empty, it is the empty space before the first time the “Chapter” regular expression appears, and the file gets splitted.
The second piece shows only the first chapter correctly.
The third piece shows chapter 2.
The fourth piece shows chapter three.
And the last piece shows chapter 4.
As explained previously, the number of regular expressions was specified to prevent a wrong result. By default, if we don’t specify the number of splits, csplit will only cut the file one time.
The following example shows the execution of the previous command without specifying the number of splits.
As you can see, only one split and two files were produced because we didn’t specify the number of splits.
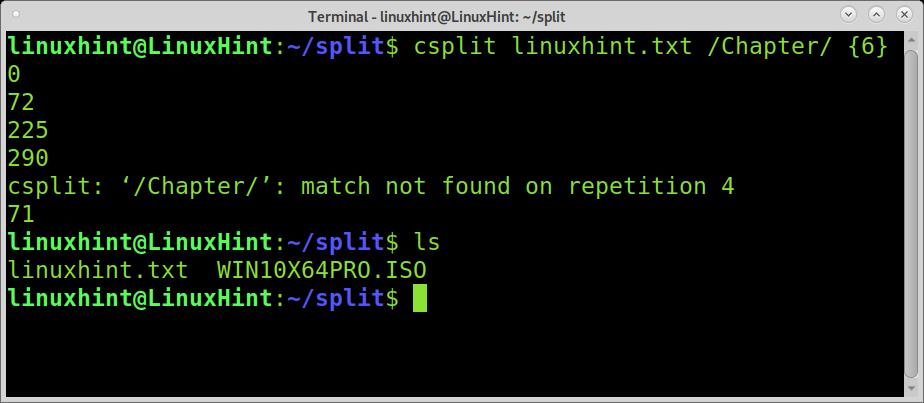
Also, if you type a wrong number of splits, for example, 6 splits with only 4 regular expressions, you’ll get an error, and no split will occur, as shown in the example below.
So what to do when the content is too long, and you don’t know how many regular expressions to split you have in the content?. In such a situation, we need to implement the wildcard.
The wildcard will produce many pieces as regular expressions found in the document without the need for you to specify them.
As you can see, the file was splitted properly.
The csplit command includes additional interesting features which aren’t explained in this tutorial. You can get additional information on the split command at https://man7.org/linux/man-pages/man1/csplit.1.html.
How to combine or join files back:
Now you know how to split files based on size or content. The next step is to combine or join files back. An easy task using the cat command.
As you can see below, if we read all file’s pieces using cat and the wildcard, the cat command will order them by the alphabetical order of their names.
As you can see, cats are capable of ordering the files properly. Joining or merging the files consists of exporting this result; you can do it as shown in the example below, where the combinedfile is the name for the combined file.
As you can see in the following picture, the file was properly merged.
Conclusion:
As you can see, splitting files into parts in Linux is pretty easy, and you only need to be aware of what is the proper tool for your task. It is worthwhile for any Linux user to learn these commands and their advantages, for example, when sharing files through an unstable connection or through channels limiting file size. Both tools have many additional features that weren’t explained in this tutorial, and you can read on their man pages.
I hope this tutorial explaining how to split a file into parts in Linux was useful. Keep following this site for more Linux tips and tutorials.


