
The speaker- test is a Linux command for testing the speakers connected to your computer. When run with no arguments, the command tests the default device, in this case, the default sound card of your computer. The speaker-test command acts as a tone generator for ALSA, and if you want to test any sound card you are using on your computer, the command is your best option.
This guide introduces you to the speaker-test command by offering examples of how to use it.
How to Use the speaker-test Command
The first usage of the speaker-test command is to test if your sound card is muted. For this, you only need to run the command with no arguments, and you should a hear pink noise confirming that your sound cards are okay and are not muted.
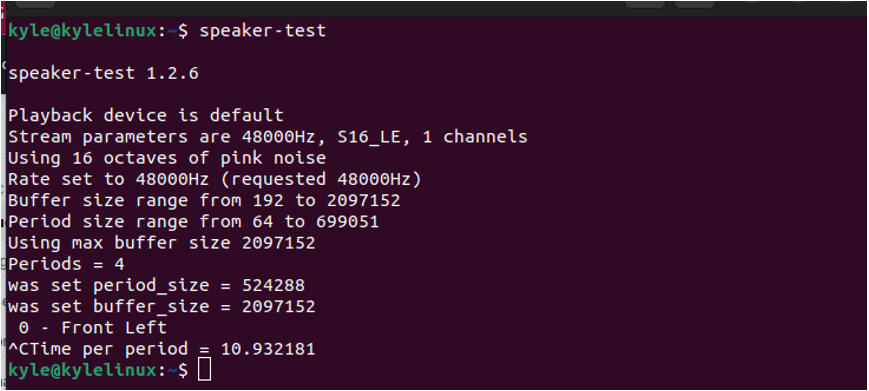
You can cancel the pink noise by pressing the CTRL + C keyboard combination.
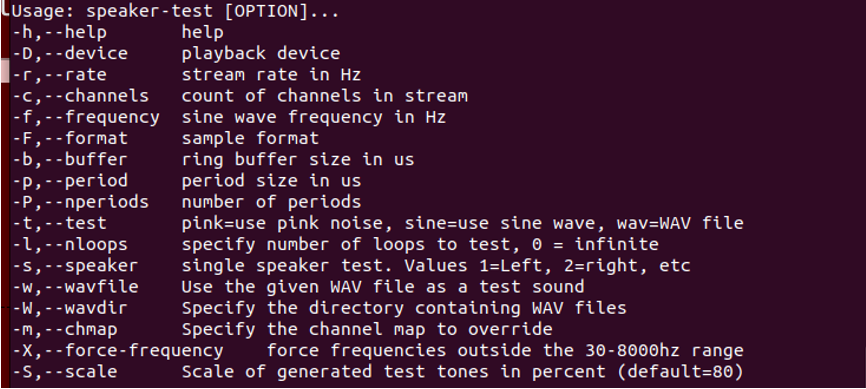
Below is a snippet of what the man page for the speaker-test command offers to highlight the various options that we can use.
However, we first need to list the available sound cards using the below command to know which cards we want to test.
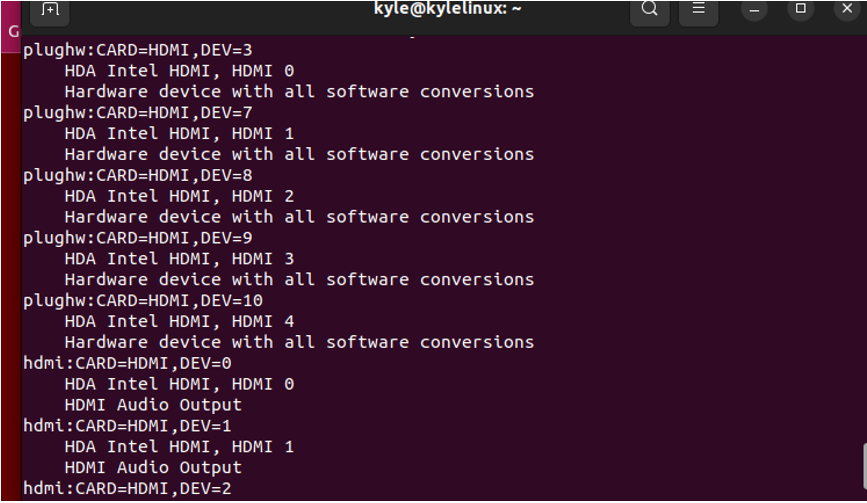
You will see the various sound cards configured on your system in the output you get. Besides, you will note others with various outputs for HDMI and analog output.
Now that you can see the various sound cards on your system, you can go ahead and test them using the different speaker-test command options.
Let’s have examples.
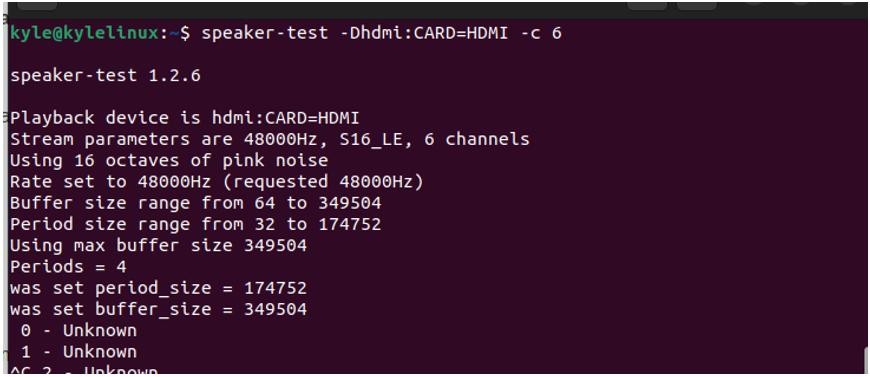
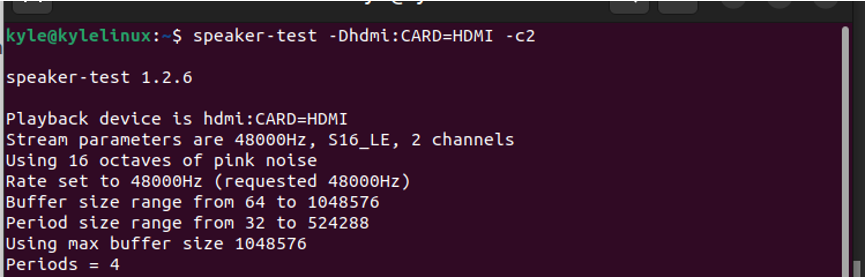
In the above example, we are specifying to test the hdmi:CARD=HDMI using the -D option for specifying the sound card and the -c for specifying that we want to test all the specified channels.
You could run the command below if you needed to produce four speaker sounds using two stereo jacks.
If you want to test a given sound frequency on your speaker, specify the frequency using the -f option and the speaker channel using the -s. For instance, specifying s1 indicates that you want to test the left channel only. Below is an example of such a command.
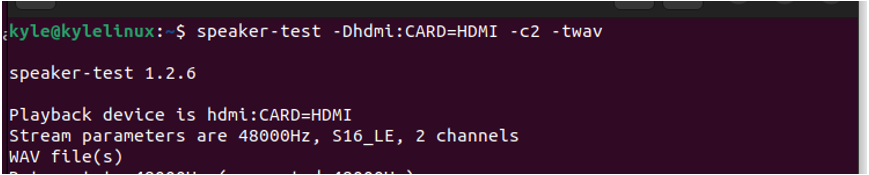
Also, note that the default sound when testing the sound cards is pink noise. You can use the sine wave or the WAV files. To specify the sound, use the -t. In the example below, we are using the wav.
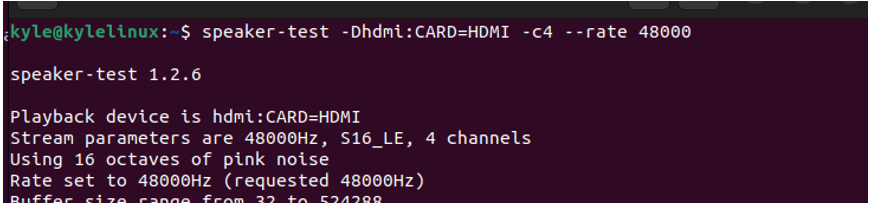
You can also set the stream rate in Hz using the –rate or -r option for the specific sound card, like in the example below.
You can note that for each speaker test, the default period is set to 4 periods. You can change that and set any period using the –P option. For instance, let’s try setting our period to 6 using the command below.
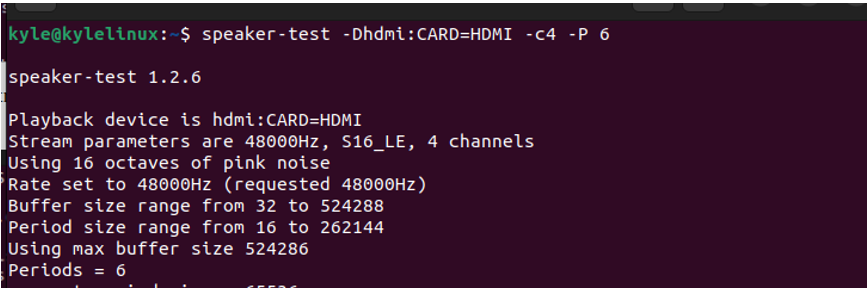
From the output, we confirm that we changed our periods to 6.
While performing the speed test, the maximum buffer size gets used and is specified by setting the buffer value to 0, meaning it’s maximum. You can change the buffer to your preference.
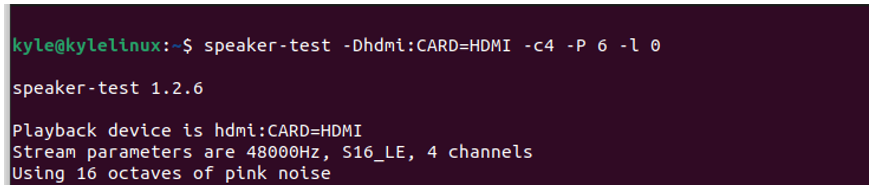
With -l, you can specify the number of loops the speed test should run. If you want it to execute infinitely, set the loop count to zero, as in the example below.
Conclusion
The speed-test command generates tones that help test your computer’s speaker. You can use various options with the command, and it all depends on what you want to get as output. This guide covers the different options you can use, giving examples to help you understand and use the speed-test command.