While working on Git, developers need to check all the committed and uncommitted changes before pushing local content to the remote repository. As we know that the uncommitted files do not get pushed to the Git remote repository. To view the status of the repository including the uncommitted changes in Git, the “$ git status” command be used. Moreover, the developers may need to view the changes between recent commits. For this purpose, use the “$ git diff” command to display the difference between desired two commits.
This guide will discuss about:
- How to View Git Uncommitted Changes?
- How to Differentiate Two Commits by Utilizing the “git diff” command?
How to View Git Uncommitted Changes?
To view uncommitted changes in Git, first go to the required repository and generate a file and track it to the staging index. Then, view the Git repository’s tracked changes by utilizing the “$ git status” command.
Follow the provided steps to implement the above discussed scenario!
Step 1: Navigate to Local Git Directory
Move to the particular local directory using the “cd” command:
Step 2: Generate New File
Then, execute the “touch” command to create a new file in the local directory:
Step 3: Add Working Directory Changes to Git Staging Area
To track newly added changes to the staging index, run the below-given command:
Step 4: Verify New Changes
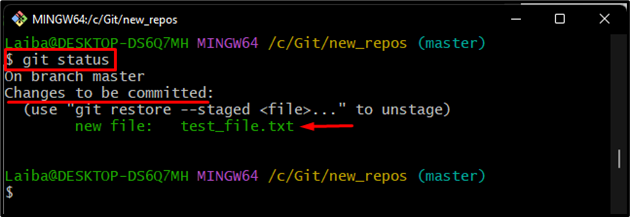
View the committed and uncommitted changes by executing the “$ git status” command:
In the below output, you can see that the newly created file needs to be committed:
Let’s move to the next section and check out the method of showing the difference between two commits.
How to Differentiate Between Two Commits by Utilizing the “git diff” Command?
To find the difference between two commits, create a new file. Then, stage and commit changes. Next, open the file in the text editor and add some changes. Add new changes to the staging area and commit them. After that, utilize the “$ git diff” command along with the SHA-hash of the desired commits to view changes in the file.
Try the provided steps to implement the above-discussed scenario!
Step 1: Generate New File
Run the “touch” command to create a new text file:
Step 2: Track New File
Execute the following command to add the newly created file to the Git staging area for tracking purposes:
Step 3: Commit New Changes
Then, save all added changes to the Git repository by running the “git commit” command:
Step 4: Open and Update File
Now, to open and update the newly added file, run the “$ start” command:
Step 5: Add Changes to Staging Area
After making changes in the file, track them to the Git staging area:
Step 6: Commit New Changes
Next, update the Git repository with newly added changes by executing the given-below command:
Step 7: Check Git Log
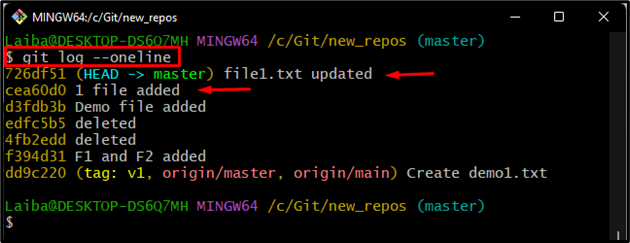
After that, run the “git reflog” command to get the SHA-hash of all commits:
In the below output, we have copied the highlighted commit SHA-hash for finding the difference between them:
Step 8: Find Difference Between Commits
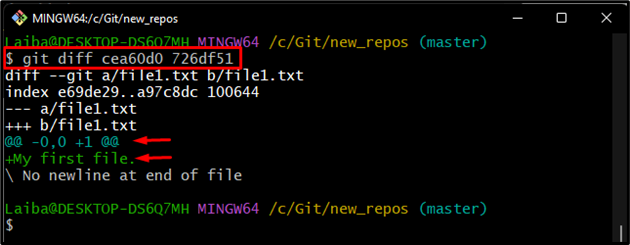
Lastly, get the difference between desired copied commit SHA-hash by utilizing the “git diff” command:
In the output below:
- “—” indicates the old version of the file
- “+++” shows the updated file.
- “+My first file.” is the updated content of the particular file
We have explained how to show uncommitted changes and differences between two commits in Git.
Conclusion
To check the uncommitted changes, navigate to the local directory and execute the “git status” command. It shows all uncommitted changes. However, if you want to find the difference between two commits, the “git diff <commit-id> <commit2-id>” command can be used. This post demonstrated the method of showing uncommitted changes and finding the difference between two commits in Git.


